Thrifted and Styled!

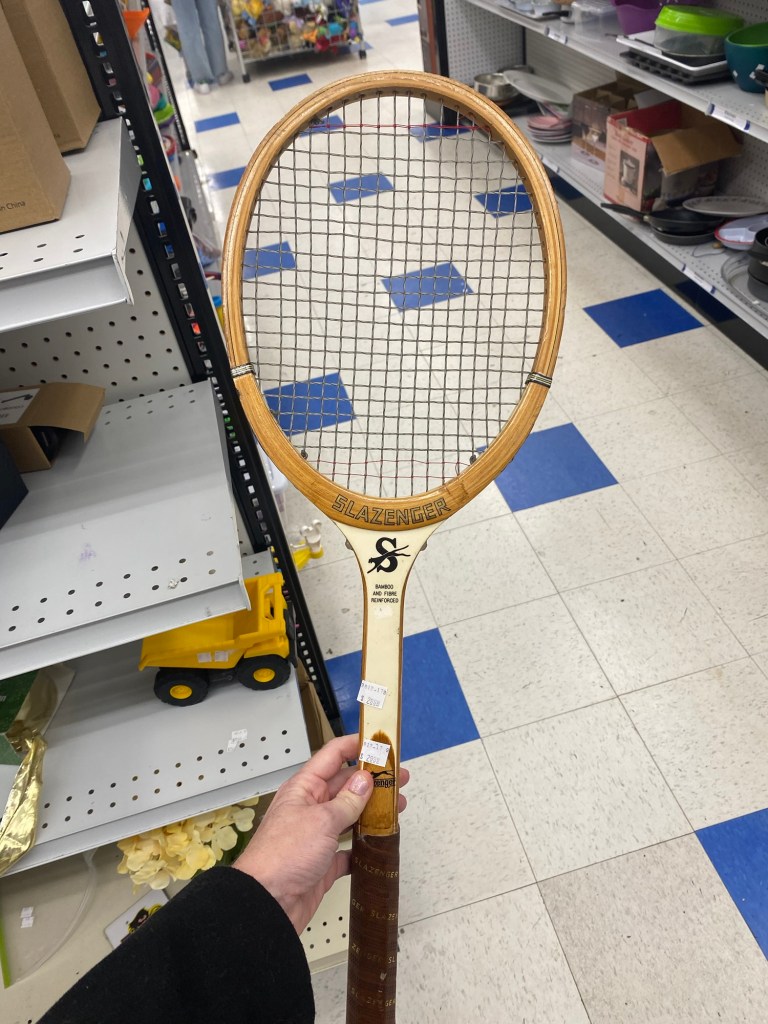
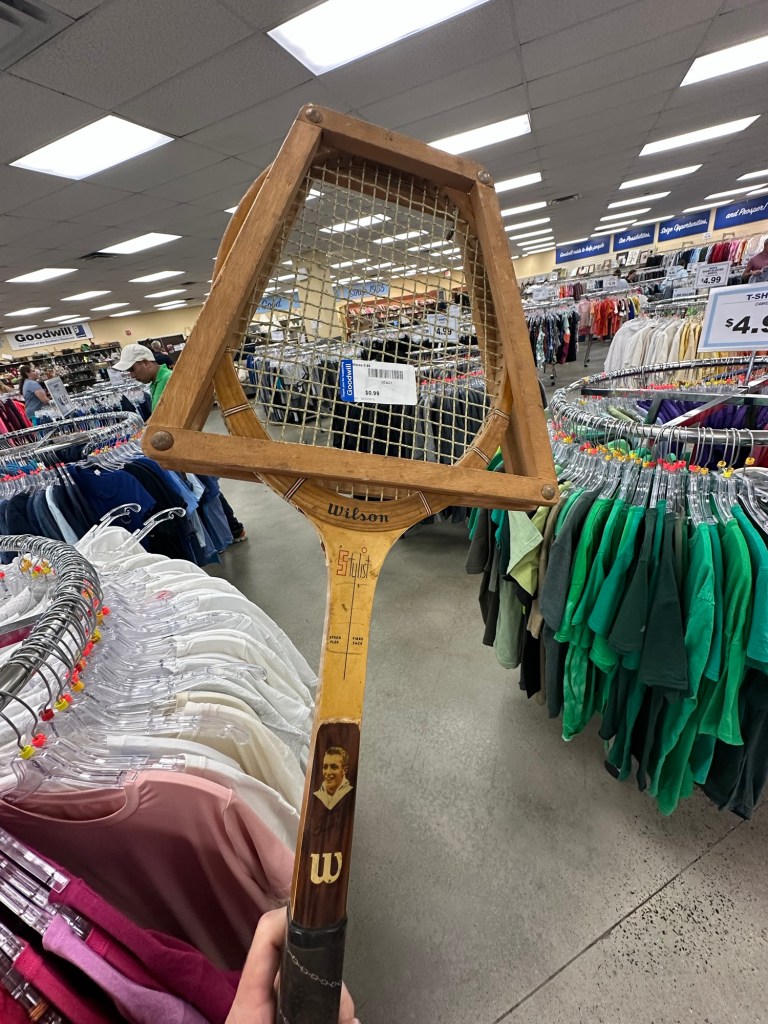
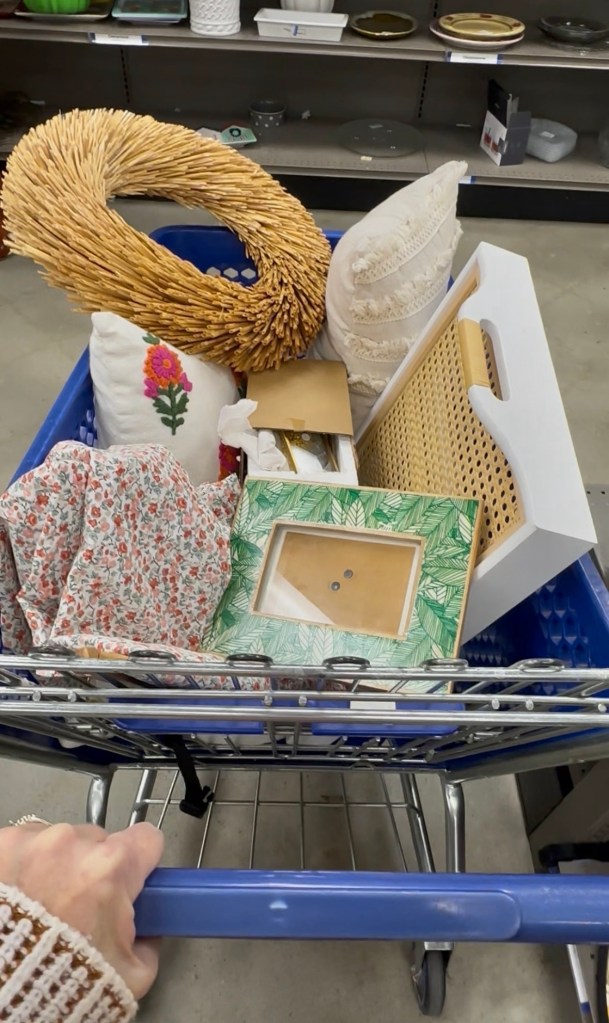
It’s the first week of 2026 and that meant one thing, I had to go thrifting! The beginning of the year means lots of people are cleaning out their homes and purging. Which means, if you’re a thrifter, it’s time to make someone else’s trash your treasure! Now, as much as I love to thrift I also love to purge. So, I dropped off a truck full to Goodwill and then went in to shop!

What a great decision it was! The shelves were full and I found some awesome things.

Cart full!
I found all of this…for $26.00!

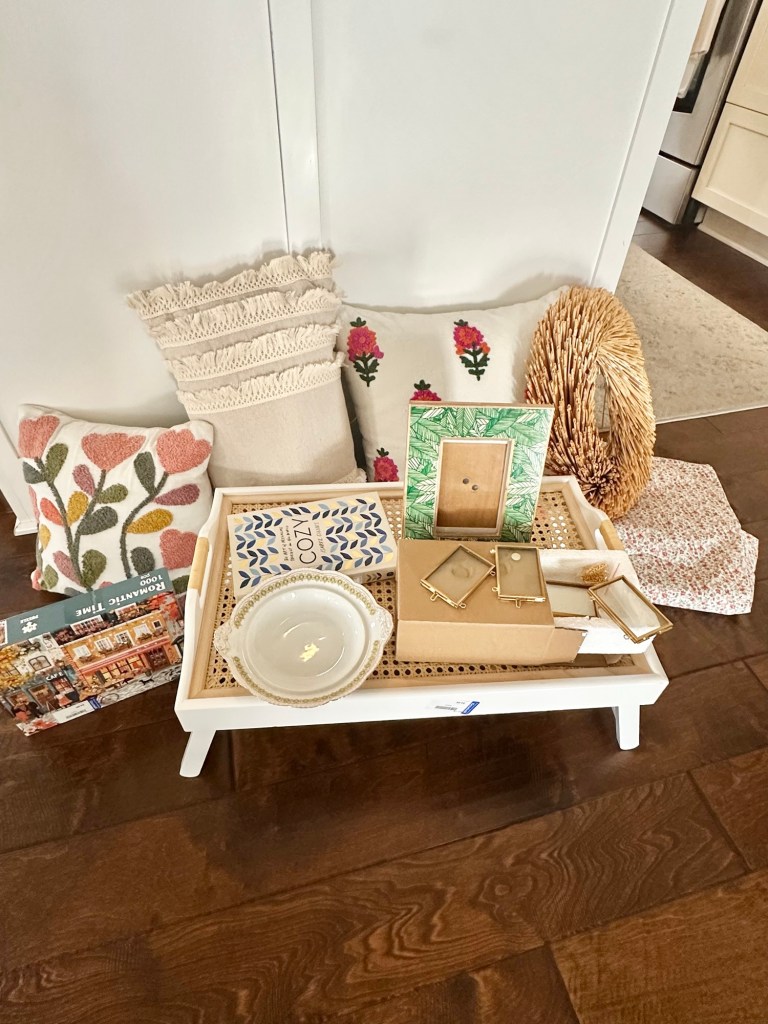
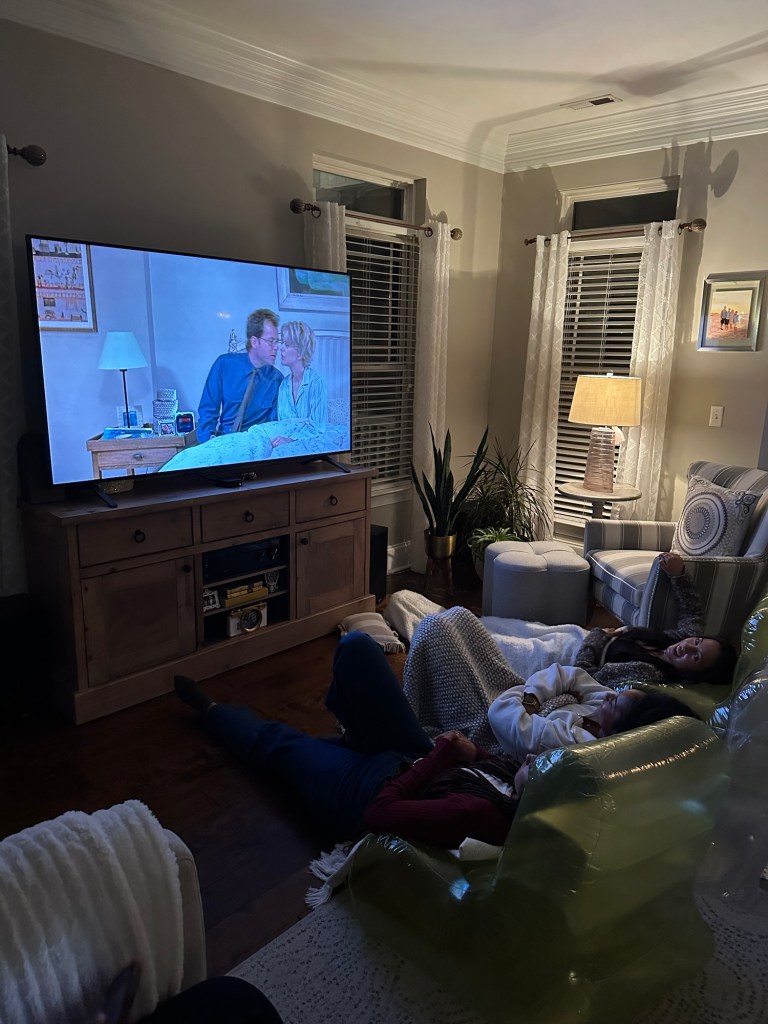
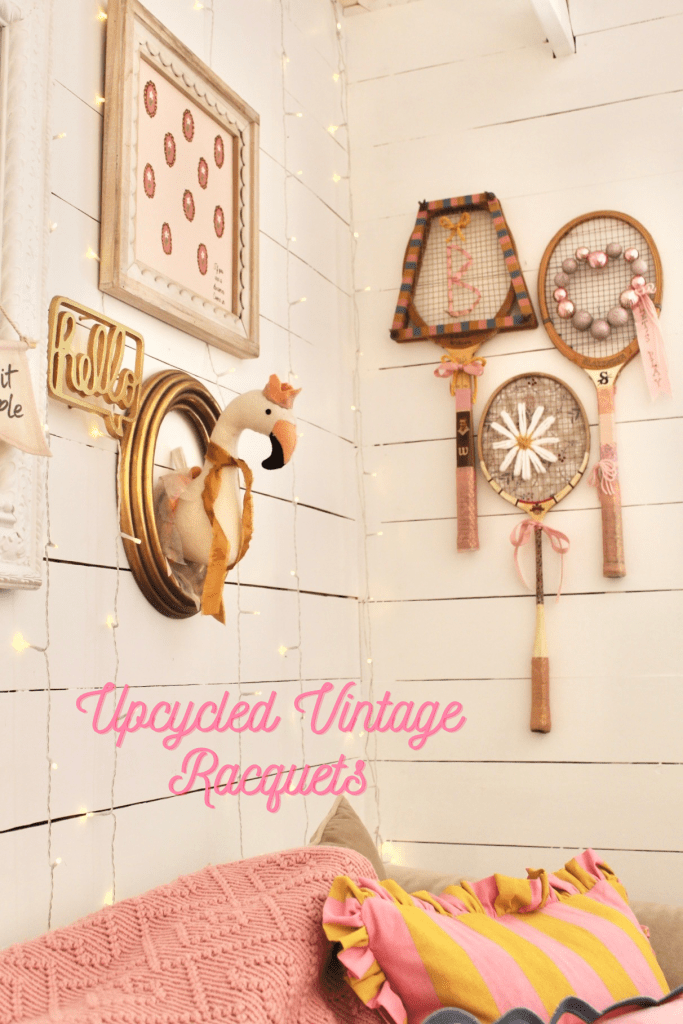
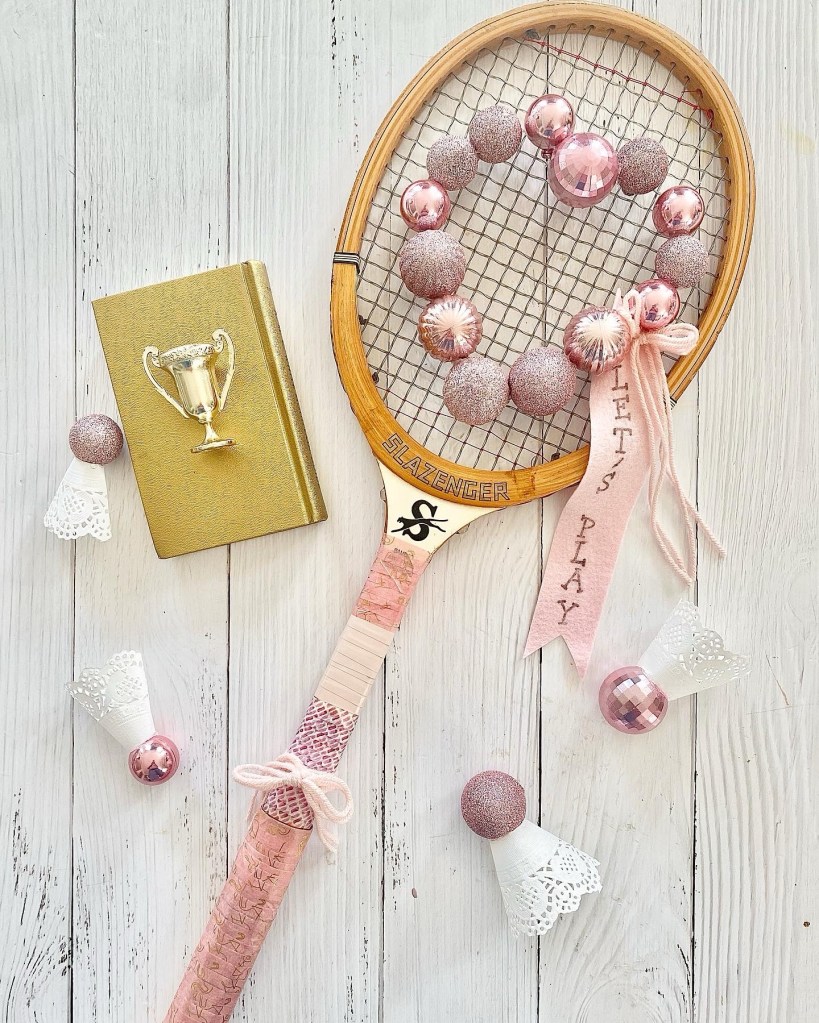
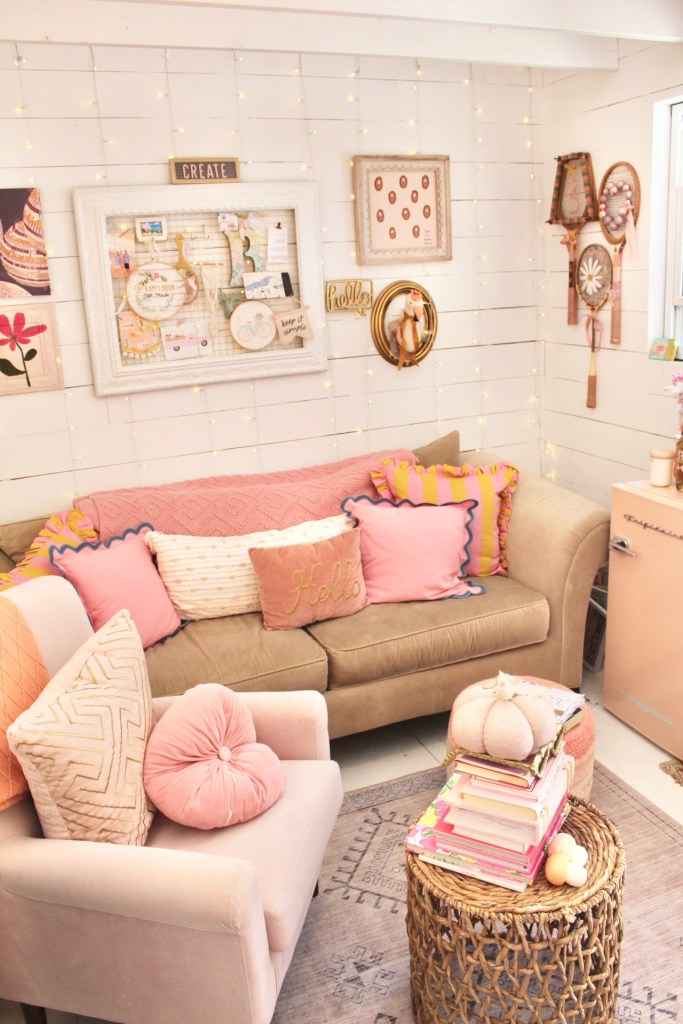
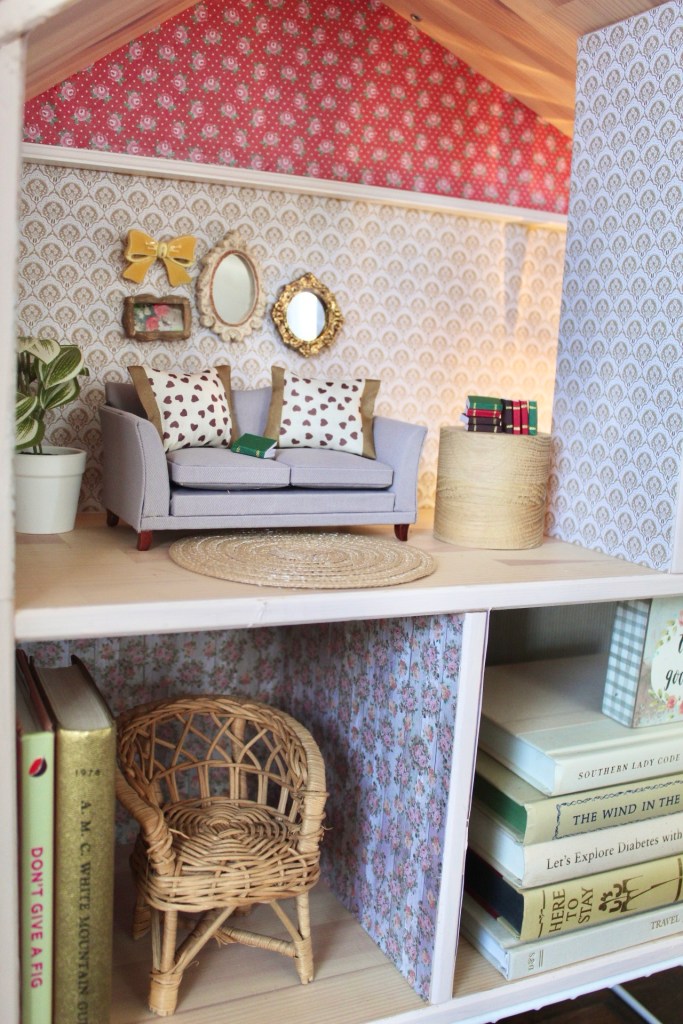
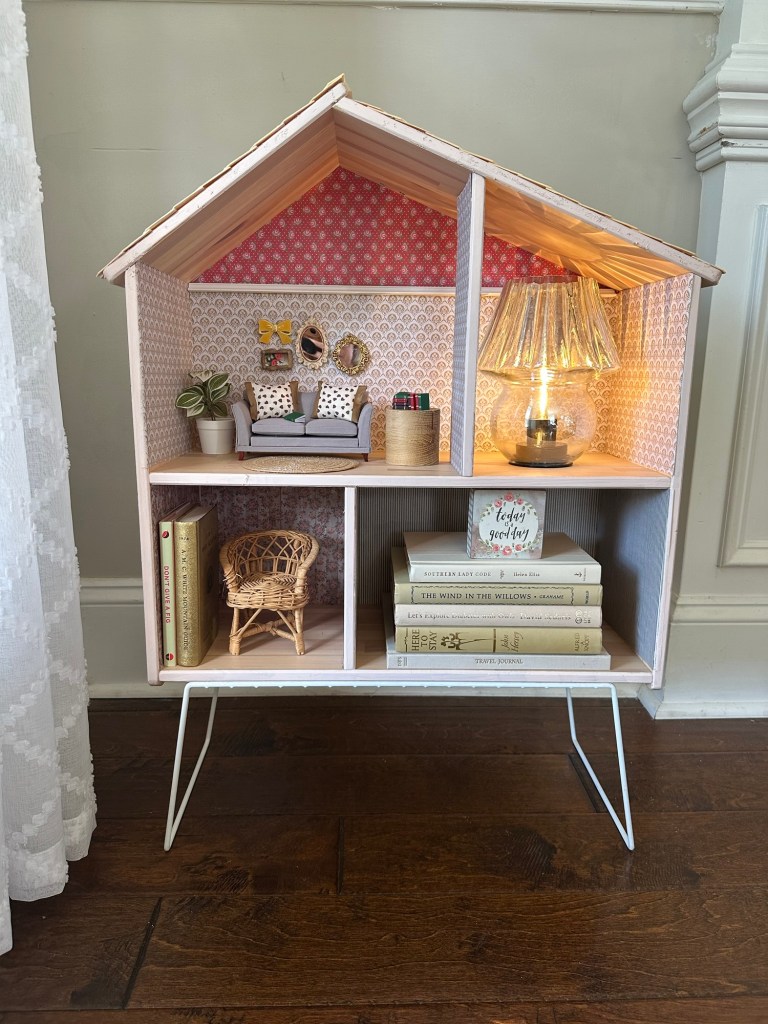
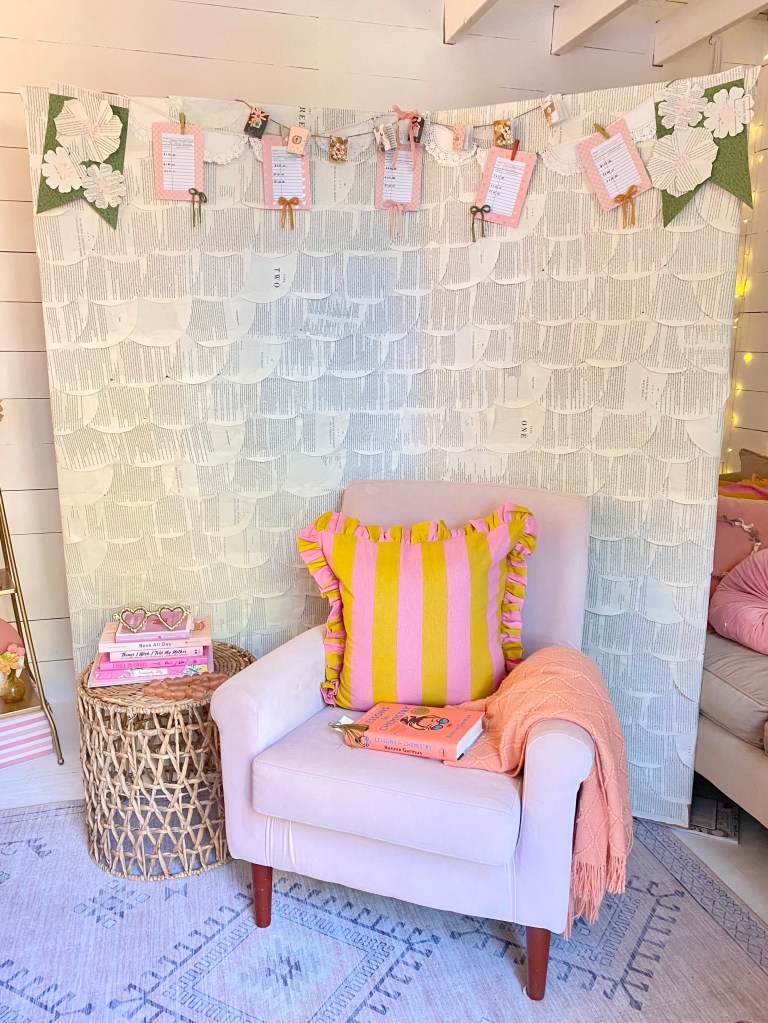
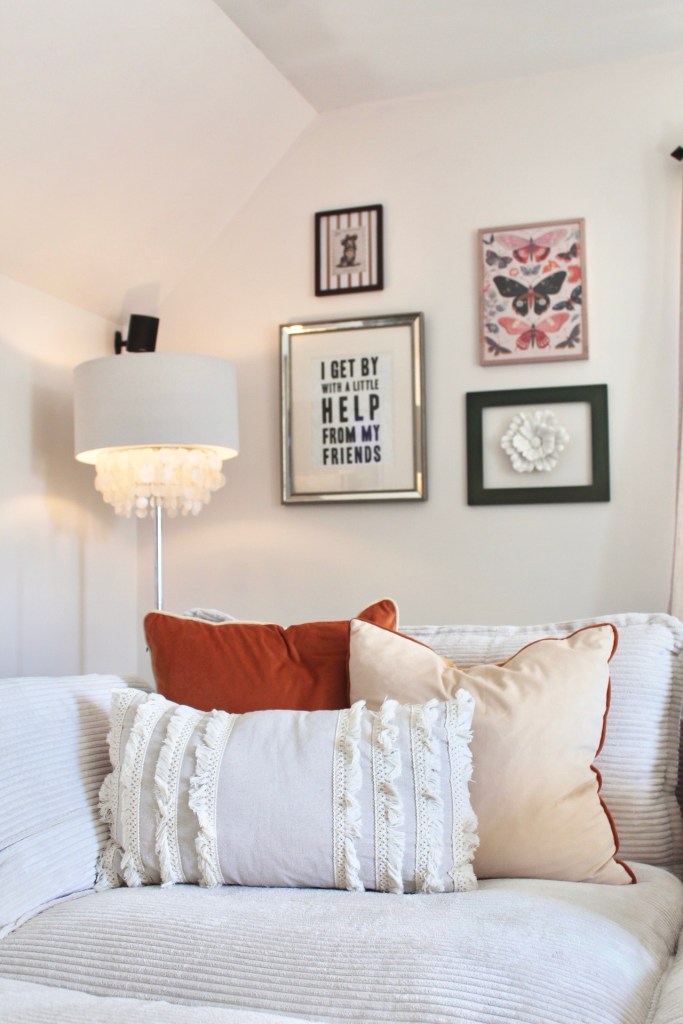
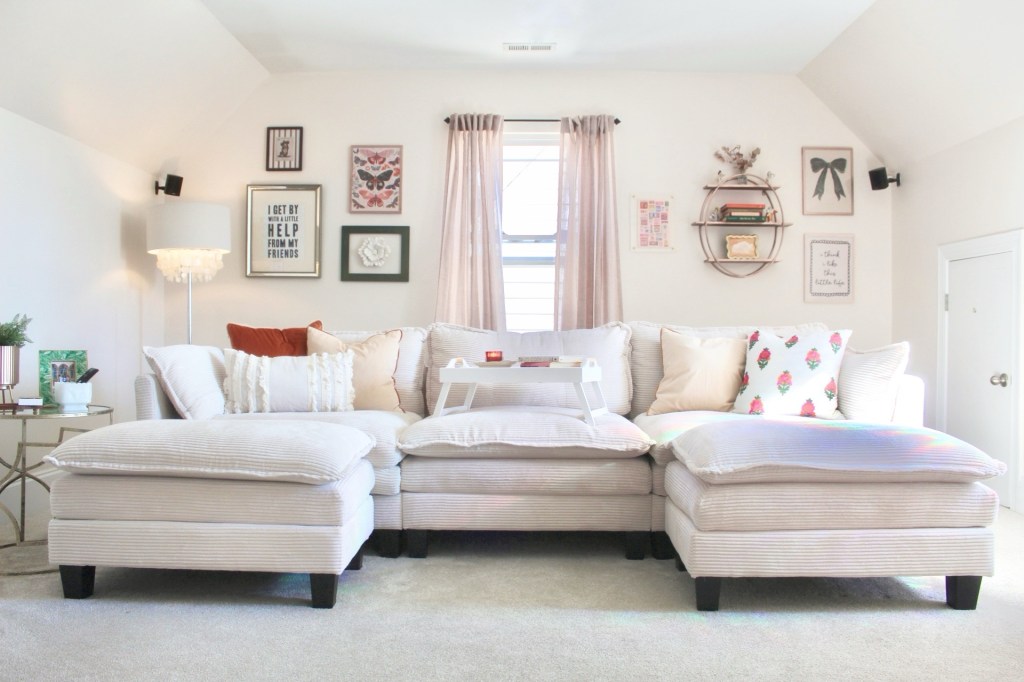
I felt like all of these items were made for me! I had recently re-done our bonus room and needed a few more accessories. The pillows were thrown in the wash and I cleaned everything else up and got ready to decorate!

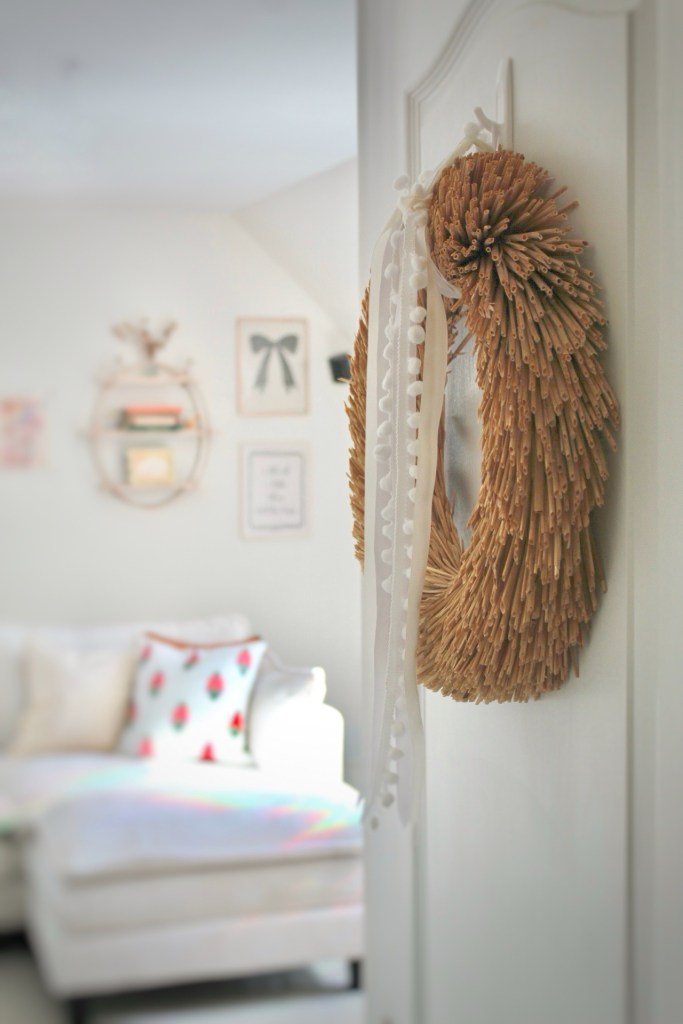
First up was this straw wreath (which was $1.99!). I added some ribbon and pom Pom trim and hung it on the entry door. Remember, a wreath isn’t just for a front door!

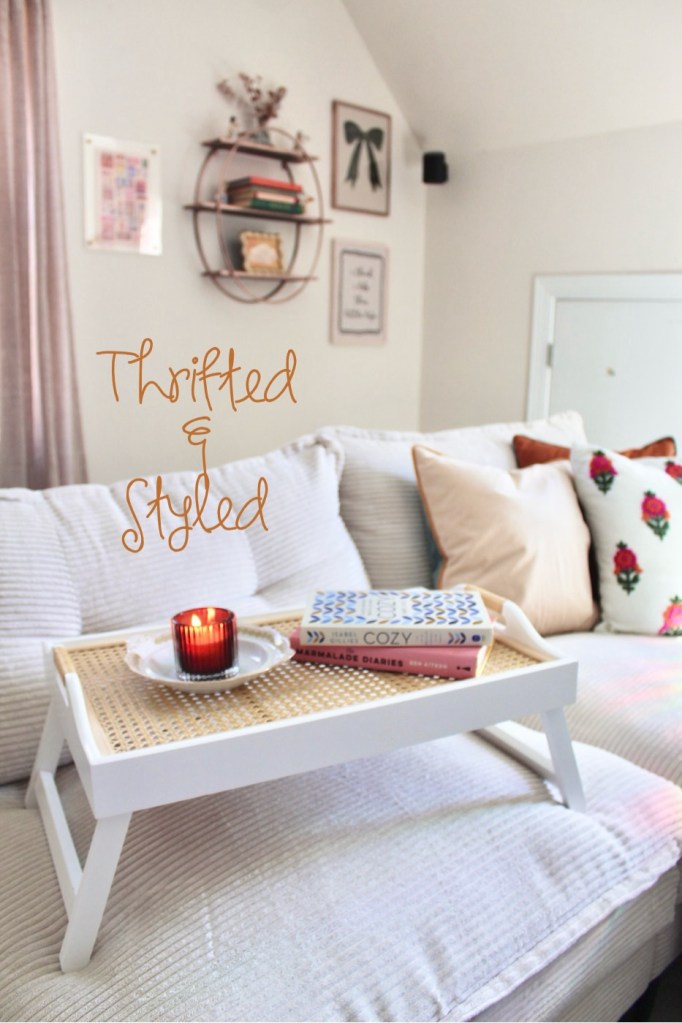
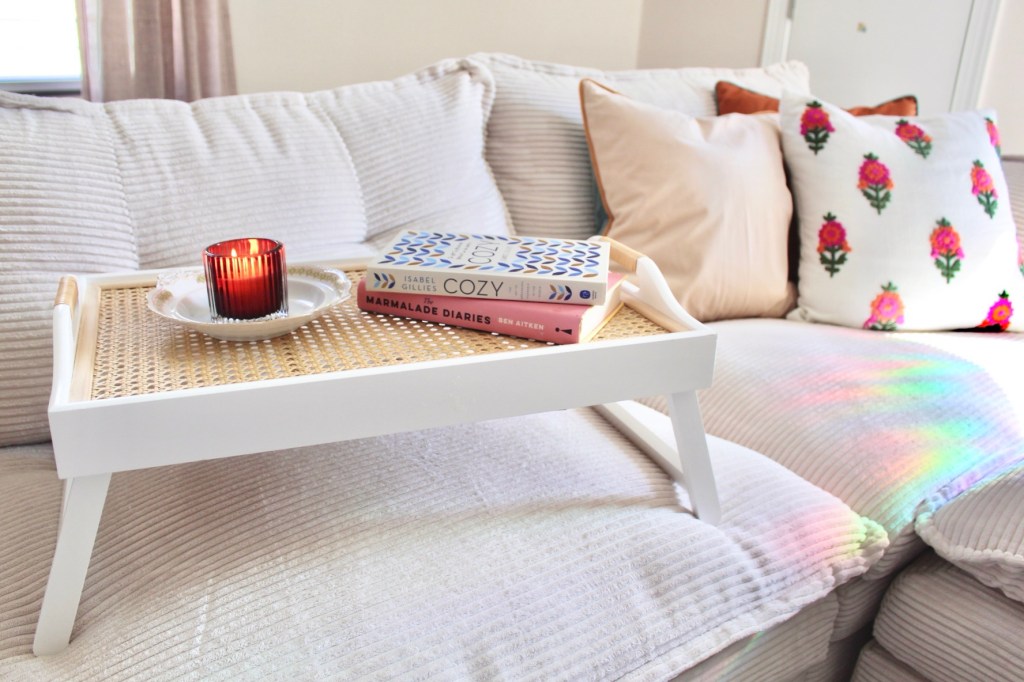
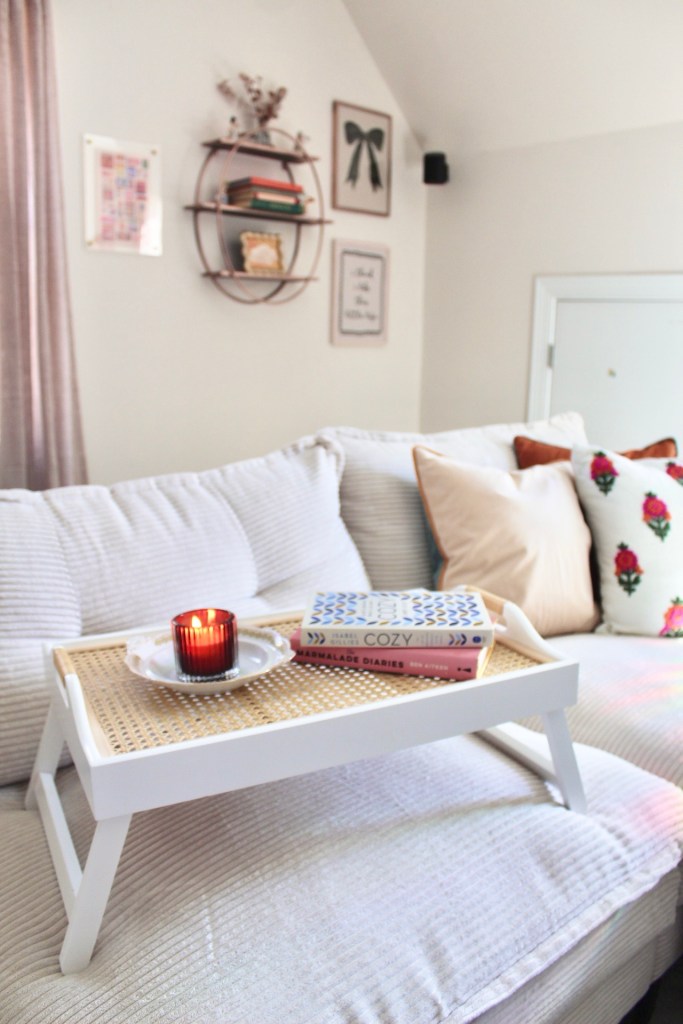
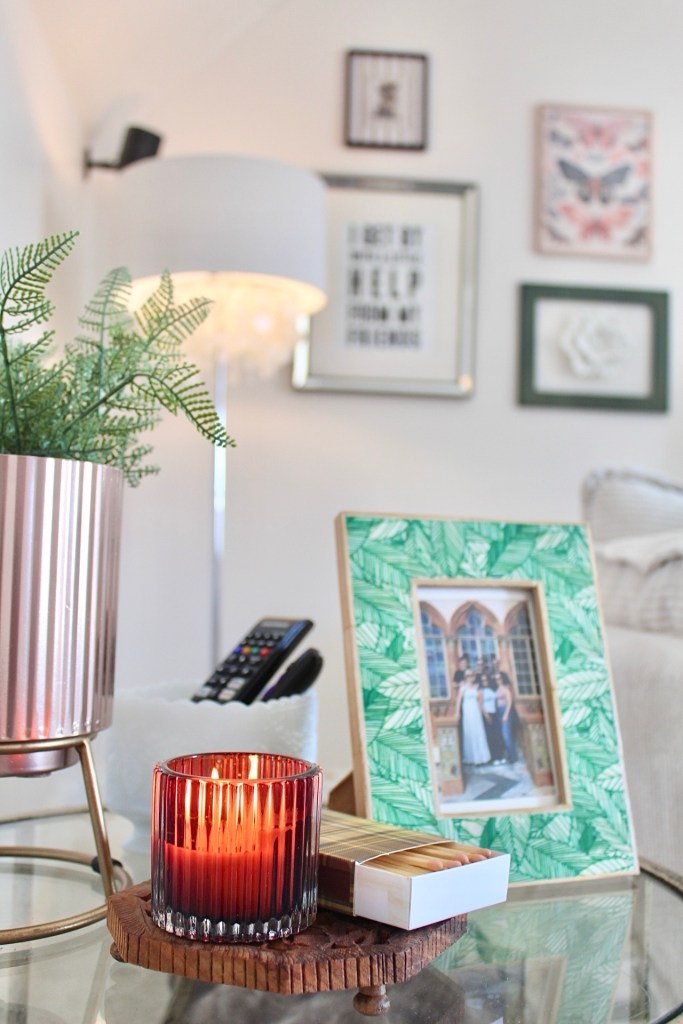
Next was this adorable breakfast tray! Since the room is where we watch tv and hang out it will be perfect for snacks or drinks. I added a couple of books and a candle for now. I also put the candle on the vintage plate I found.

Next…pillows! You can never have enough pillows, and for $1.99 each these were immediately in my cart!

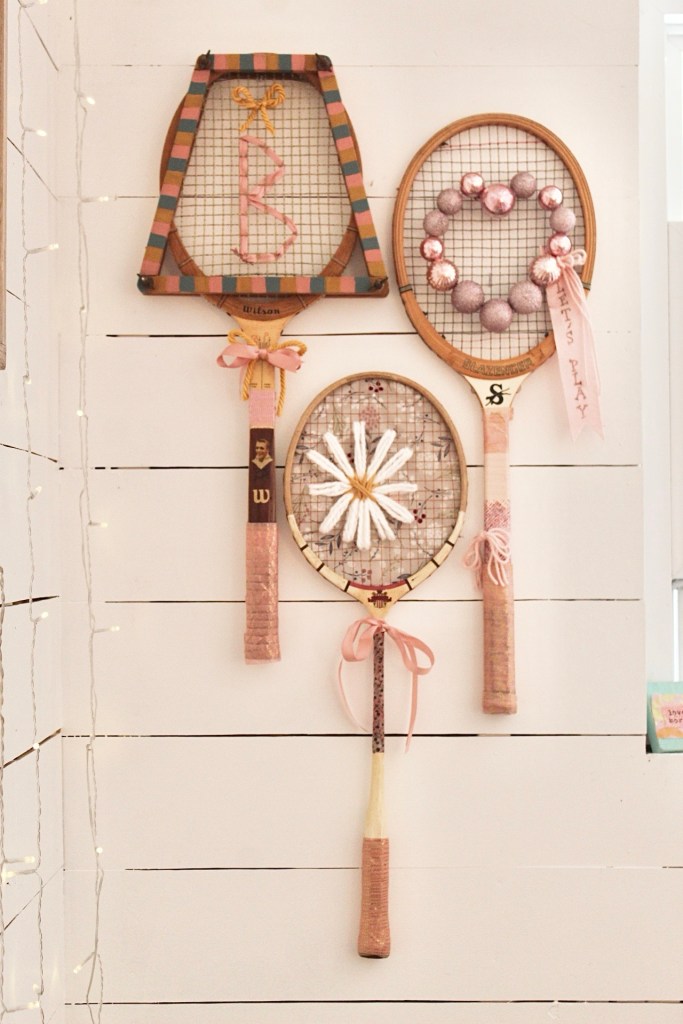
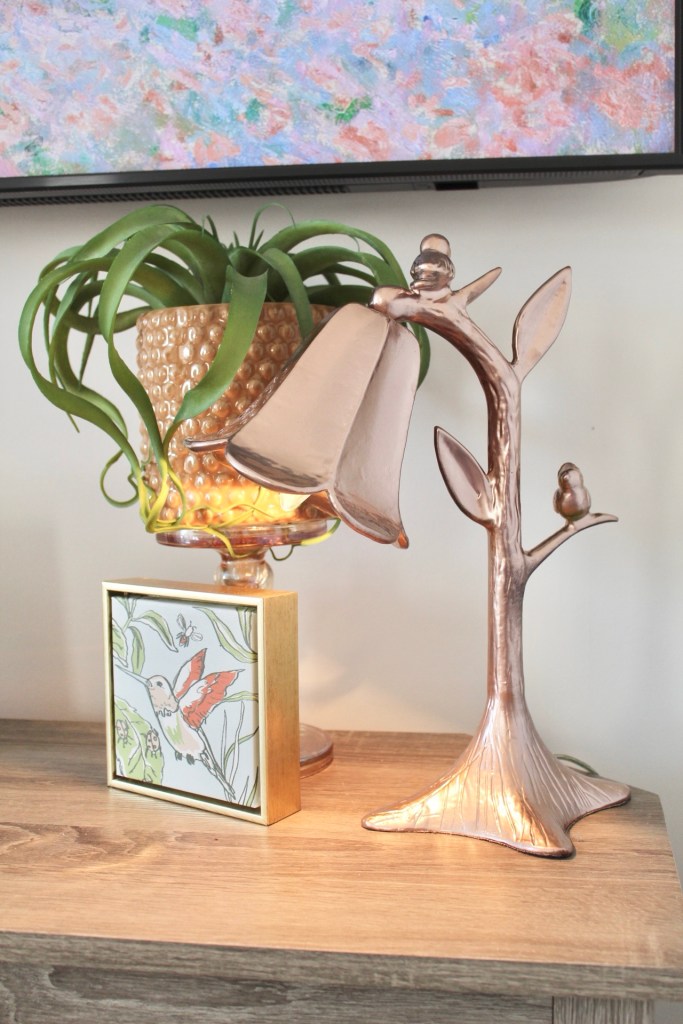
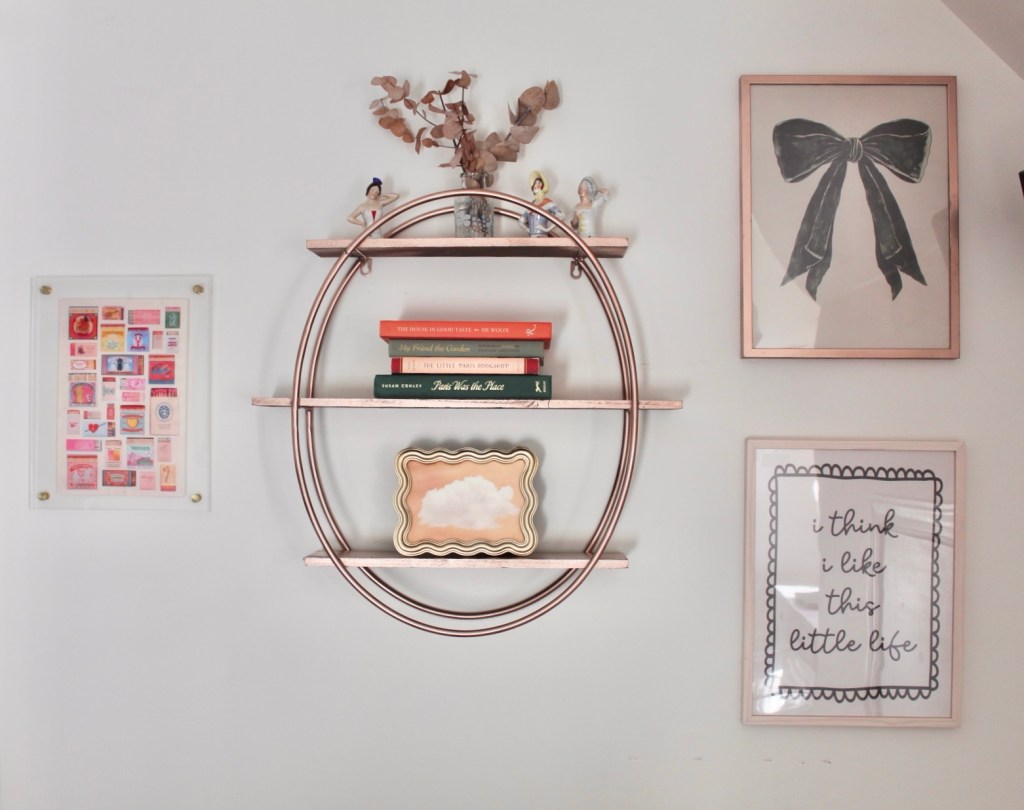
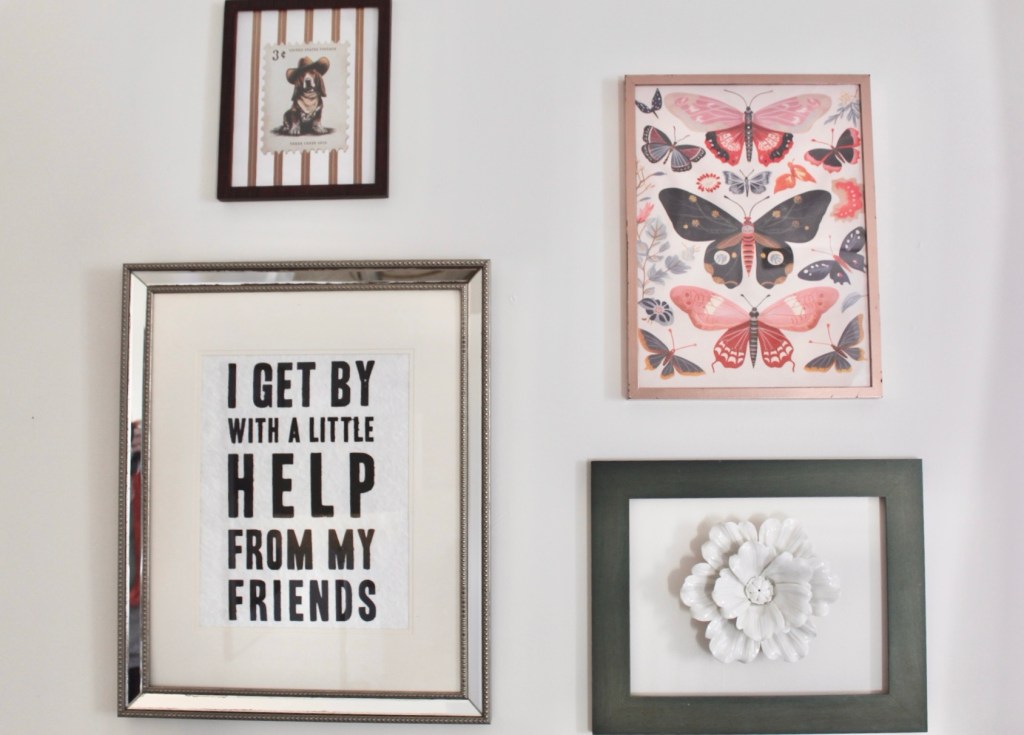
I found these mini gold frames in a box, unlabeled. I think they may be ornaments but I decided to use them in a different way. I hung a piece of art that was a great aunt’s and then cut some paper from an art exhibition I had went to and put it in the frames. I love how mini and cute they are!

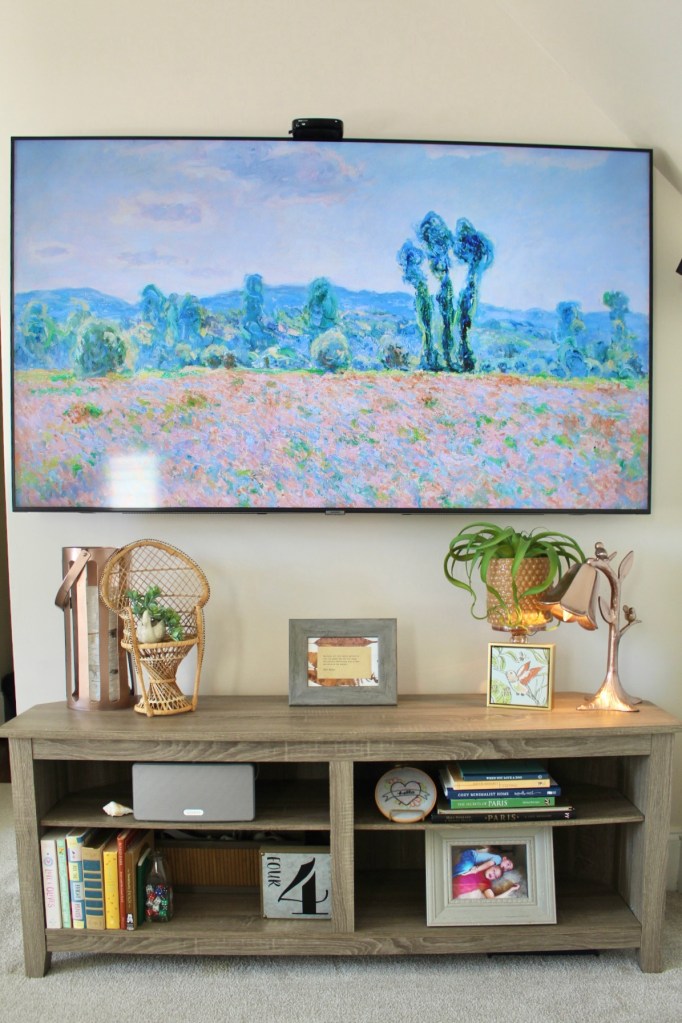
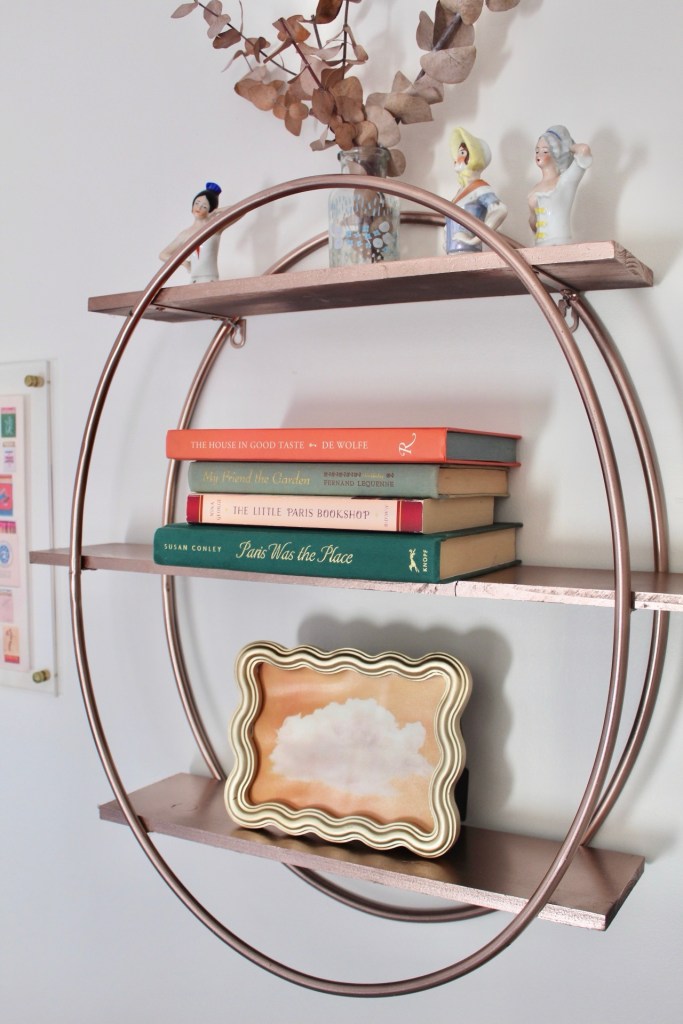
I had thrifted a lamp a few weeks ago and spray painted it rose gold. I added it to my tv stand with some other thrifted pieces. It adds the perfect ambient lighting.

I am thinking of painting the tv stand to add a fun pop of color!

This cute leaf print frame looks perfect on my side table!

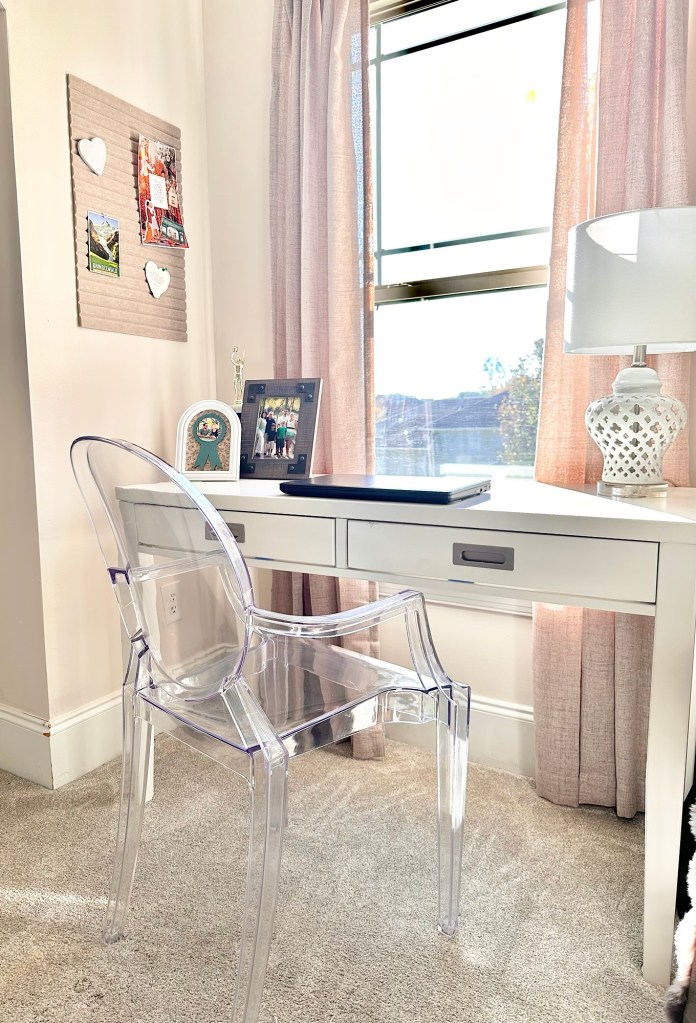
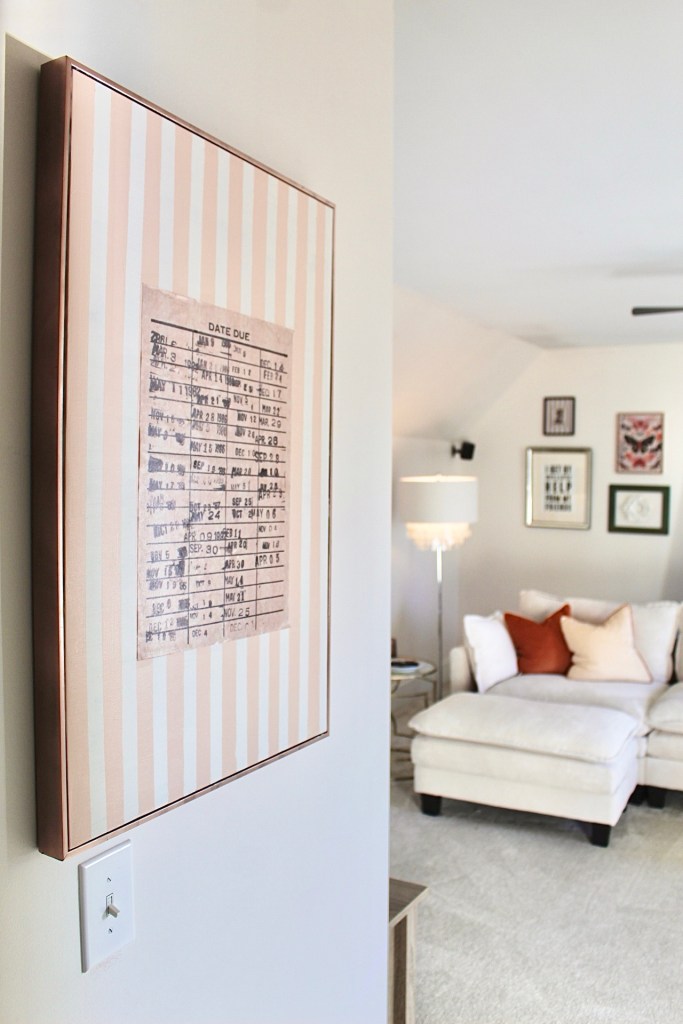
When I started redesigning this room I was determined to do it on a budget. I sold our old couches and found this sectional on Amazon! I then spray painted old frames and added art I found on SHEIN. I moved things around from other parts of my house, too. I had a friend give me a desk she didn’t want and my mom thrifted the clear acrylic desk chair! I am proud of getting the look I wanted on a budget!

So, here’s your reminder to check out the thrift store when redecorating!

You’ve Got Mail Fall Party

If you know me, you know I love a theme party. And I love Fall. So, what better way to combine one of the best Fall movies and some girlfriends then to host a You’ve Got Mail Fall Party?!??

I absolutely love You’ve Got Mail. It’s such a feel good movie and I could watch it over and over. So, I decided to host a girls night, have some Fall food and watch the movie together! And obviously, I had to make some crafts to pull it all together. I’ll share what I made!

First up I made an invitation on Pinterest Collages.

Next up I painted a little ceramic house that I had from Target years ago. I wanted it to look like The Shop Around the Corner so I painted it green, added the shop name and took some mini books to put outside of it with a pumpkin. So cute, right?

Before! Plain and white
After! The Shop Around the Corner!

While I was painting the house I was thinking of cute quotes from the movie, too. So, I added a “bouquet of sharpened pencils” to the little vignette but got thinking about making a piece of art, too. So, I grabbed some more pencils, a frame at Walmart and a washcloth. I put the washcloth in the frame, cut out the quote from the movie on my Cricut in vinyl and added a bouquet of pencils! I had to cut the pencils in half, glue them to a piece of cardboard and tie the ribbon around them. I then used a command hook to hang them on the outside of the frame! Now it’s a piece of art I am keeping up all year.

Here are the supplies I grabbed at Walmart.
And here is my finished art!

I had a clear frame that I wanted to add some images to for the food table. So, once again I made a Pinterest collage and had it printed at Staples. I also created a menu on Canva and framed that. I like the custom touches that make the party feel a bit more “fancy.” A friend came over and also helped me make pumpkin favors for the guests. We just tied some yarn to mini pumpkins for a sweet gift.

I did one more craft. I grabbed a huge tree branch from my yard and cut out leaf shapes on my Cricut machine and attached them with twine. This is such a cheap and easy idea but adds so much impact!

The Fall menu was fun to prepare. But my favorite things were the Fall Dessert board and the wine in a pumpkin! For the desserts I had a pumpkin roll, macarons, ginger snaps, pumpkin spice pretzels and the cutest acorn donut holes!

And for the wine I grabbed a box of wine and took the bag out. I cut the top of the pumpkin and cut a hole for the spout. I put the wine in the pumpkin and then painted “cheers” on the outside! It was such a fun touch.

Since I was having 12 of us over I needed more seating. I had bought some inflatable chairs and added blankets. Honestly they weren’t that great and deflated quickly so I would not recommend them. We squeezed in on my couches and I brought some chairs from my dining room in and it all worked out.

We had such a fun evening. Eating, catching up, making new friends and watching the cutest movie! I highly recommend planning a special night with some friends and making sweet memories.

Fun Fall Pumpkins

I thought I would share some of my favorite Fall pumpkin crafts over the years! I think Fall is the prettiest for decorating and I have so many fun ideas you could try yourself or for a craft night!

First up is the pastel pumpkin. I simply took a faux pumpkin from Michael’s, painted it in two colors and used some Mod Podge to glue on different florals from a roll of gift wrapping. You could also use napkins for this project. Apply a layer of Mod Podge to the bottom and then another layer on top.

Next is a great project for your porch or front door. I call them pumpkin houses. You simply buy a few pumpkins in different sizes and create a little fairy house.

With these different versions I simply cut out windows, a door and used my imagination. I added florals in between and added twigs to the windows and doors. Then add a votive candle inside and enjoy the glow!

Another fun option is to simply paint your pumpkin. Add acorn tops with glue to add texture. You can also Mod Podge pretty leaves onto a pumpkin!

One of my favorite fall decorations is to use a pumpkin as a vase for florals. I cut the top off a faux pumpkin, put a glass inside for water and add my favorite flowers!

I hope these ideas have inspired you for Fall! Which is your favorite?

Upcycled Vintage Racquets

I have loved the looks of vintage tennis and badminton racquets used for decor. So, a couple of years ago I found one thrifting and my obsession with up cycling them began!

My first thrifted racquet!

My first racquet was found at Goodwill for $2.99! I wasn’t sure exactly what I wanted to to do with it, but had some pink ornaments that I thought would be cute to attach to it in a heart shape. I popped them in and even made badminton birdies (because I’m extra)! I added a little felt ribbon and stamped “Let’s Play” on it and I wrapped the handle in pink washi tape. So cute, right?

Every time I go thrifting I look for a racquet. It took me a couple of years, but I stumbled across another one! It was so unique!

I knew I wanted to paint the square surrounding it and decided to try to weave my initial in it with ribbon. I used washi tape and ribbon again, too!

My collection is beginning to grow!

When I shared this on my Instagram page a friend mentioned to me she had a racquet she would like to give me. It was fifty years old! I am so honored she was willing to gift it to me.

So, as always, I never have a set design in mind. I wasn’t sure if I wanted to add Pom poms or maybe make it a picture holder. As I pulled out yarn I thought I would try to weave a flower in it. My flower is far from perfect, but I think it is cute. I then decided to add a piece of fabric in the back. I just traced the fabric, cut it and Mod Podged it to the back.

I think it’s adorable!

My collection keeps growing and getting cuter! I think it is so whimsical for my she shed!

So, what do you think? Should I keep hunting for more?

I love a cute collection and I think this is one of my favorites!

Thrifted Dollhouse Makeover

If it’s wrong to be 48 years old and want a dollhouse then I don’t want to be right. I have been dreaming of one for a while now but just couldn’t justify spending the money. But my mom called me from the thrift store and found one for $3.00! How could I say no?

Here was what my mom found thrifting. It is an IKEA dollhouse.

It was in great shape. I just had to scrape off the moss and clean it up. I knew I wanted to shingle the roof so I headed to the craft store. Hobby Lobby has a great dollhouse section. I found a bag of shingles for $10.00. I also found a pack of wallpaper for $4.99 and some molding.

Shingling the roof was pretty easy. I laid a row and glued it with wood glue. I then placed a layer on top and continued to the top.

Then I moved on to the wallpaper. I measured, cut and used Mod Podge to apply it to the walls.

I found a couch and the mini mirrors at Hobby Lobby. I used a photo holder as a coffee table and added mini books and a rug from Hobby Lobby. I recovered the two pillows with a scarf I had. I had a yellow bow barrette from when I was little, so I broke off the back and glued it to the wall.

The other shelves were filled with books I had and a wicker chair I had as a little girl. I found the battery powered light at Five Below. I wanted to elevate it so I just used a plastic stand I had in my cabinet! I made add legs in the future but for now I love it!

What do you think? Would you add a dollhouse to your home?

Starting a Cut Flower Garden

I adore flowers. I usually buy flowers each week to add to my home. I also love visiting flower fields and in the last few years I would take a drive with a friend so we could cut flowers to enjoy. So, I decided I wanted to grow my own! Last year I tried zinnias and had so much fun growing them! This year I asked my husband to build me two raised beds so I could create a cut flower garden. I’ll share a bit of what I am growing and it’s blooming!

I put the two raised beds on the side of my she shed where I get lots of sun. I filled them with soil and got planting.

I planted zinnias, dahlias, cosmos, gladioli’s, daisies, poppies, snapdragons, lupine and African lilies. I had no real plan, I just spaced seeds and bulbs and topped with soil. I then watered and stalked my garden looking for seedlings.

The dahlias were the first to bloom and I was so excited! I also have a gorgeous hydrangea bush that is great to add to cut flower bouquets!

I added some stones in front of the beds to help with some water drainage.

Now the fun begins! I can cut flowers and add them to my home and gift to friends. One thing I will change next year is I will move the gladiolus. They get too long and stalky and take up too much space. Zinnias and dahlias are blooming like crazy now ( it’s June in NC) and my cosmos have some buds. I will see how everything else grows and then have a better idea for the future. I also am thinking I will ask my husband to build another bed and add that for more flowers!

Let me know if you have any suggestions or pointers for flowers I should plant! Happy gardening!

Pink Garden Bench

Last week I had an idea that I wanted a garden bench in my backyard. I’m officially in my gardening era! I seem to be in and out of the garage grabbing things I need to clean, dig or prune. So, I thought a bench would be perfect to keep everything organized. Plus, I have new raised beds by the side of my she shed so I plan on spending lots of time back there.

So, I started pricing garden benches. And, I had my heart set on a pink one (obviously!). I found some cute ones but just wasn’t ready to spend the money. As I was cleaning up our bonus room it hit me! My mom gave me a bookshelf last year that has been collecting my boys junk. Why not paint that and use it? I know it’s nice wood, but aren’t most garden benches? Then my mom gave me good advice….use it and if it only gets used for a year I can purchase one next year! Moms always have the best advice!

So, here is the shelf before. I ran to Walmart and got some pink spray paint, a garden trellis and a pink pot.

I used two cans of spray paint to spray the shelf and the trellis. I didn’t care if it was smooth or perfect since it will be for plants and will get wet. I lightly distressed it with sandpaper. Once I put in the spot I wanted I realized I had a problem. This is the back of the garage and I wanted to cover the unsightly meters. The trellis wasn’t giving enough coverage. So, I grabbed three pallet craft signs I had in the garage and nailed them together. I then nailed a spot on the top pallet to hang it on the trellis. It’s not perfect. But I think it’s pretty good for using what I had!

I added a little bee/ladybug house and some plants.

I love it! I think I will enjoy using it this spring and summer!

I’ll keep you posted on my gardening fun!

Host a Book Swap!

I am a book lover and had an idea to host a book swap for some girlfriends. I got brainstorming and have some cute ideas to share if you decide to host one, too.

First I created a cute photo backdrop. I shared all the details in how I made it in my previous post here.

I brought it into my backyard and put a chair and a small table there with a stack of books. I found some cute art on SHEIN and added them to pallets to add some decor.

Next I made book page table runners. This was an easy project! I simply took a thrifted book, tore out pages , and used Elmer’s glue to glue them together. I made two of them and think it added a cute touch!

I also created a bookmark station. I had bought a wooden book from Michael’s and painted it to match my theme. Inside I added acrylic bookmarks and some stickers so my guests could customize one and take one home.

Next I collected books from my collection and put them on cake stands to add to the food table. I had little houses I bought at Target years ago and decided to make labels with book shop names, too!

I made some snacks, iced coffee and sangria. I had also made “book worms”! I put gummy worms in a bag and added a label. I ordered a pink cake from Walmart and added some paper hearts to it.

Once everyone arrived we put our books in a basket and everyone browsed and went home with a new book! We were able to chat, talk about our favorite books and have a lovely afternoon! I highly recommend getting some friends together for a book swap and making some sweet memories!

Let me know what you think of this idea!

DIY Book Page Photo Backdrop

I am planning to host a book swap for some friends this month. I have so many cute ideas for decorations and knew I wanted to have a photo backdrop for cute pictures of my guests. I brainstormed a few ideas and decided to use book pages along with some different garlands. I’m going to share how I made this cute back drop with craft supplies I already had and a special secret ingredient……a refrigerator box!

Can you believe it? I was going to buy a sheet of plywood, and as I was driving to the store there was a family moving into their new home. There was a huge refrigerator box on the grass, so I immediately pulled over and asked them if I could take the box. They said sure, so I loaded it into my truck and then brought it into my she shed. I flipped the bottom panels in the back to make it “stand” up and it worked!

Next I grabbed a book that I didn’t care about and ripped out all the pages. I wanted a scallop pattern so I put on a show and started cutting!

Next I started glueing! This seems like it would take forever but only took me about an hour. I just used Elmers glue and started at the bottom and worked my way up. Once I got to the top I wrapped some pieces of paper around the edge and glued them to the back.

I knew I wanted to add garlands, too. I made an easy one by folding paper doilies in half and glueing them around twine. I also wanted to make a mini book garland and a library card version. I’ll show them below and how I made them!

So, for the mini book garland I used scrapbook paper to make the outside of the book. I folded it with a small “book binding” so that I could add the pages inside. I just took book pages and folded them according style and glued them inside the book. I then added stickers to the outside. I then glued the books to twine.

Next up was the library card garland. I had found these cute cards in a local shop. Amazon or Etsy sell them too. I had a date stamp from SHEIN that I used to stamp due dates on the cards. I then added a classic book title and glued the library card on scrapbook paper with a yarn bow and used a clothespin to hang them on twine.

I also decided the end of the backdrop needed something. So, I cut some green scrapbook paper and the used my die cut matchine to cut floral shapes. I made some book pages and folded flowers and added them to the green paper. I think it adds a perfect pop of color.

I think all the little touches are so cute and I’m thrilled that I was able to create this with what I had and an old box! I can’t wait to host this party and I will make sure to share all the other details.

“Painted” Hand Pies

I had seen an idea from Shop Art and Flora on Instagram that I loved. She made heart shaped Pop Tarts and used gel food coloring to decorate them. I thought I would give it a try and I think they’re so cute. I need a bit more practice “painting” and will share a few things I would do differently.

First off, here’s what you will need:

  • Pre made pie crust (or make your own if you prefer!)
  • Gel food coloring (I grabbed the pastel version but it was still bright!)
  • Filling ( I used strawberry jam and blueberry pie filling)
  • Paintbrushes
  • One egg for egg wash and egg brush
  • Wax paper
  • Cookie cutter in your shape of choice

First off you will roll out your dough and cut the shapes. You will need a bottom and top piece. I took excess dough and rolled it out to create more pieces. With one box of dough I made seven hand pies.

Next up place your pieces on the wax paper on a cookie sheet. Place a tablespoon or so of filling and brush the edge with egg wash.

Next place the top on and seal it by crimping the edge with a fork.

Next you want to egg wash the tops of the pies. I didn’t do this step on all of them and you can see the difference once baked. It will have a more golden look. Let the egg wash dry and start the fun part…painting!

I painted a bow on this one!
I cut out a heart from dough and placed it on the pie and then added the gel color!

You can also cut out pieces of dough and make hearts, flowers or any design you like. Once done bake in the oven at 400 for 10-12 minutes. Then enjoy!

I think these would be cute for a baby shower or bridal shower with the brides initials! The ideas are endless. Let me know if you’d try to make these!