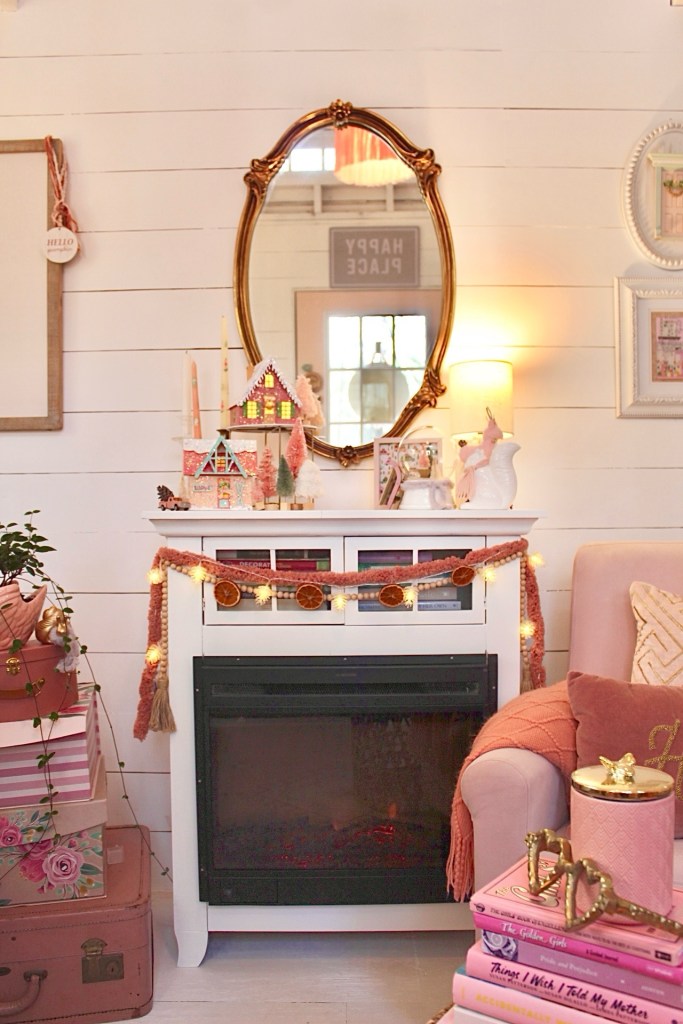
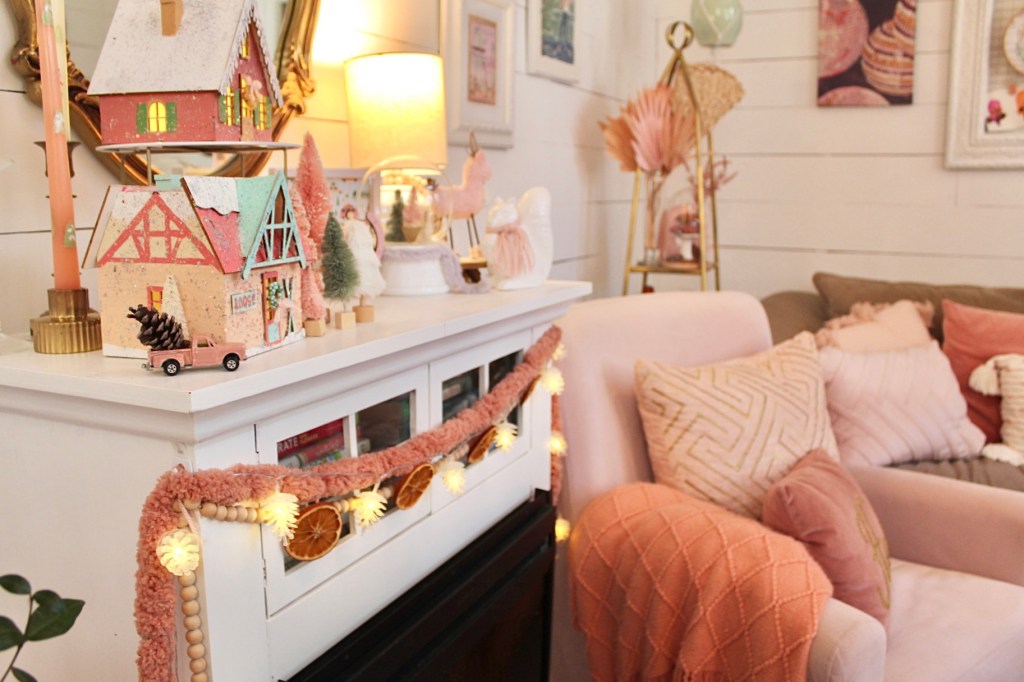
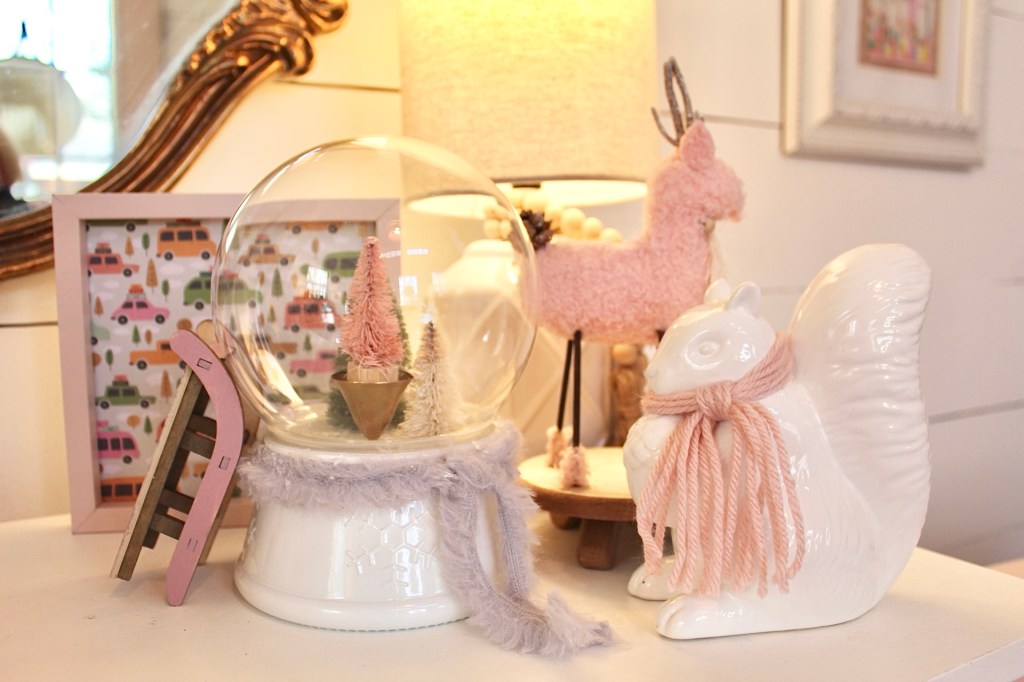
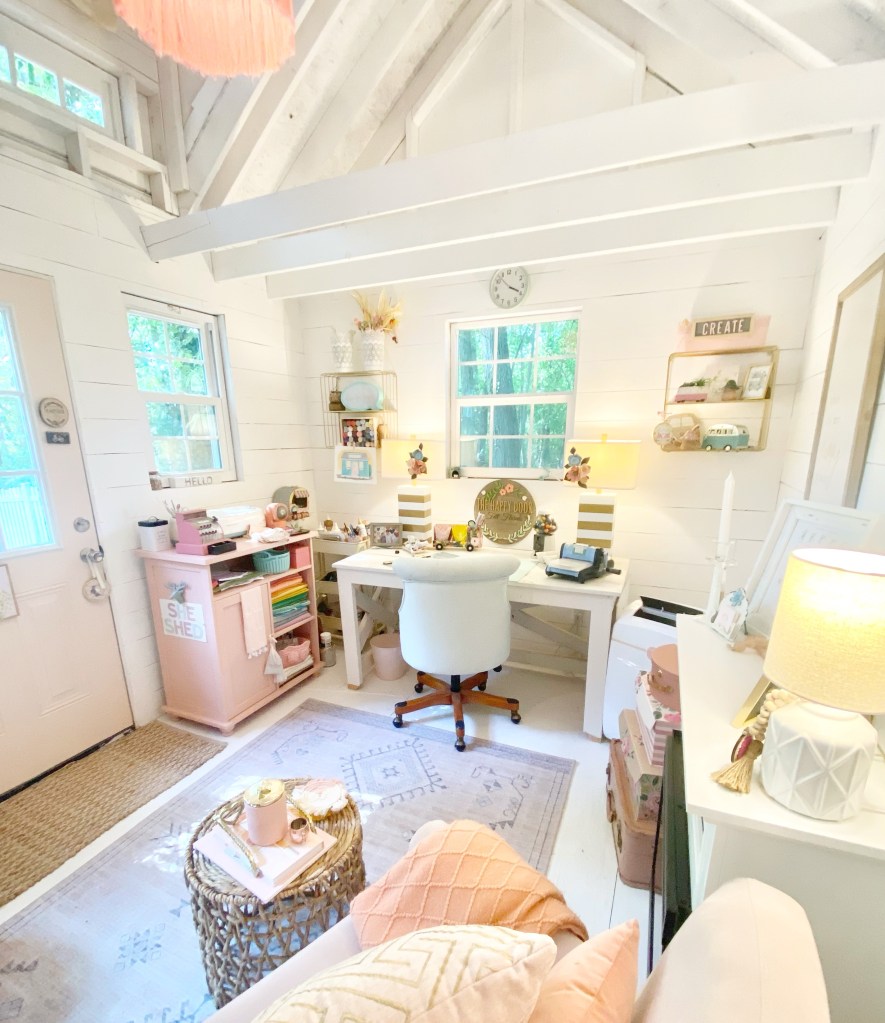
One thing I love about having my she shed is being able to change up my decorations. I mean, I love decorating my home for my family, but with this space I can really make it girly and whimsical! And PINK!
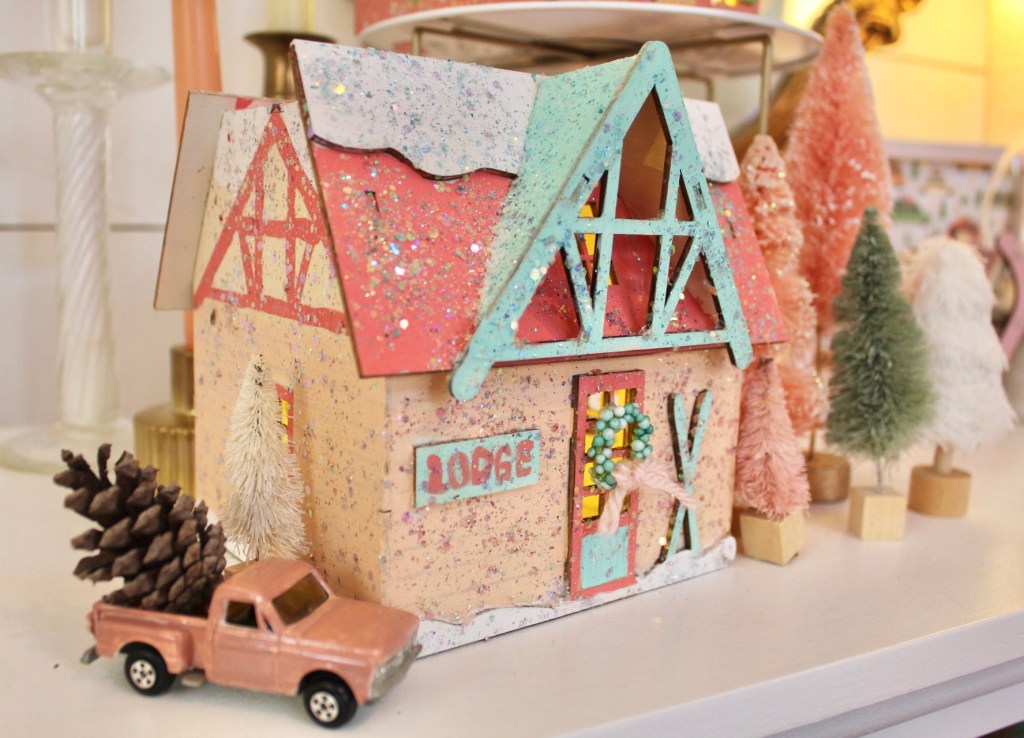
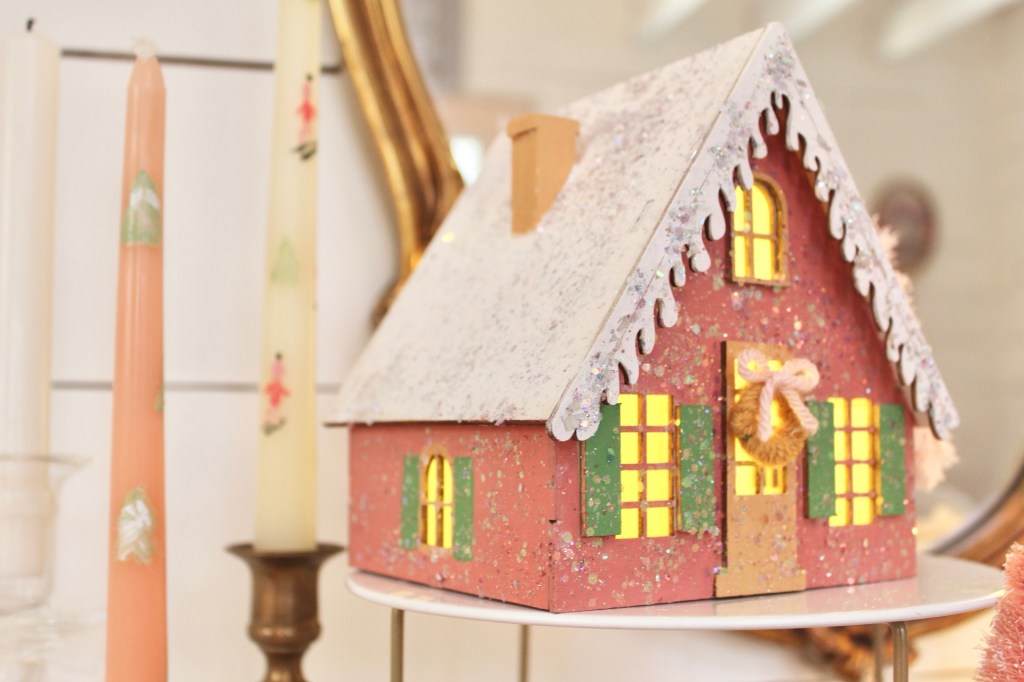
So, this winter I pulled out some of my past decor, but was so excited to add some new things. First off, I found these charming little houses at Michael’s. I grabbed the A frame house and ski lodge. They were a bargain at $5.99 each and even light up! If you want to grab your own head here.
These were the houses before I decorated them.
I painted them both and then added glitter. If you decide to add glitter you will add a coat of Elmers glue with a brush and then sprinkle the glitter on the wet glue. I also made two mini wreaths to attach to the doors.
I painted a couple of taper candles I had and added some bottle brush trees. I then added a little pink pick up truck. I mean, if I was to go skiing I would want to go here!
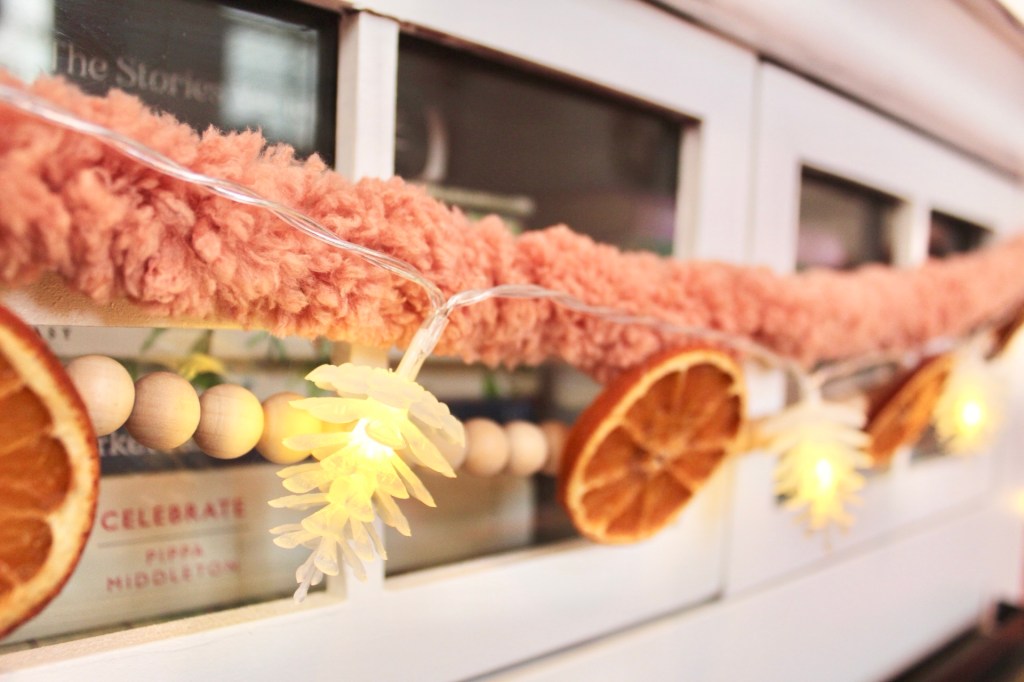
I decided to make a garland to hang on the fireplace. I attached a couple of command strips to the side and strung a beaded garland I had already. I added a piece of chunky yarn and strung some dried oranges onto the yarn. If you want to dry oranges make sure to check out my previous post here. Then I added some pine cone twinkle lights to finish off the whimsical look.
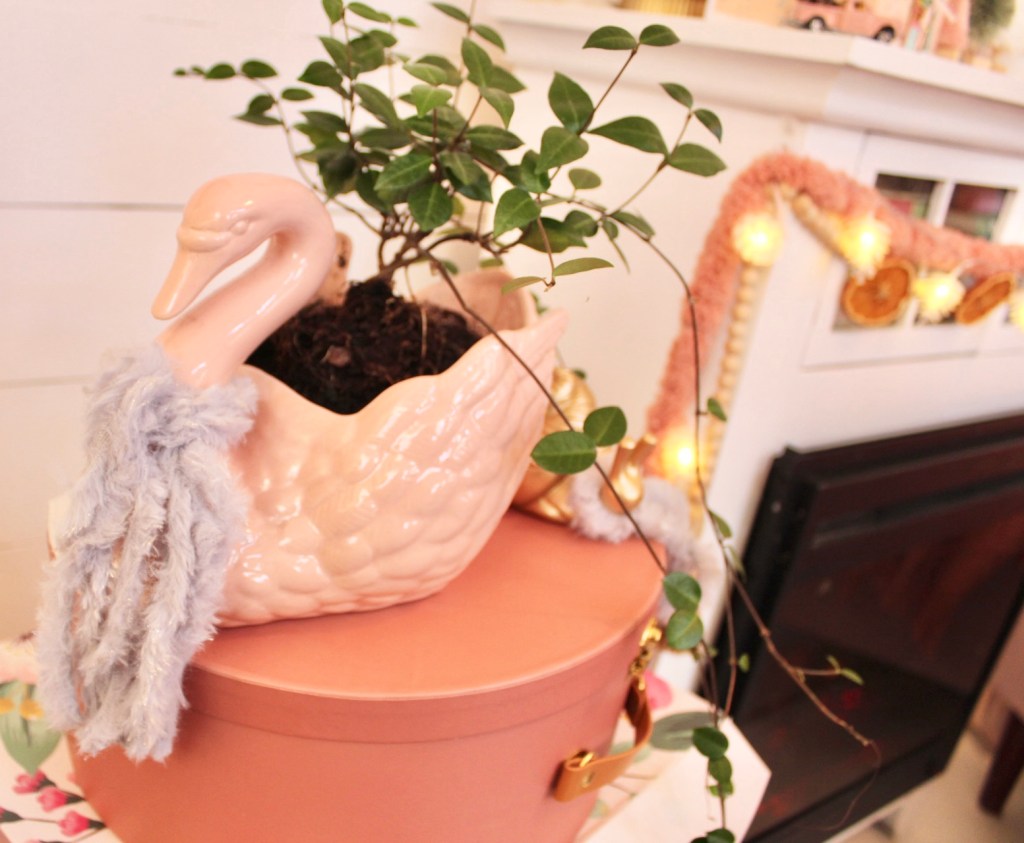
Every year I add scarves to any woodland animals I have. This year my new pink swan got one!
I just love all the pink and all the whimsy! It’s such a happy space to get creative in! Let me know your favorite part.
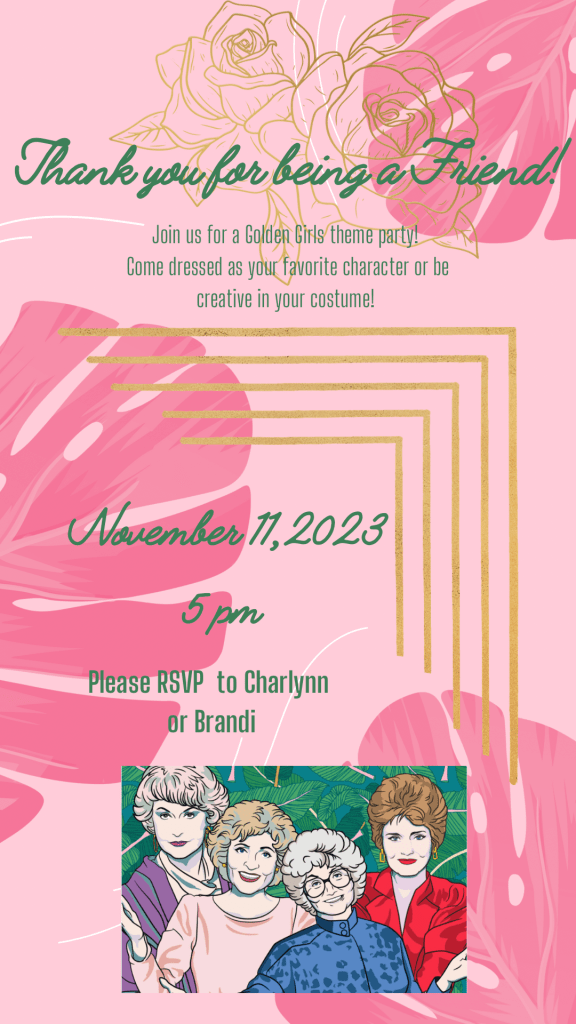
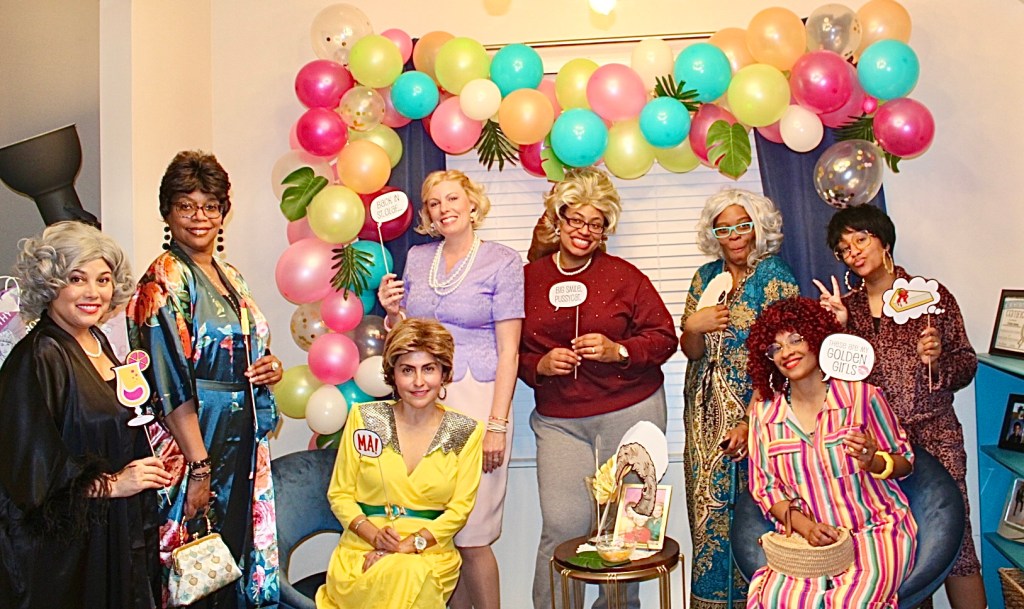
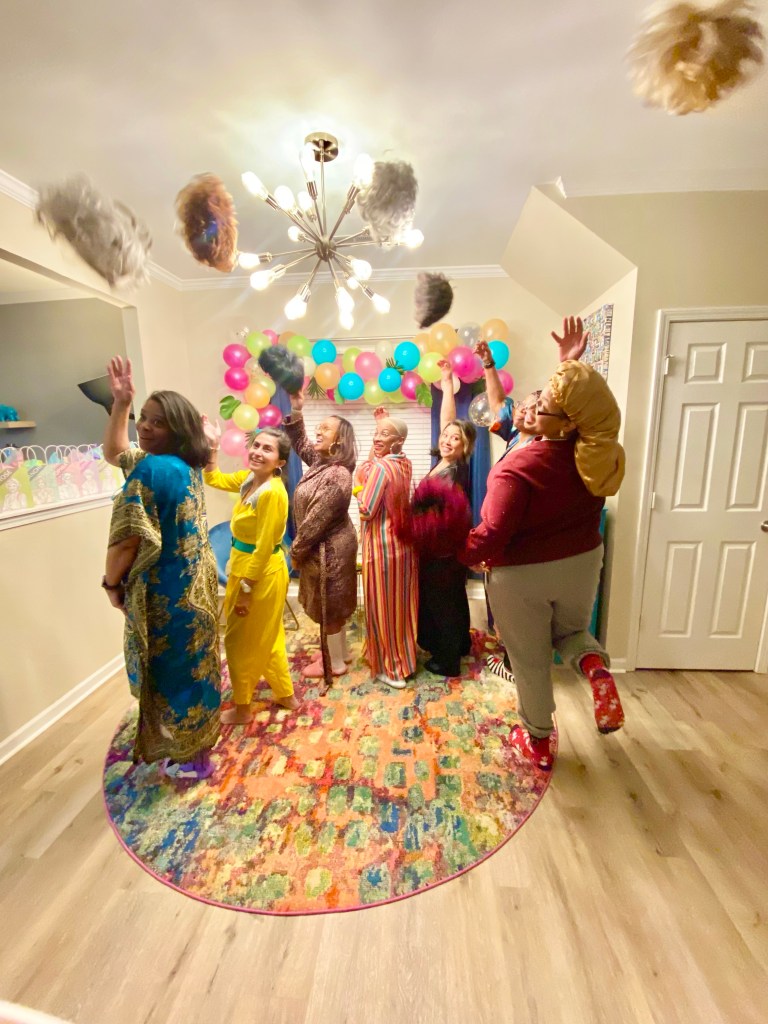
I love the Golden Girls! And I have a good friend who shares a love of the show. So, obviously we had to host a Golden Girls theme party. I thought I’d share a few of the ideas we had to make the party fun for our friends.
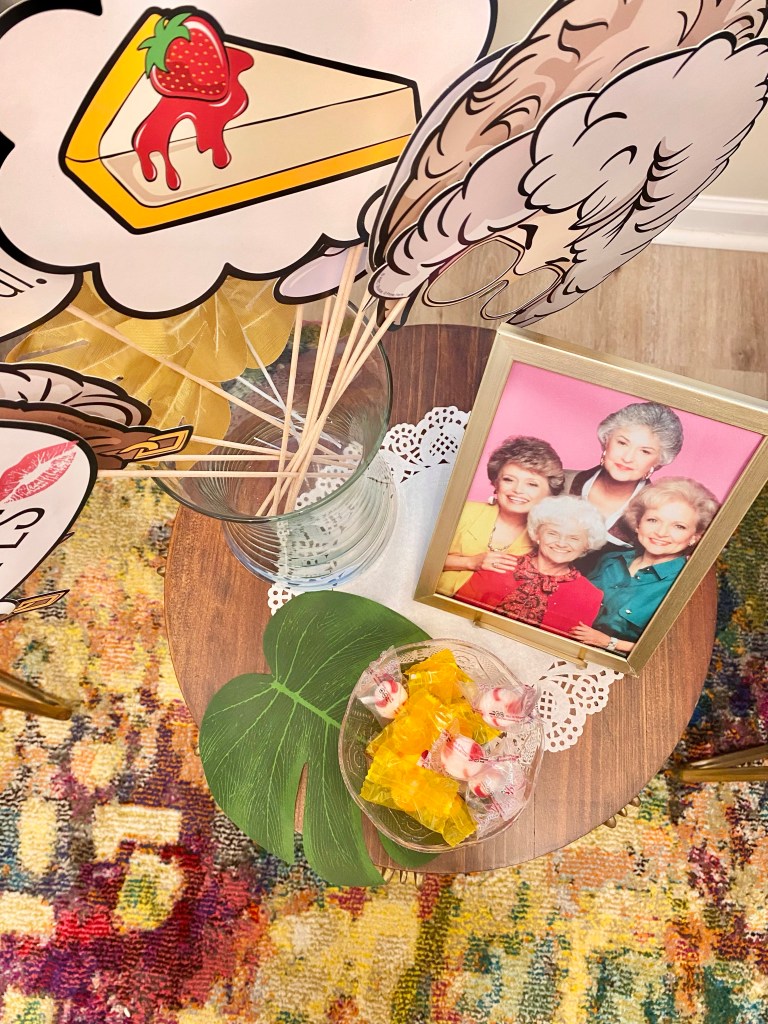
Of course, we started with a cute invitation. I designed one on Canva. I wanted it to feel like it was coming straight from the ladies condo!
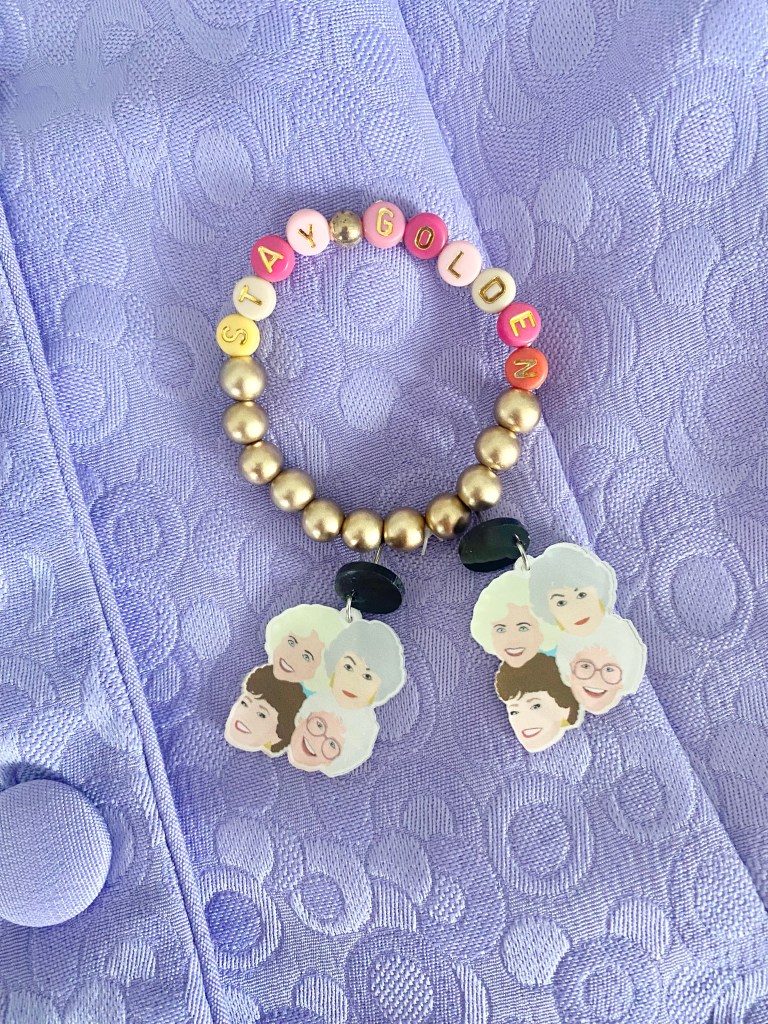
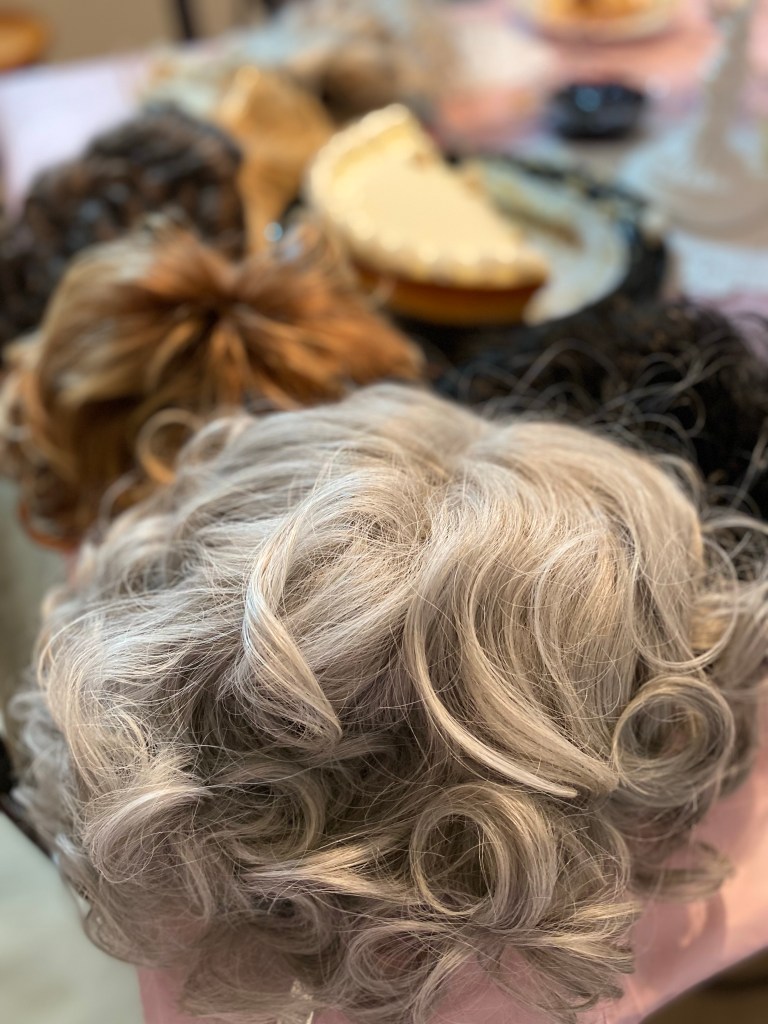
Next, I went shopping for a costume. I love thrifting, so going to Goodwill was the obvious choice. I found an 80’s suit that had a Rose vibe. I grabbed some pearls from Walmart and bought the cute earrings on Amazon. I made a “Stay Golden” bracelet with some beads I had.
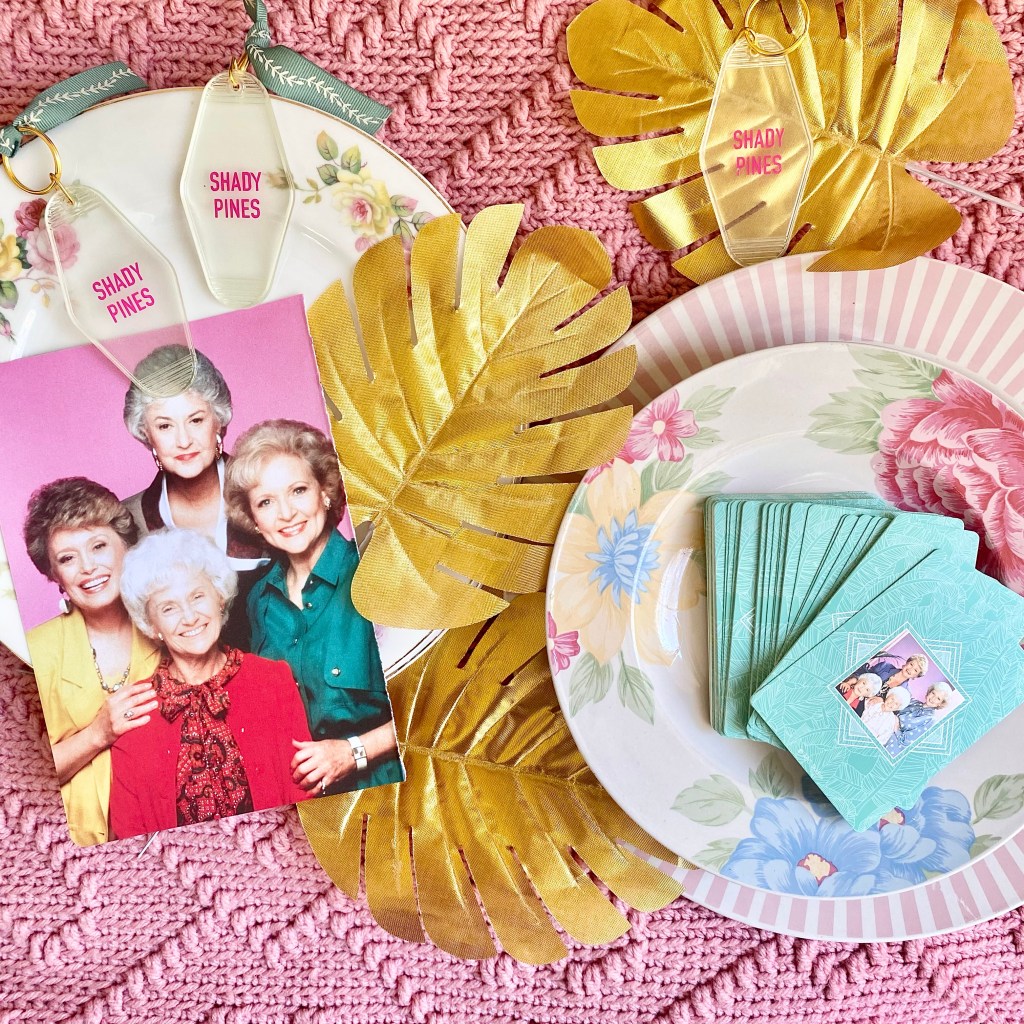
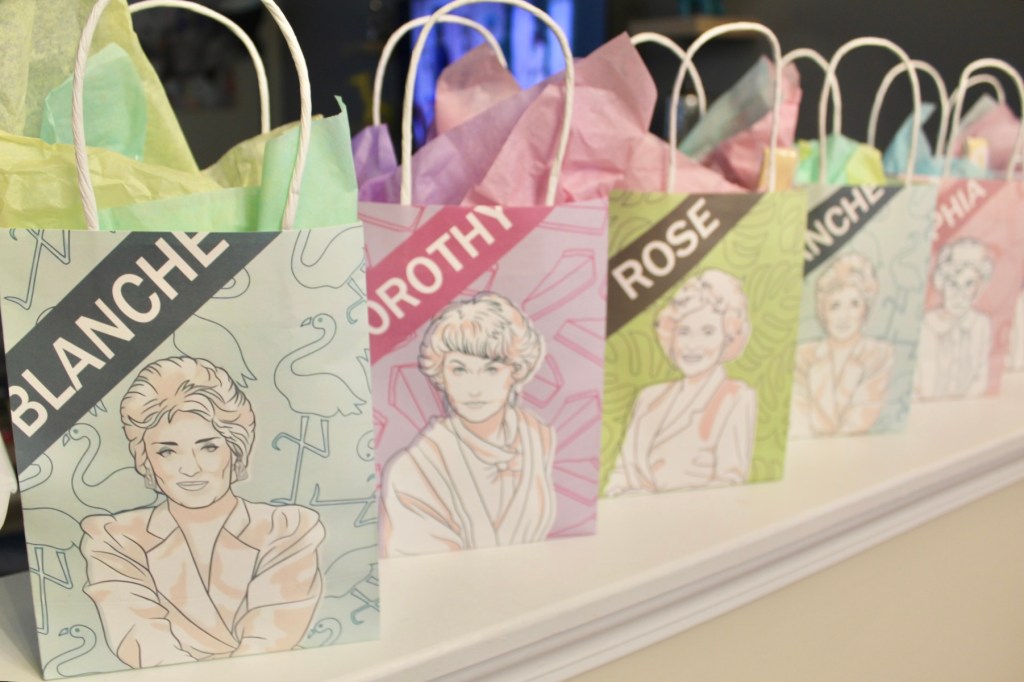
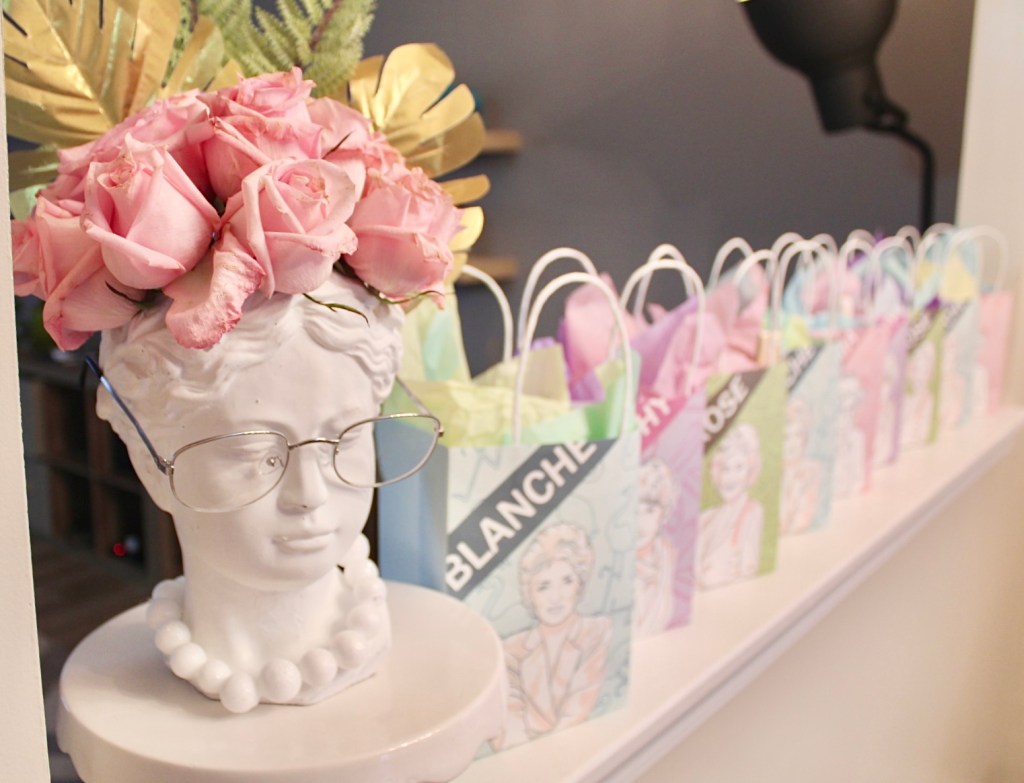
Then we started planning some details. We got a balloon garland for a backdrop from a Temu. We got some photo props and gift bags from Amazon. The water bottle tags are from Etsy and added a cute touch!
I also thrifted some dishes for the party. The retro florals we’re perfect for the theme!
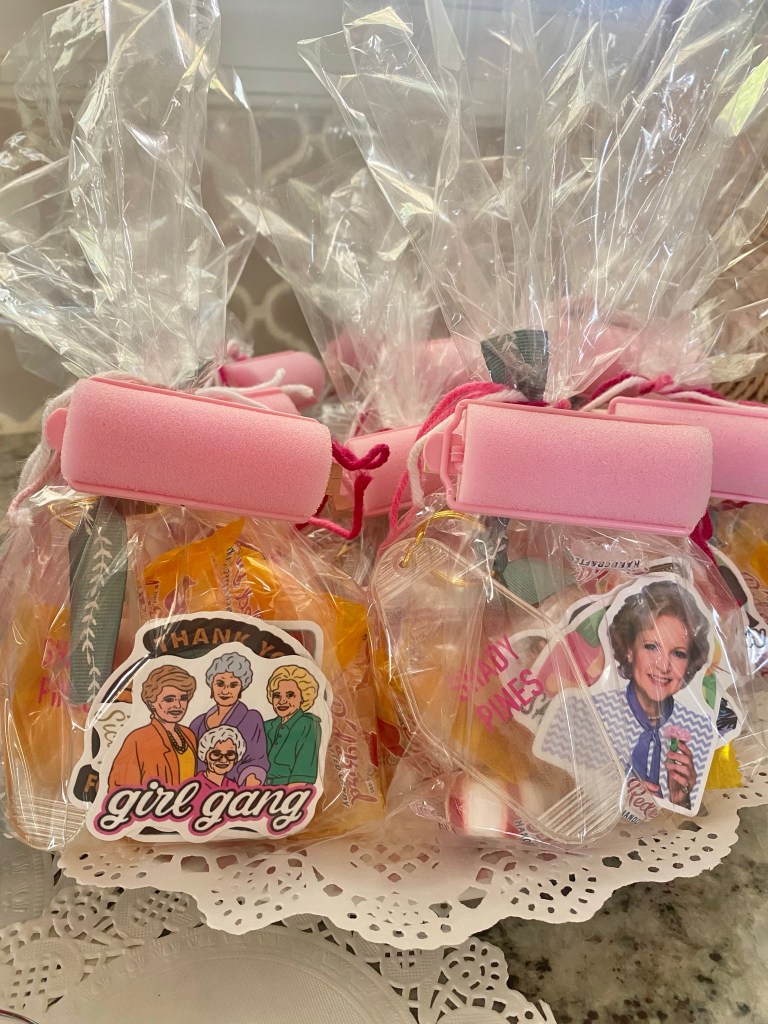
Inside the gift bags I added some “granny candy”(butterscotch and mints), a few stickers I bought from Amazon and a Shady Pines keychain I made. I wrapped them up and put a pink roller on a clothespin to close the bag up!
My friend found a perfect party game…Bingo! She found that on Amazon, too!
I wanted to make a floral centerpiece, too. I have a ceramic bust and had an idea to make a Sophia arrangement. I ordered some gold monstera leaves from Temu, picked up some roses from the grocery store and added glasses and pearls! I think she’s perfect!
We had also seen some cute cake pops on Pinterest and my friend did an amazing job making them!
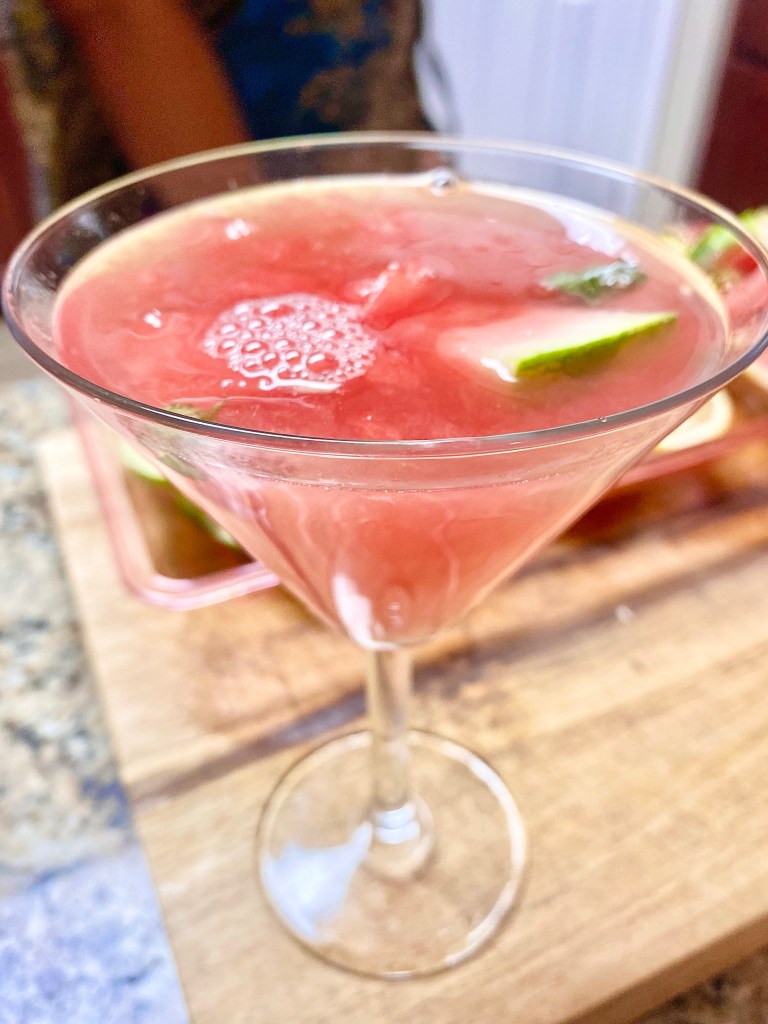
We also decided to make a cocktail for each character. We made four pitchers of drinks and had a little menu on display.
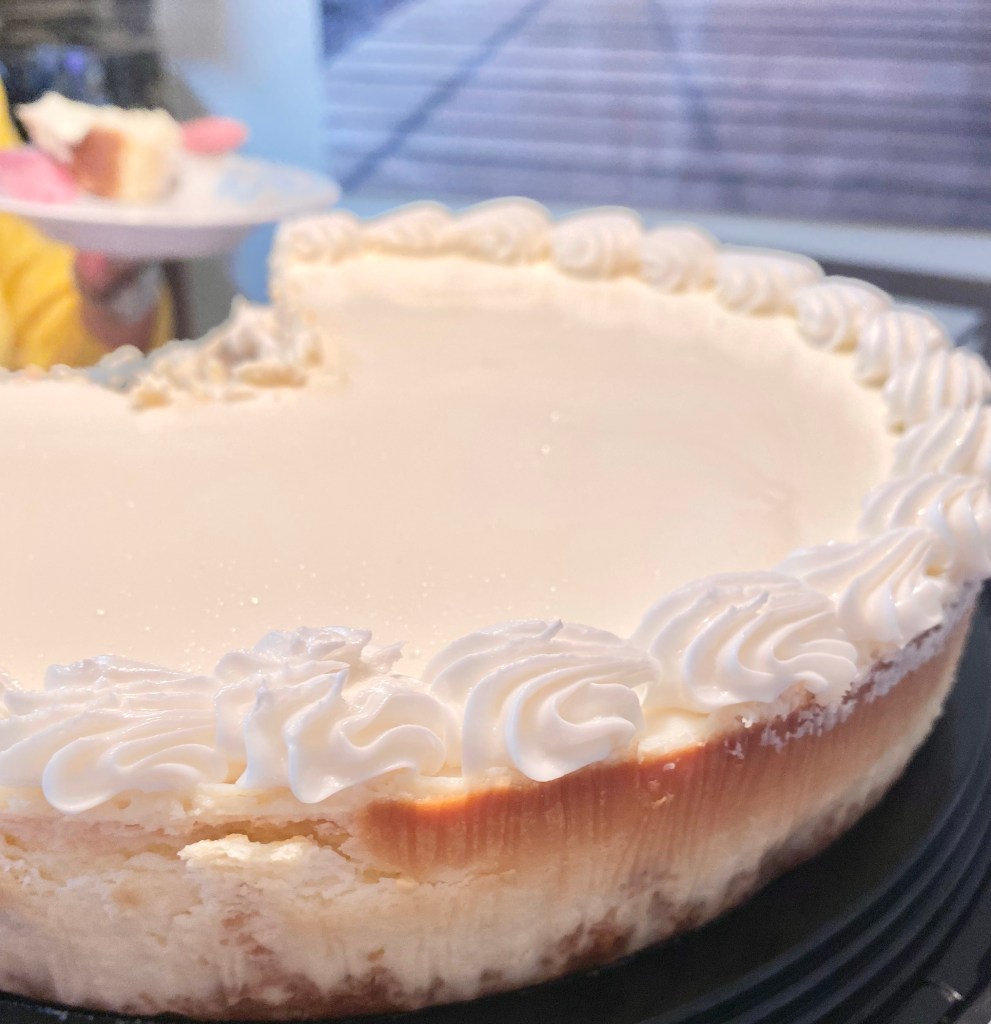
No Golden Girls party would be complete without a cheesecake bar! I failed to grab a photo of that, but we basically had different fruit toppings for your cheesecake. It was delicious.
Golden Girls must eat cheesecake!
We had such a blast. We ate, laughed, had cocktails and caught up. It was a perfect girls night!
I hope this has inspired you to have your own Golden Girls themed party! It’s such a fun theme!
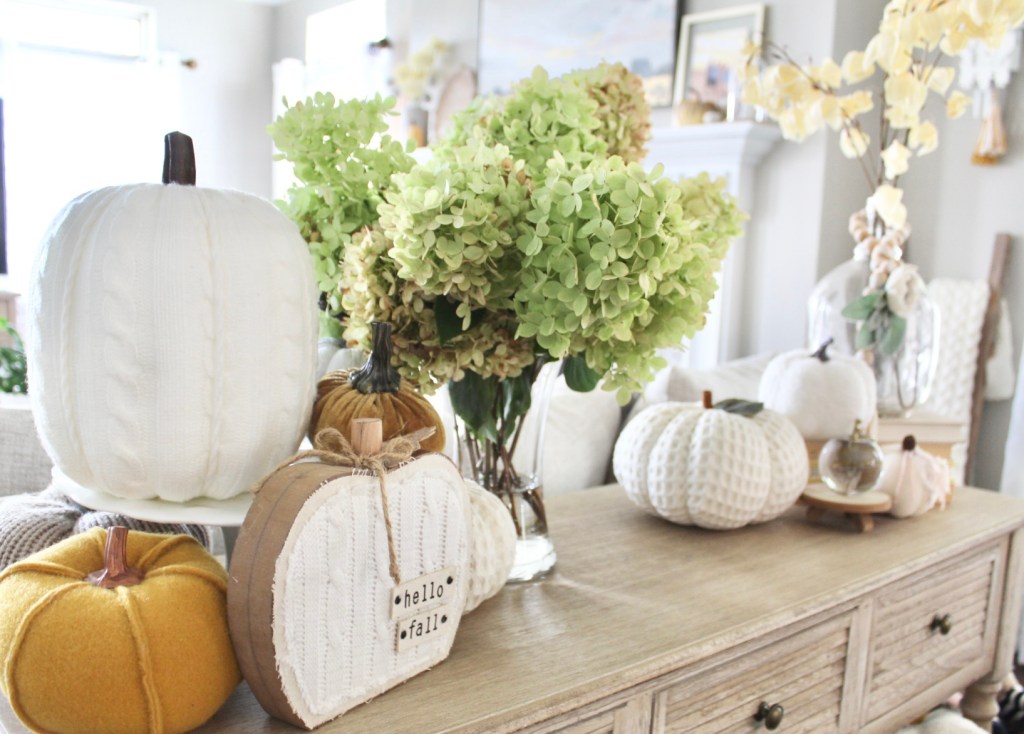
If you’ve been here for a bit you know that Fall is my favorite season. Pumpkins just make me smile and I would like to keep them out all year! So, I have quite a collection and each year I try to think of fun, new ways to decorate with them!
I thought I’d share a round up of some of my favorite ideas. I’ve painted, carved and used pumpkins as vases for flowers. Below are some of my favorites!
Here’s my she shed with quite a few pretty pumpkins! Read below for some of the ideas.
First off, the large wooden pallet pumpkin is new to my she shed this year. Before it was plain and gray. Although it was pretty, I wanted to make something fun for the entrance to my Petit Chateau. So I painted it in different shades of pink and peach and painted different rows of flowers. Then I added some orange yarn to the top. Now, it’s perfect!
This fun and easy update fits perfectly now!
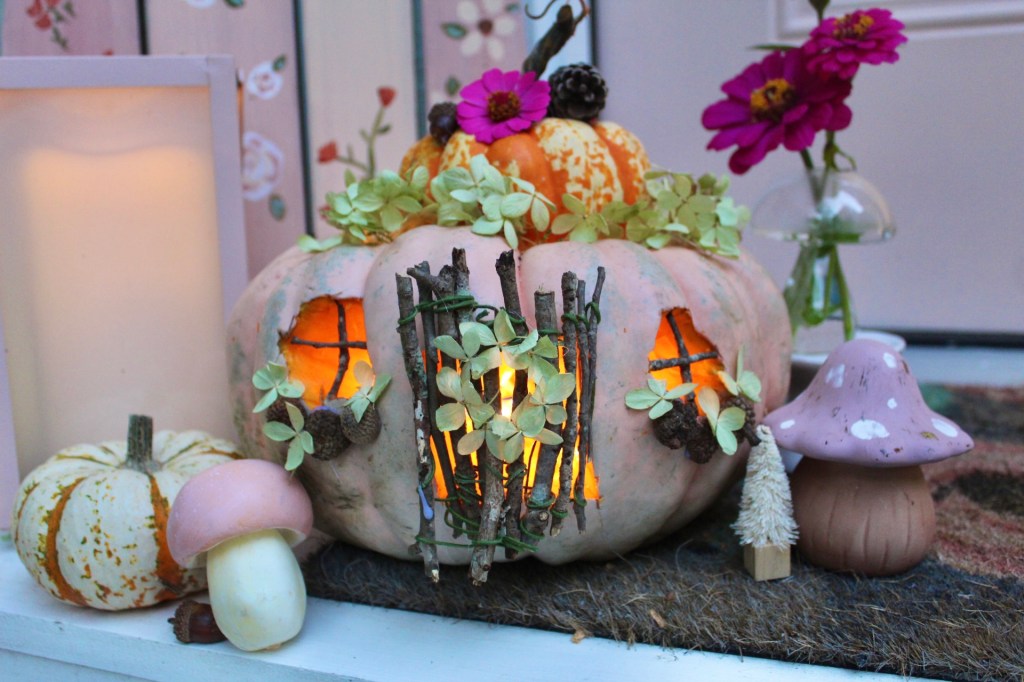
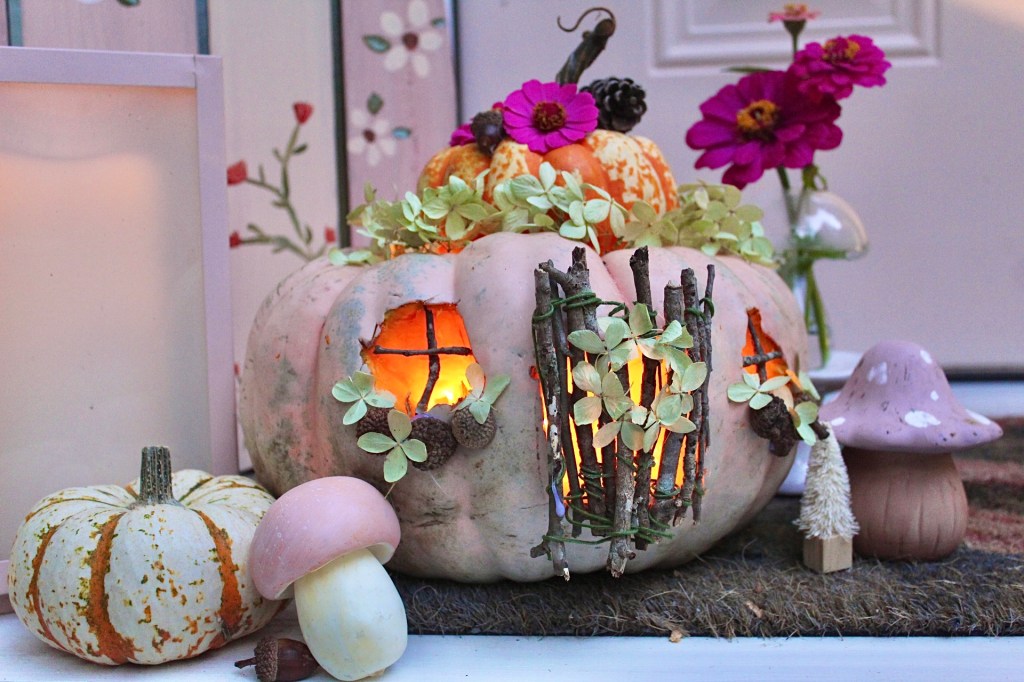
Next up I decided to carve a pumpkin and make a pumpkin fairy house!
I found a pretty peach pumpkin and carved the top off. I cleaned out the inside and put some battery powered twinkle lights inside. I then cute out two round windows and a square door. I grabbed some twigs and assembled them with floral wire to make a door. I hung the door on a small skewer. I then got glued acorns and dried hydrangeas on for window boxes and made a mini hydrangea wreath. I added a few sticks for window panes and topped another mini pumpkin on top with some flowers. The fun thing about making one of these is you can use what you have and be creative!
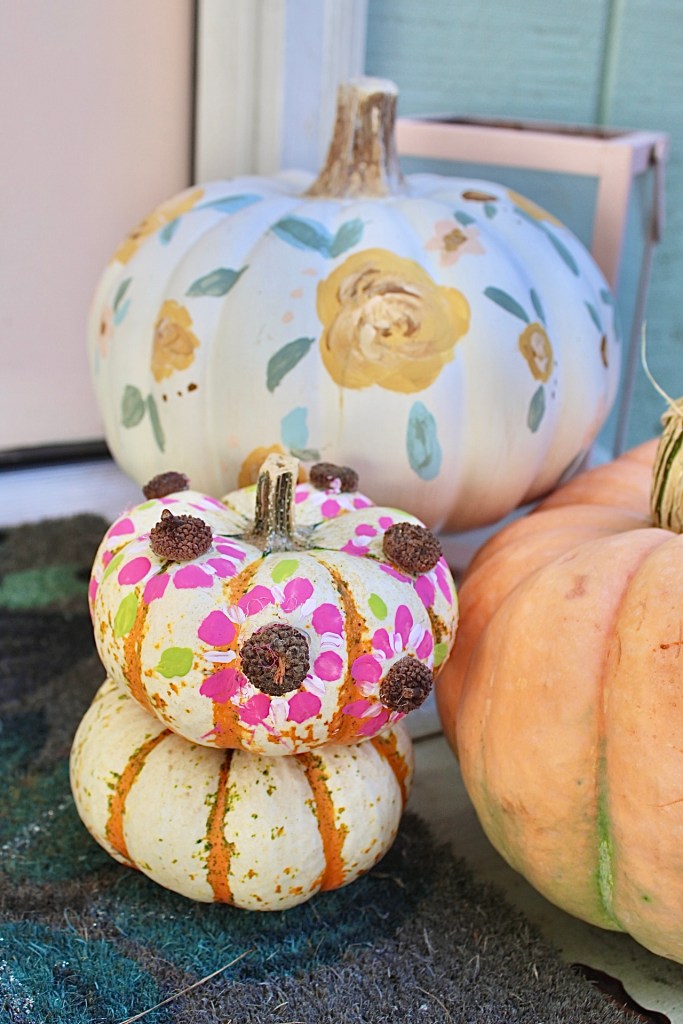
I also made a fun pumpkin with acorn flowers. This is easy! Grab some acorn tops and hot glue them onto your pumpkin. Then add some acrylic paint to make flower petals and leaves.
The pumpkin behind my acorn pumpkin is from a few years ago. I just painted florals on a craft store pumpkin. It’s still one of my favorites!
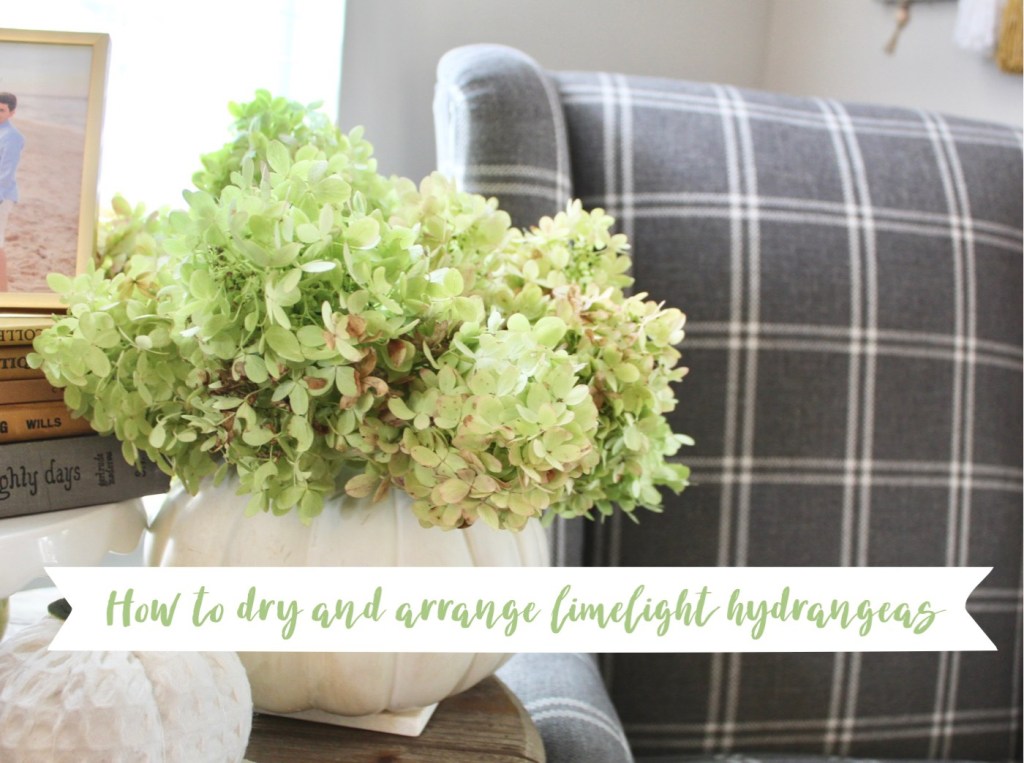
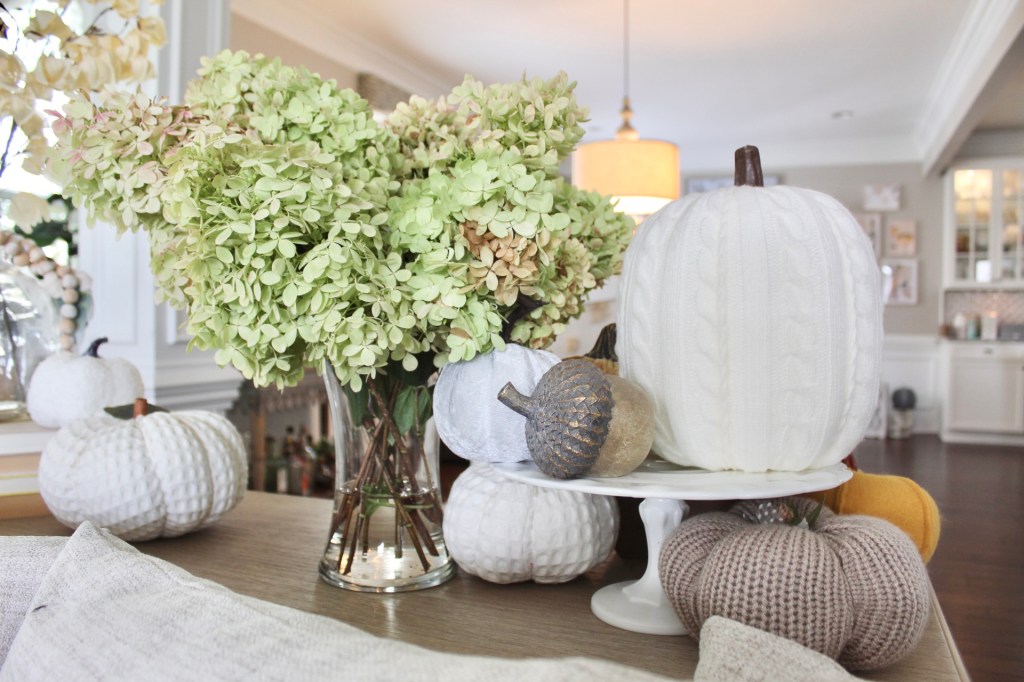
Another thing I love to use pumpkins for is floral arrangements! You can use a real or fake pumpkin. I carved out the top of a fake pumpkin and then fill it with flowers in a small vase in the pumpkin.
This year I put some dried limelight hydrangeas.I’ve also filled it with hydrangeas from my yard.And this arrangement was with grocery store flowers.
I hope I’ve given you some inspiration for ways to add some whimsy to your Fall decor! Let me know if you’ve tried any of these.
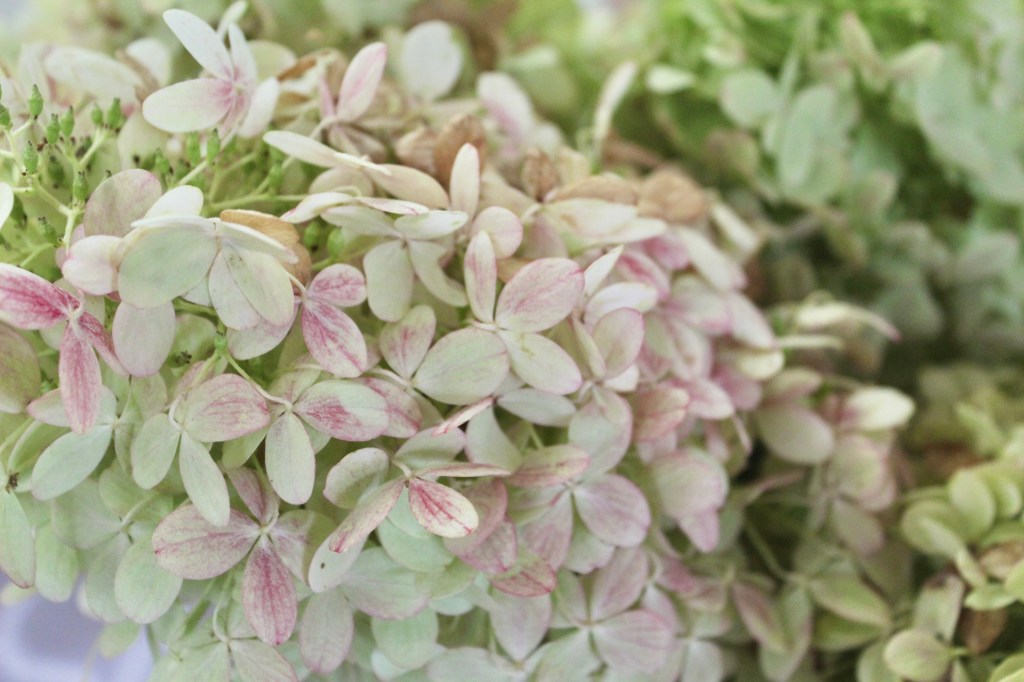
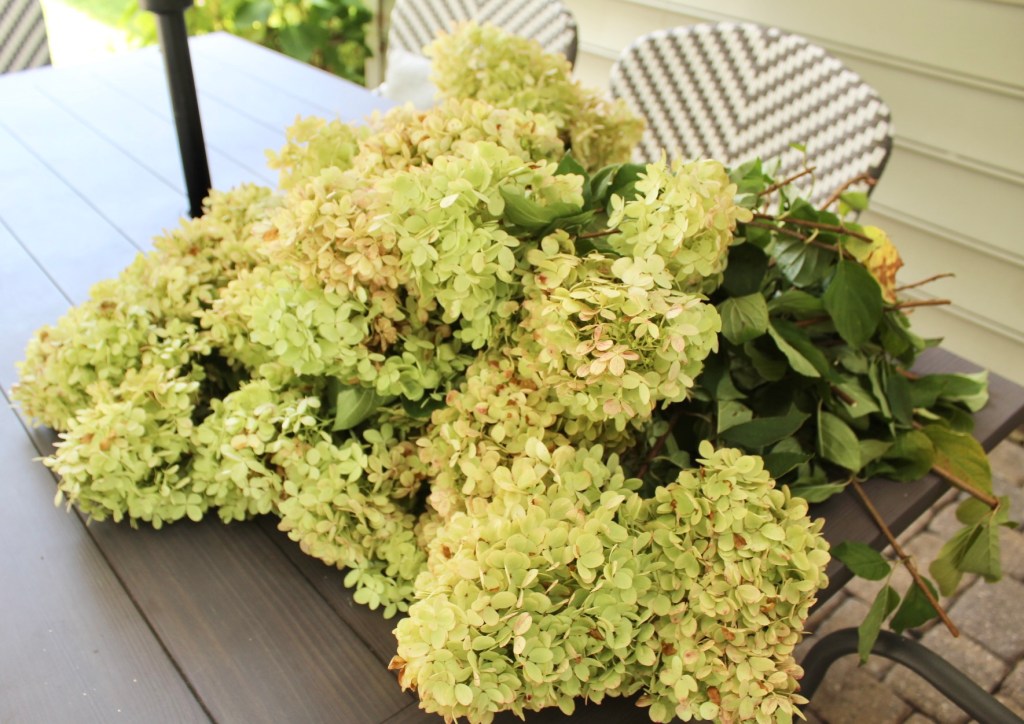
I have two large limelight hydrangea bushes in my front yard. I absolutely love them during summer. They are a pretty creamy white and then fade to a lovely pale lime green. Come Fall time they start drying out but they are still beautiful! They are shades or green and muted pink. I love to clip the stems and arrange them for Fall decorating, so I thought I’d share a few tips and ideas.
The colors are so pretty for Fall!
So, pruning and trimming the stems off was quite a bit of work. I ended up throwing away a huge trash bag full of stems that had turned too brown. But, I reserved a lot of beautiful ones!
Once you have trimmed the blooms you then want to remove all the leaves from the stem. They will quickly wilt and won’t look pretty. I just run my hand down the stem and pull the leaves into a bucket.
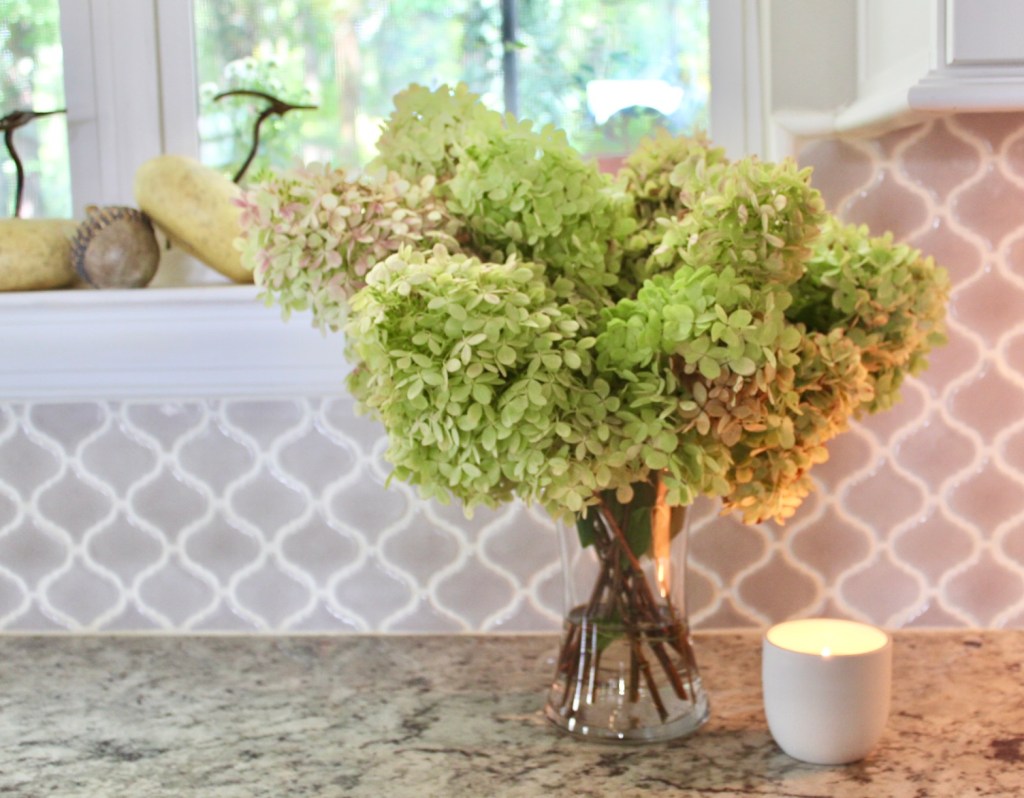
Once you have done that you are ready to arrange them!
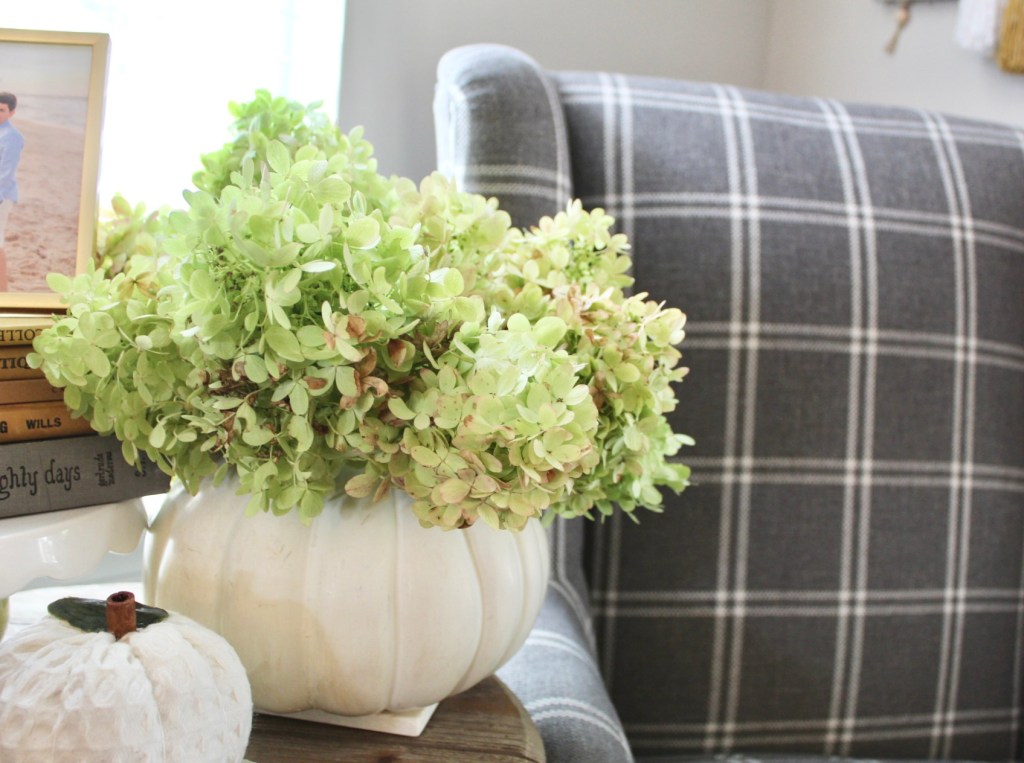
The best way to dry them so that will last is to place them in about three inches of water. Let the water dry out in the stems and they should stay for you to use as you would any dried flower. I put mine in a clear vase and a hollowed out faux pumpkin!
They also look pretty in my back patio!
I hope you have a chance to dry some hydrangeas this Fall! Let me know your thoughts.
Our family had planned a trip to Spain in 2020 but when Covid hit our flights were cancelled. I was so upset because I was dying to go. So, we waited for everything to open back up and make new plans. And let me just say, the wait was worth it! This vacation was one of the best in my life. I am going to share some of the places we visited and the highlights!
We boarded our flight. We had a stop over in Philadelphia where we met my sister in law and brother in law. From there we took our flight to Madrid. From Madrid to Malaga was a five hour drive so we were pretty exhausted. But, where we were staying was worth the wait!
We stayed in amazing home with a beautiful view and a pool.
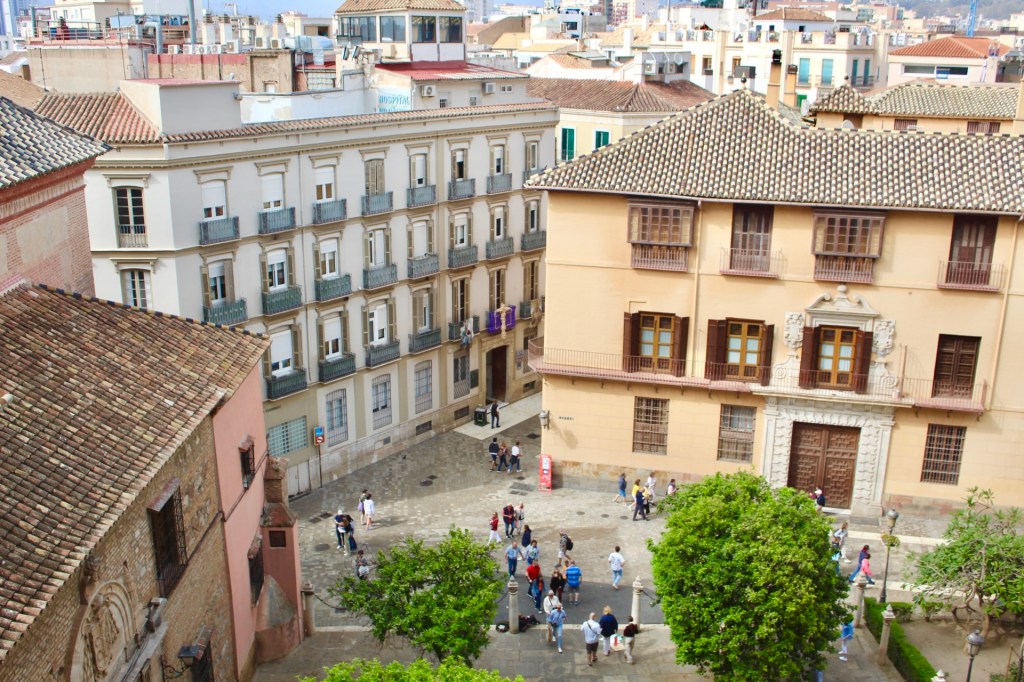
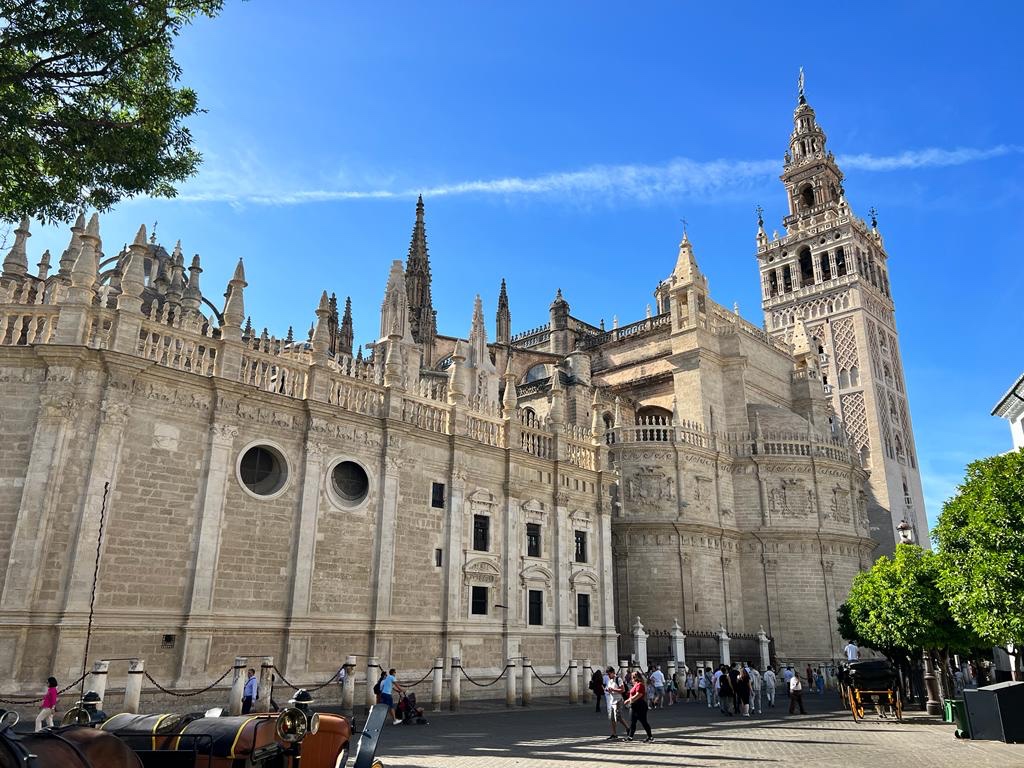
Once we got a good nights sleep we decided to explore Malaga. We had rented a car and it was fairly easy to get around. We headed to the Malaga Cathedral. I had read that the view from the top were amazing, and that was accurate!
From the top of the Cathedral the views were stunning!
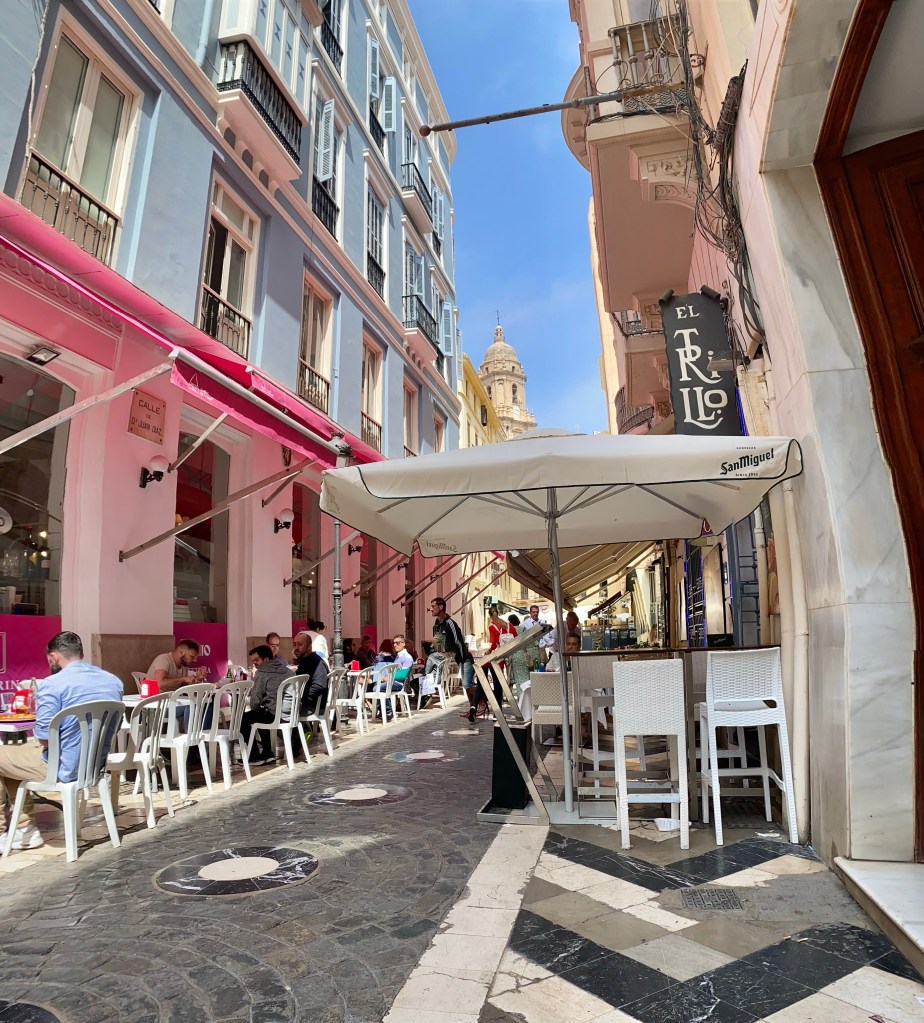
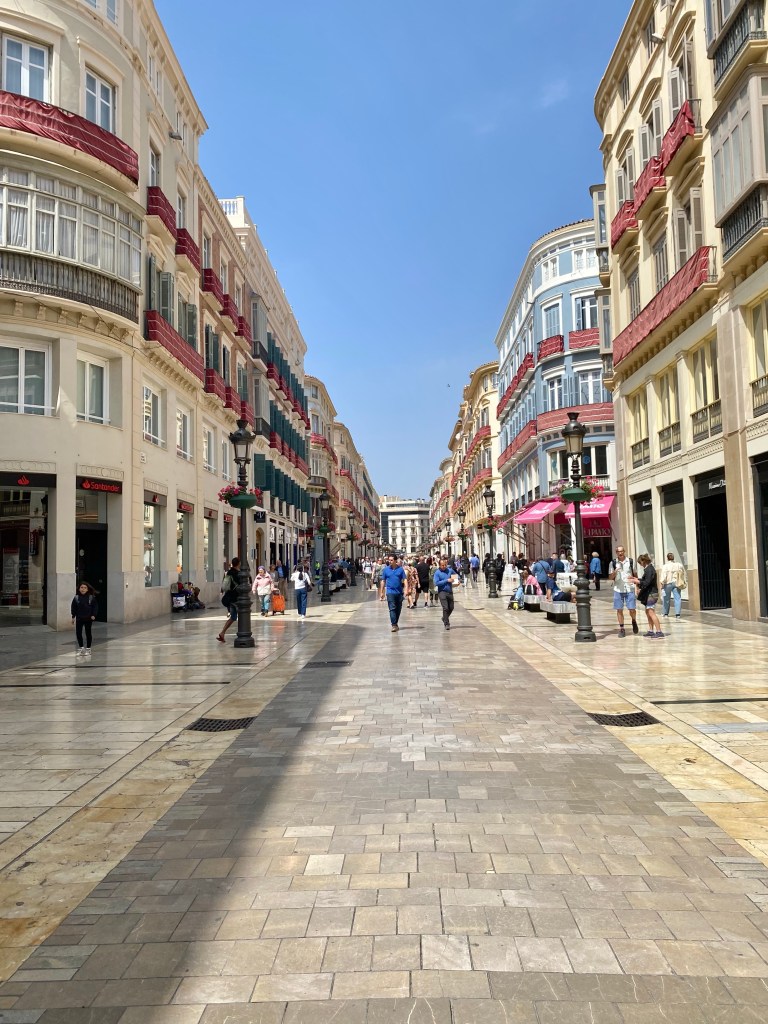
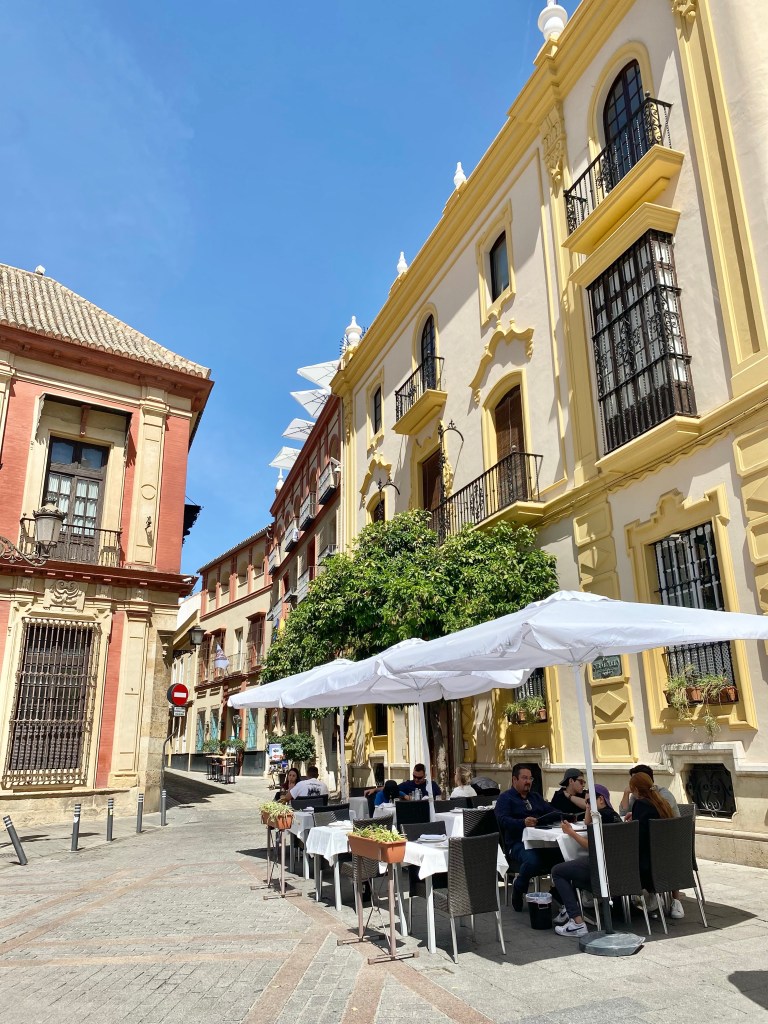
Next we roamed the city. It is so charming. And it is so clean!
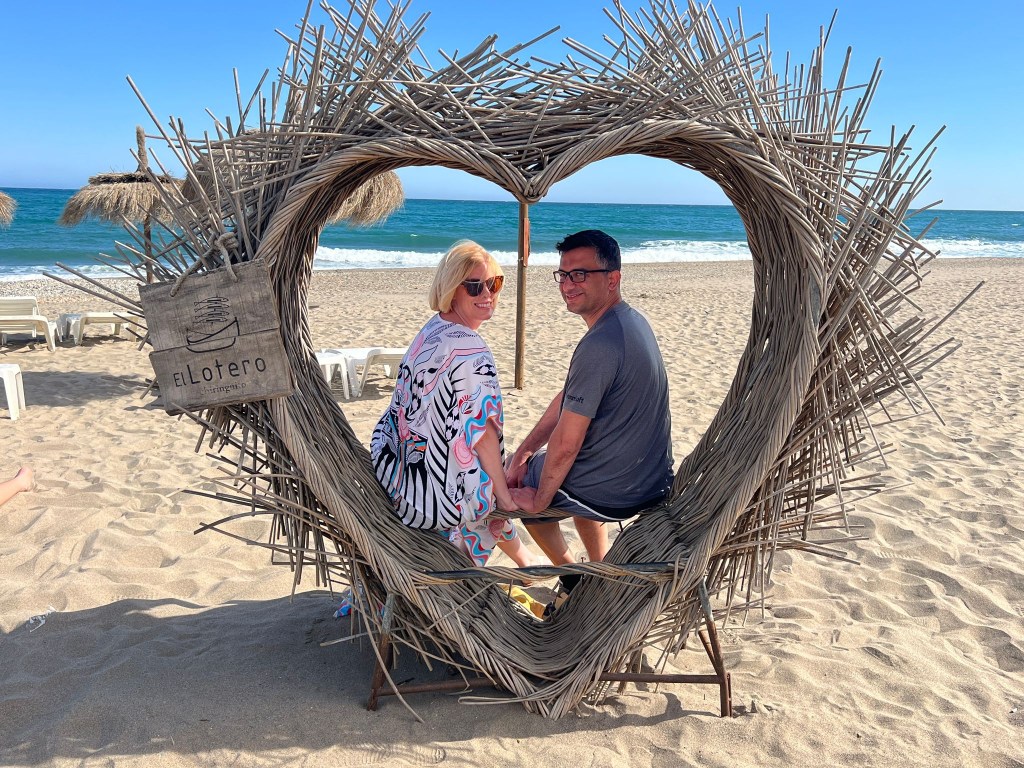
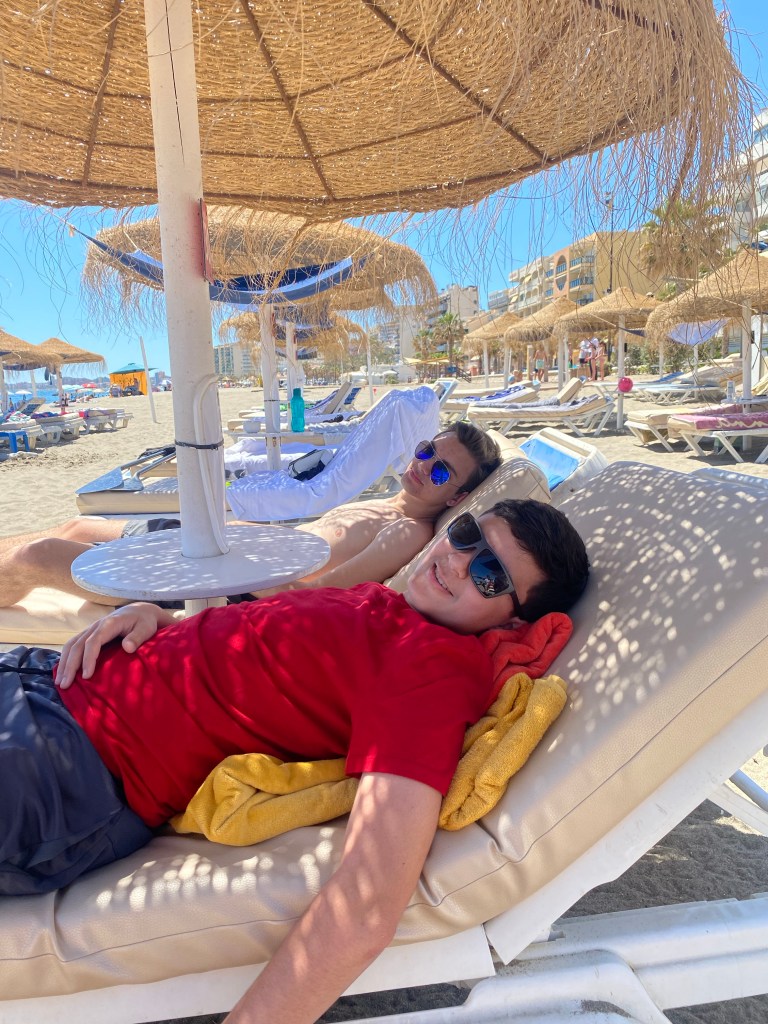
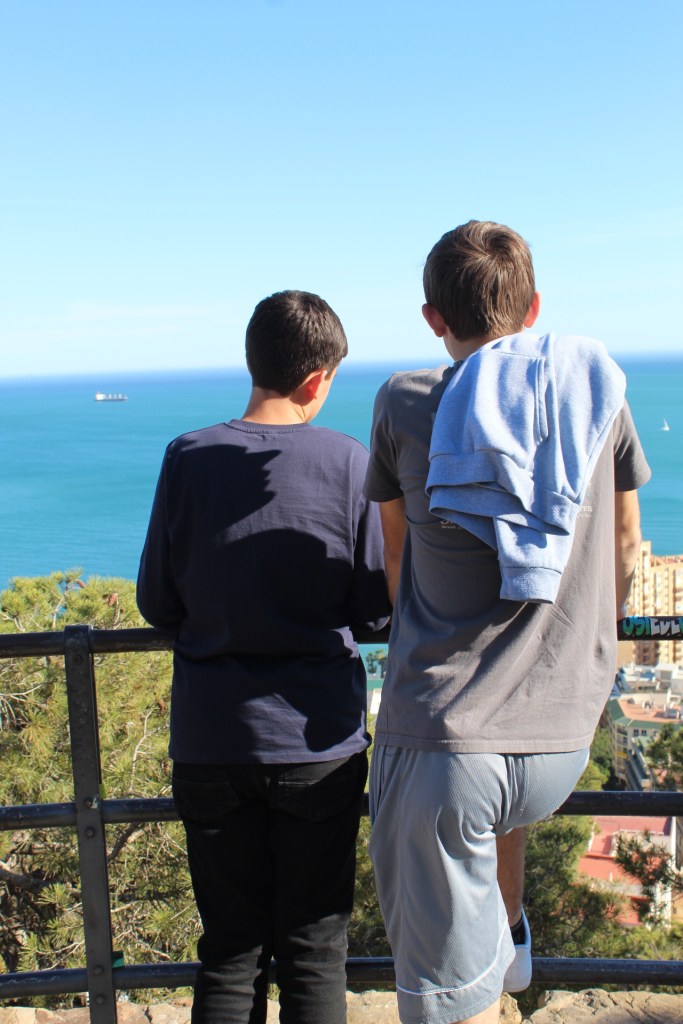
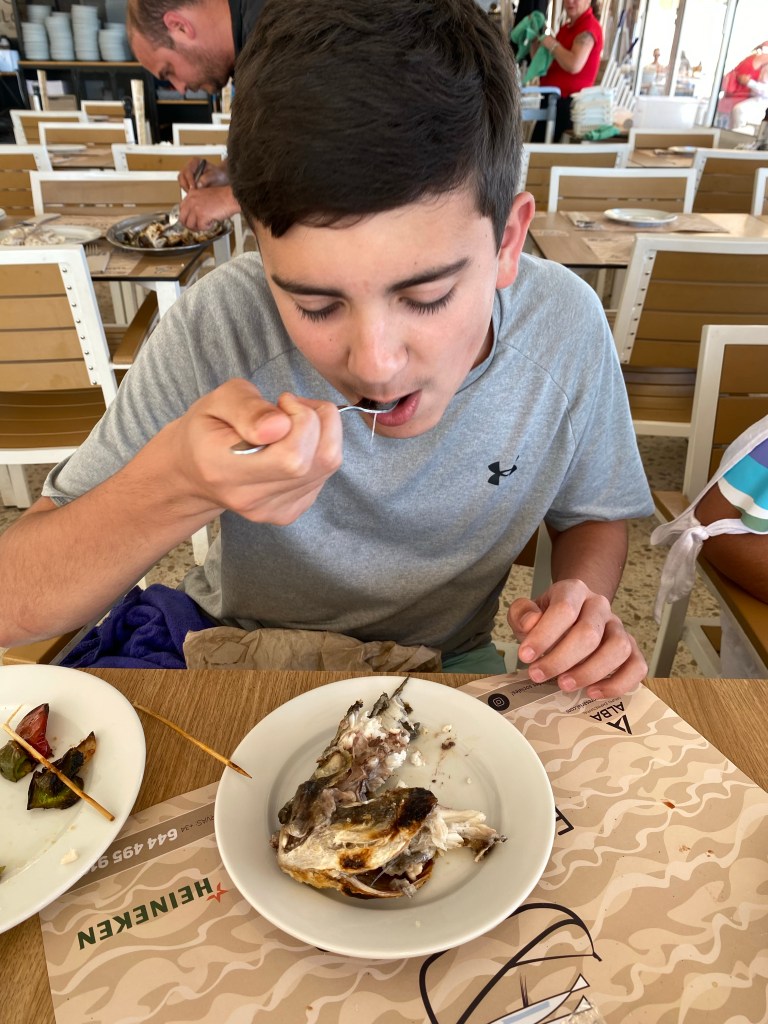
We knew we wanted to spend a day at the beach, too. There were lots of recommendations for beaches, but we went closest to where we were staying in Benalmadena. The beach was beautiful. We rented some chairs which had umbrellas and ordered some sangria and fried fish with French fries. It was a perfect day! We were there in April, so the ocean was too cold for me, but my youngest son and brother in law went in the water!
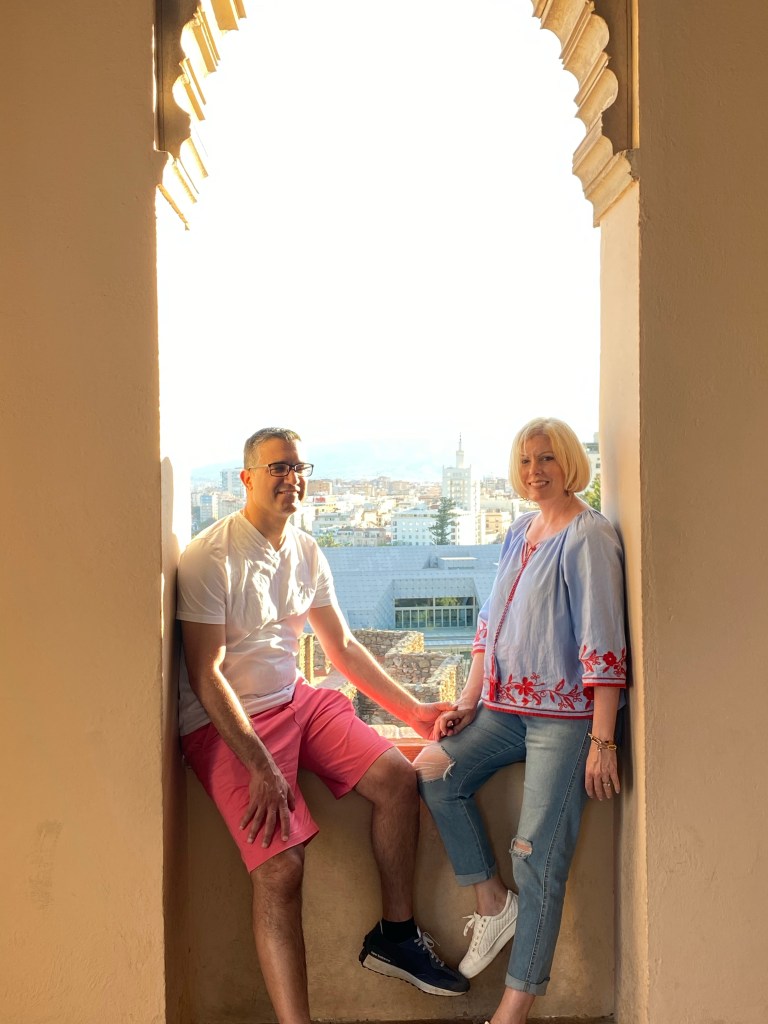
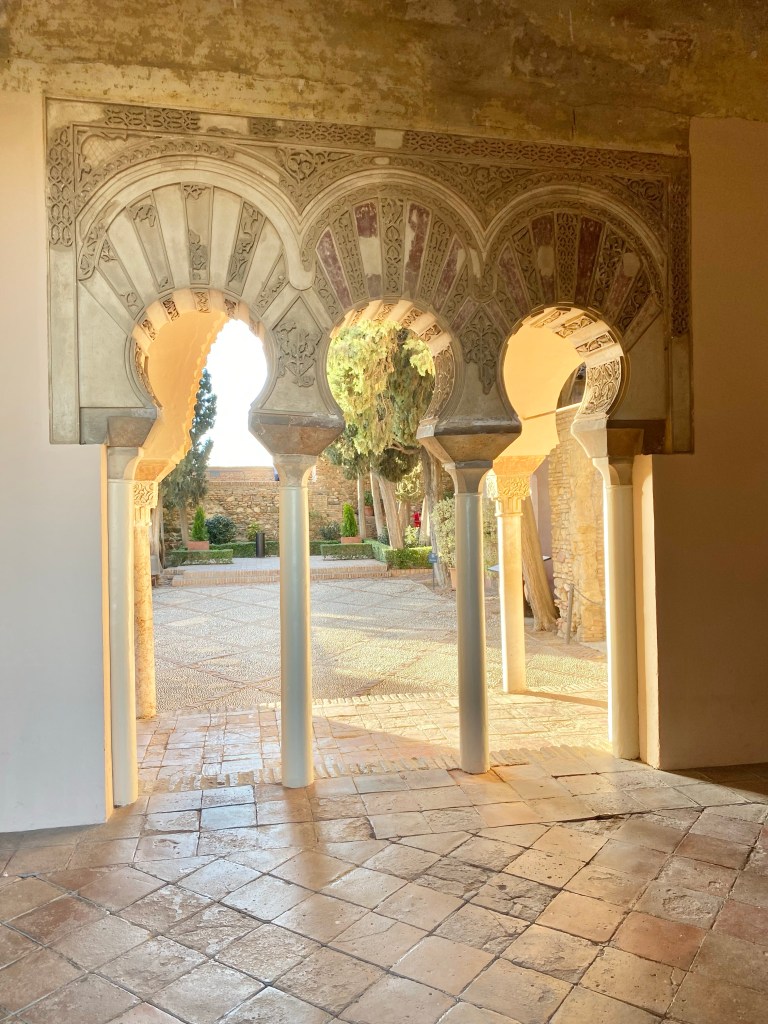
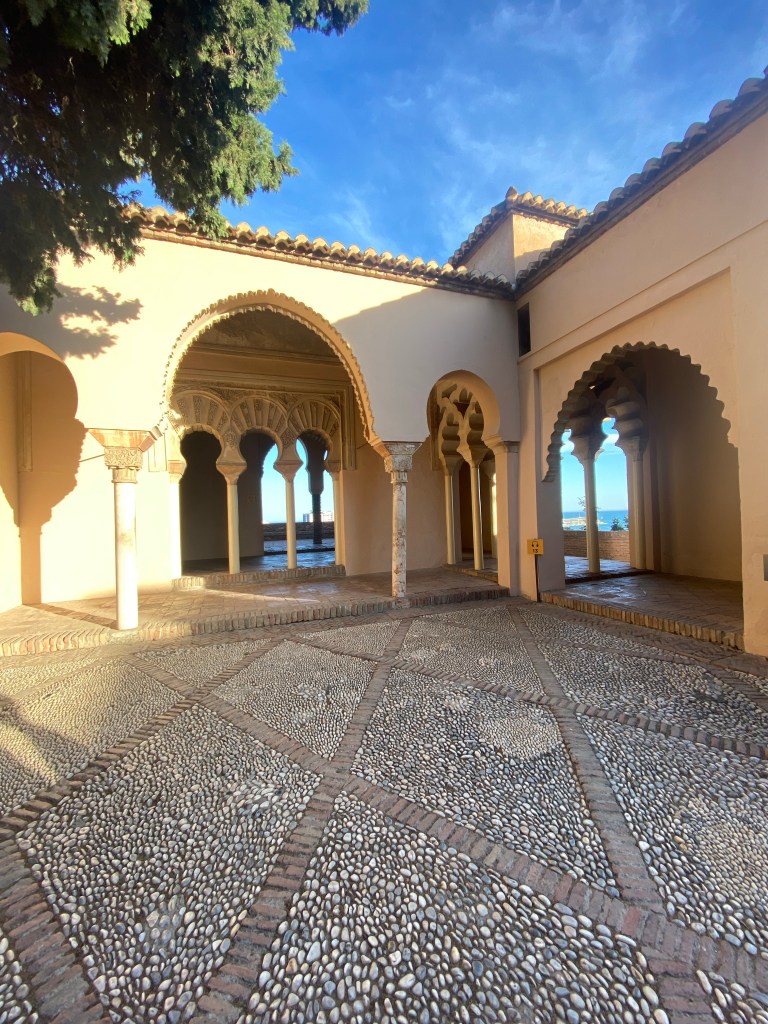
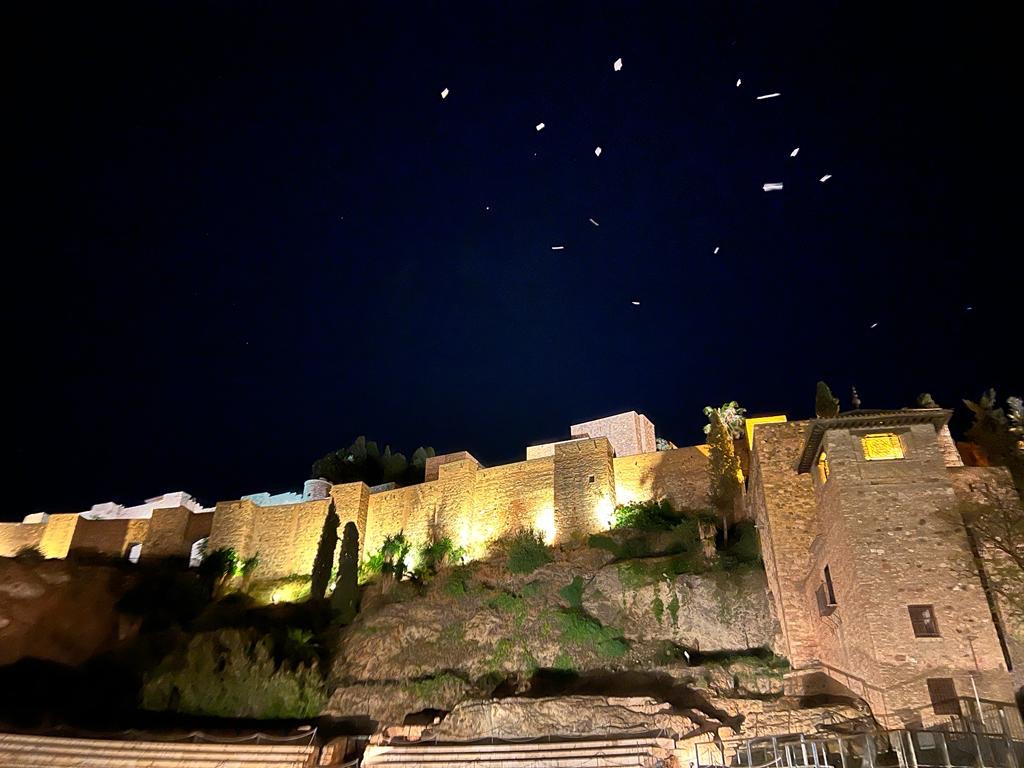
We met some friends who lived in Malaga. They were so gracious and hosted us for a lunch. We then went to Gibralfaro castle (we didn’t tour it, just took in the views). Then they took us to Alcazaba to tour the castle, which was beautiful. Then we met friends for a late dinner.
The view from Gibralfaro castle. You could see the bullfighting ring.Touring Alcazaba was beautiful!
Just a few views of evening time in Malaga…
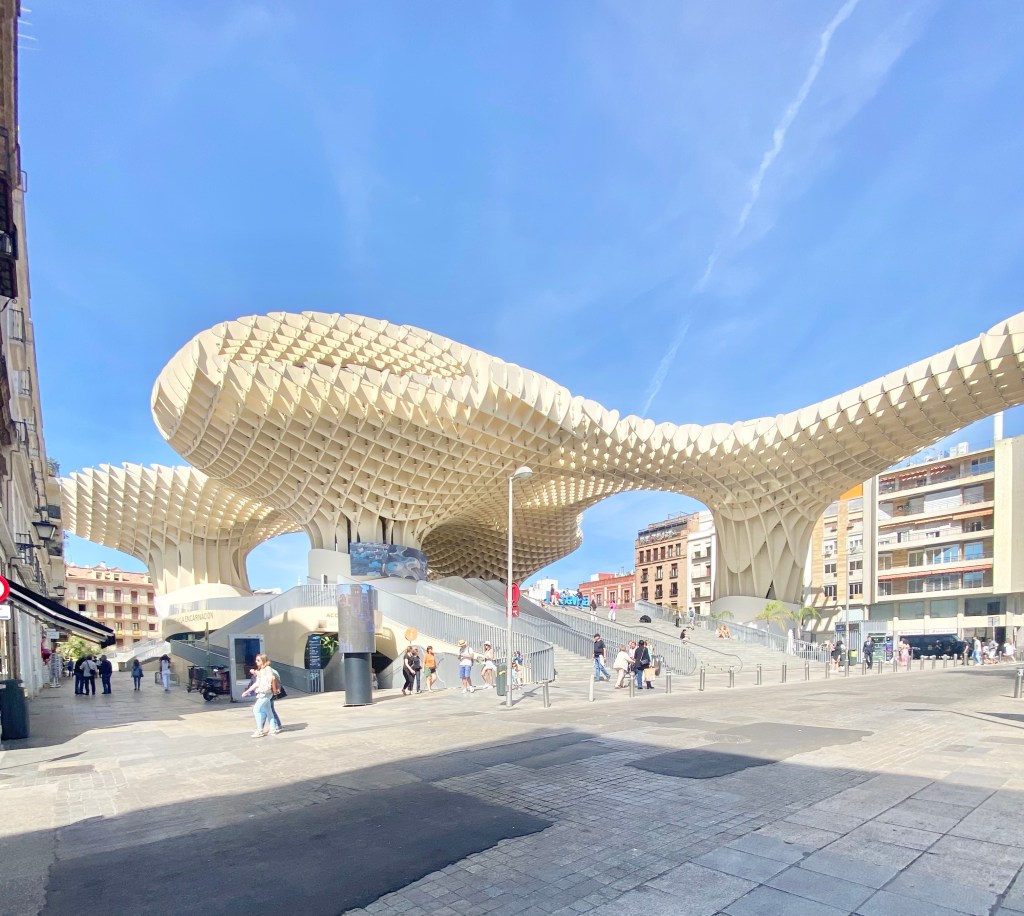
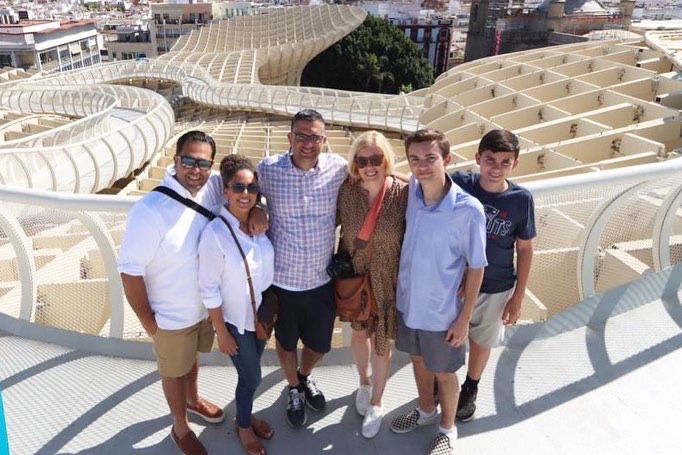
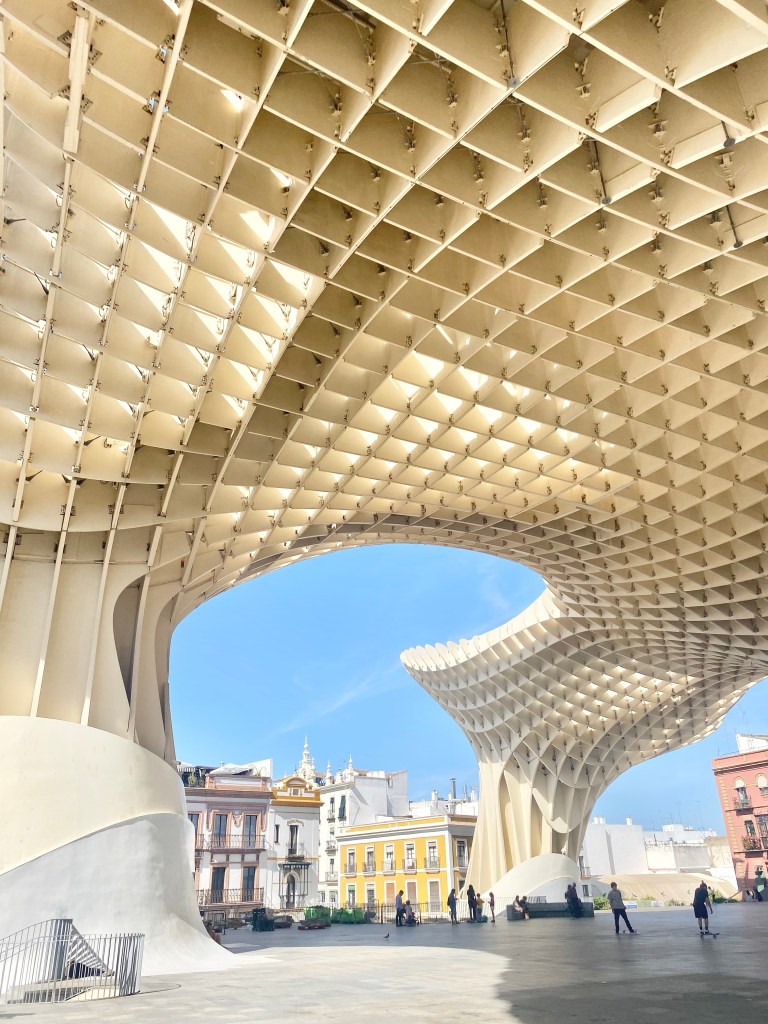
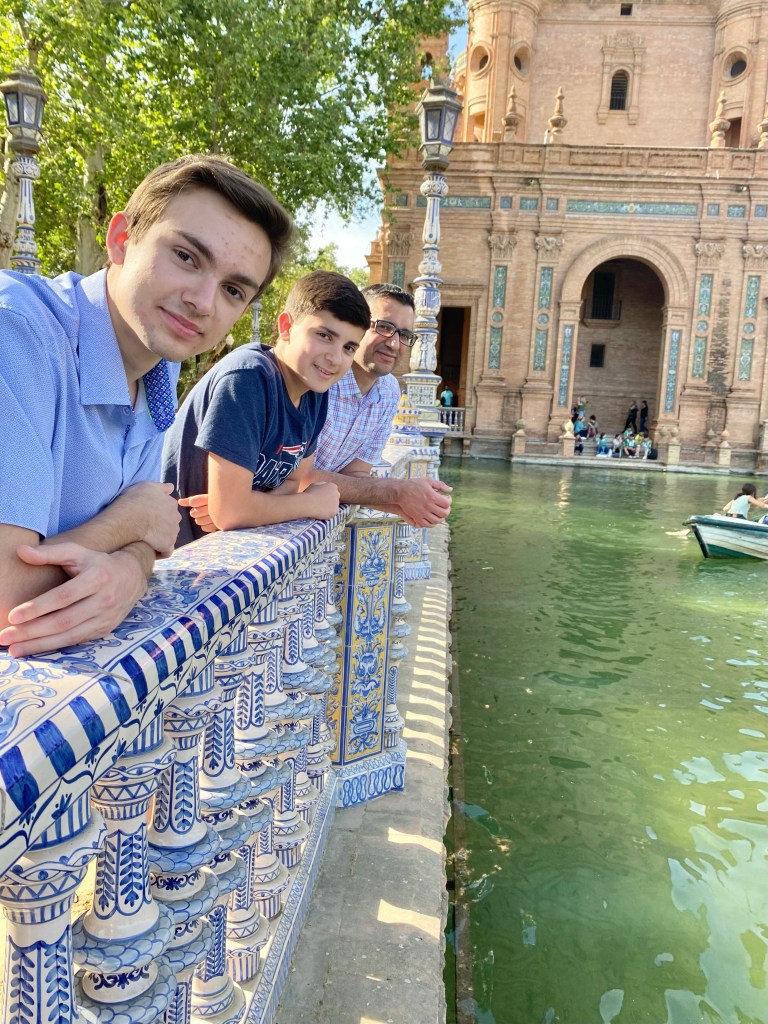
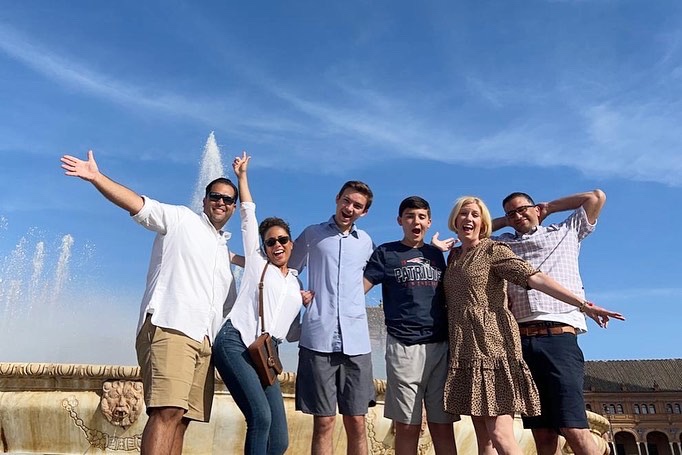
We knew we wanted to take a day trip to Seville. Originally I had read it was an hour from Malaga, but it was more like two and a half. It was with every minute! We wanted to see Alcazar, but when we went to book a ticket they were booked for a week! So, if that is on your list make sure to book well in advance. Even with missing that we still spent a full day and saw so many gorgeous things!
We went to see Space Metropol Parasol. It was cool to walk across the top, you have to buy a ticket but it was worth the views.
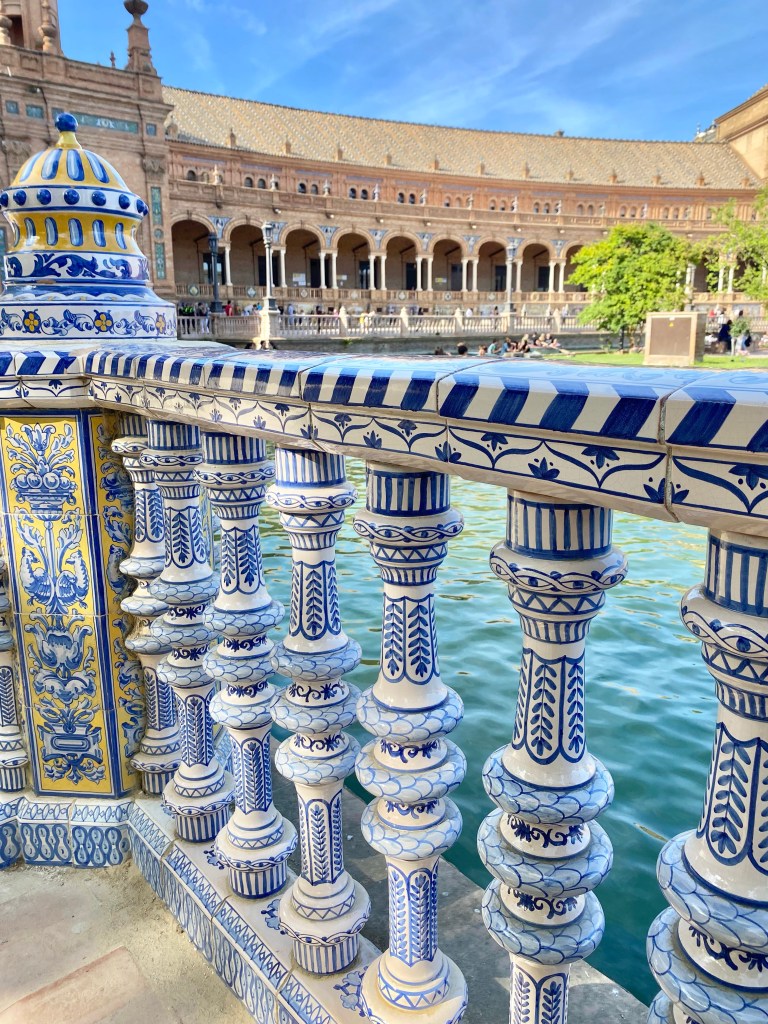
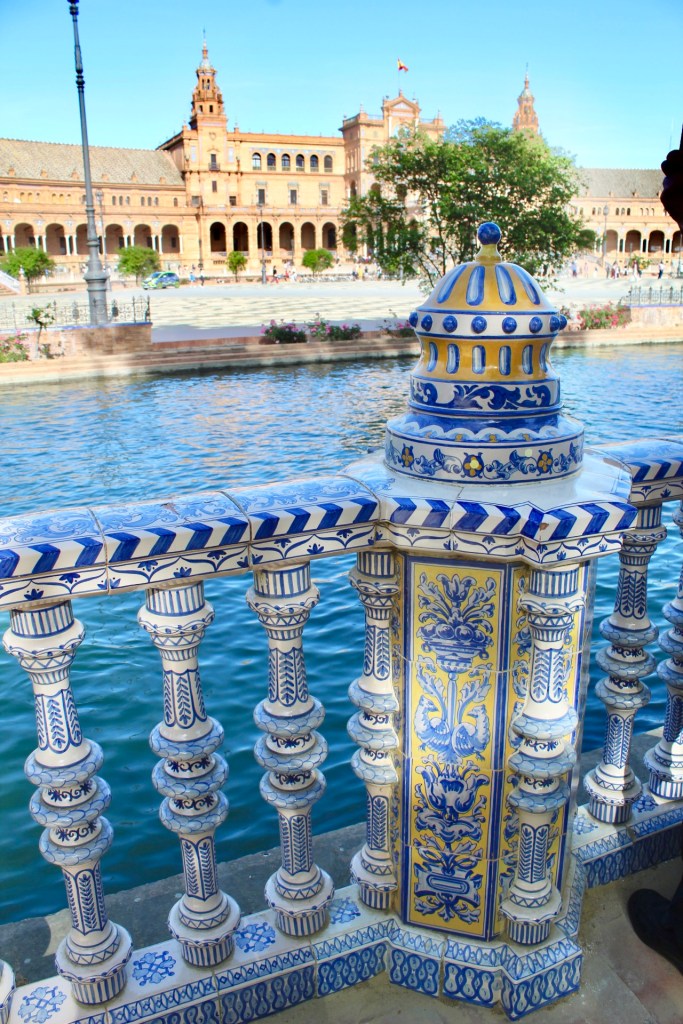
Lastly we saw Plaza de Espana. It was so beautiful. The details of the columns were amazing. All porcelain and in perfect condition!
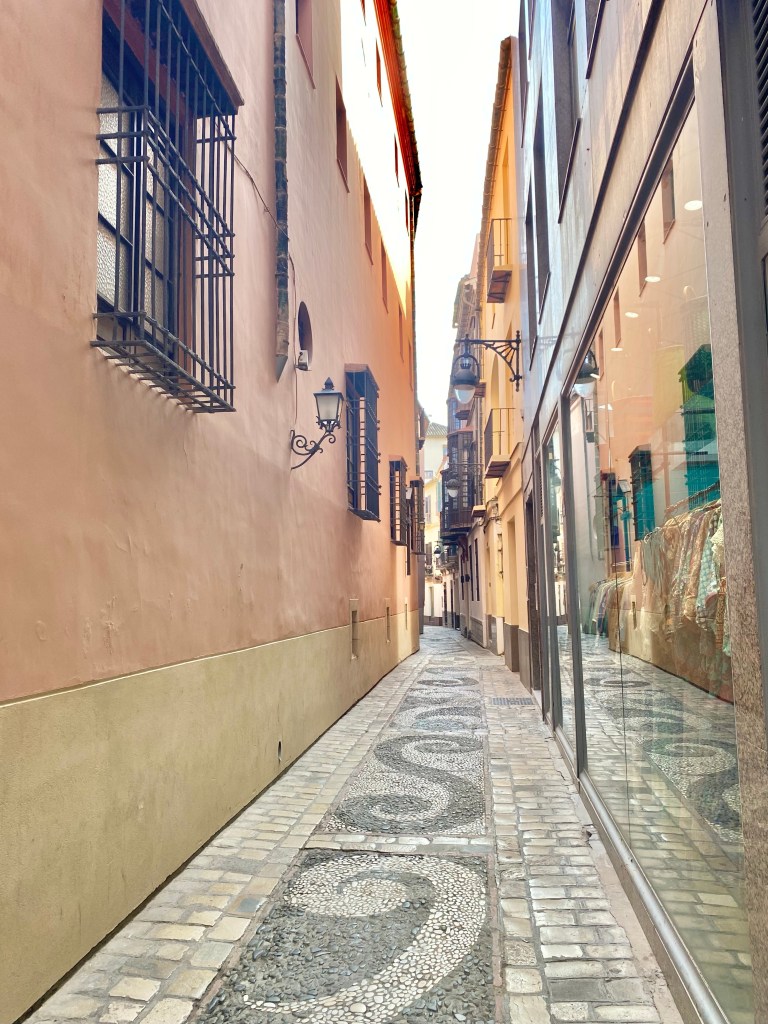
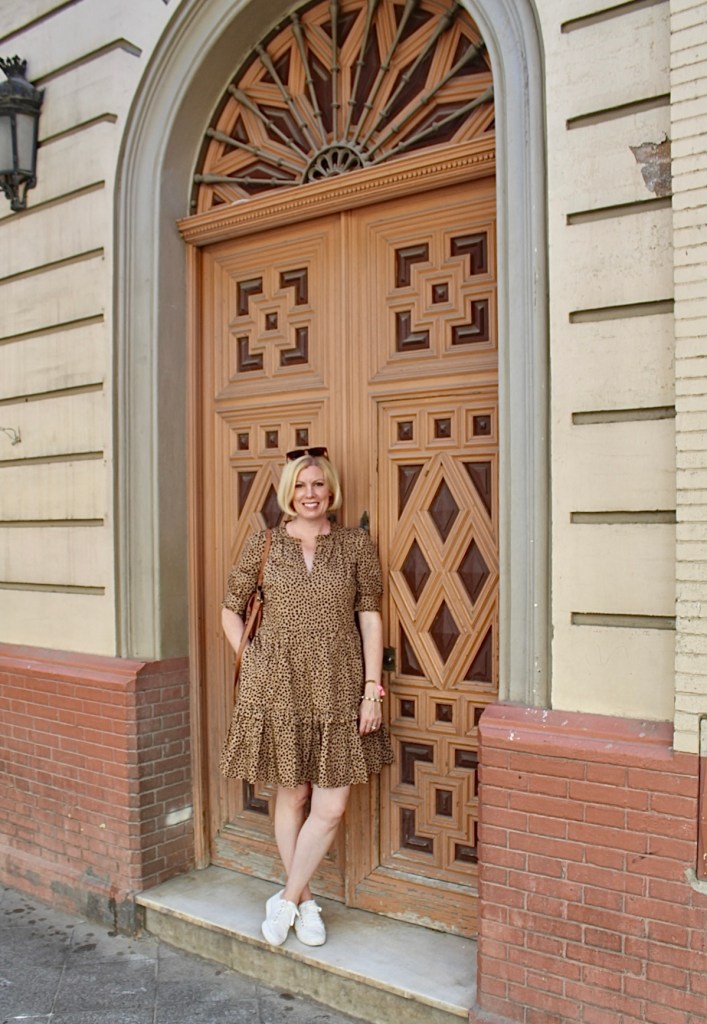
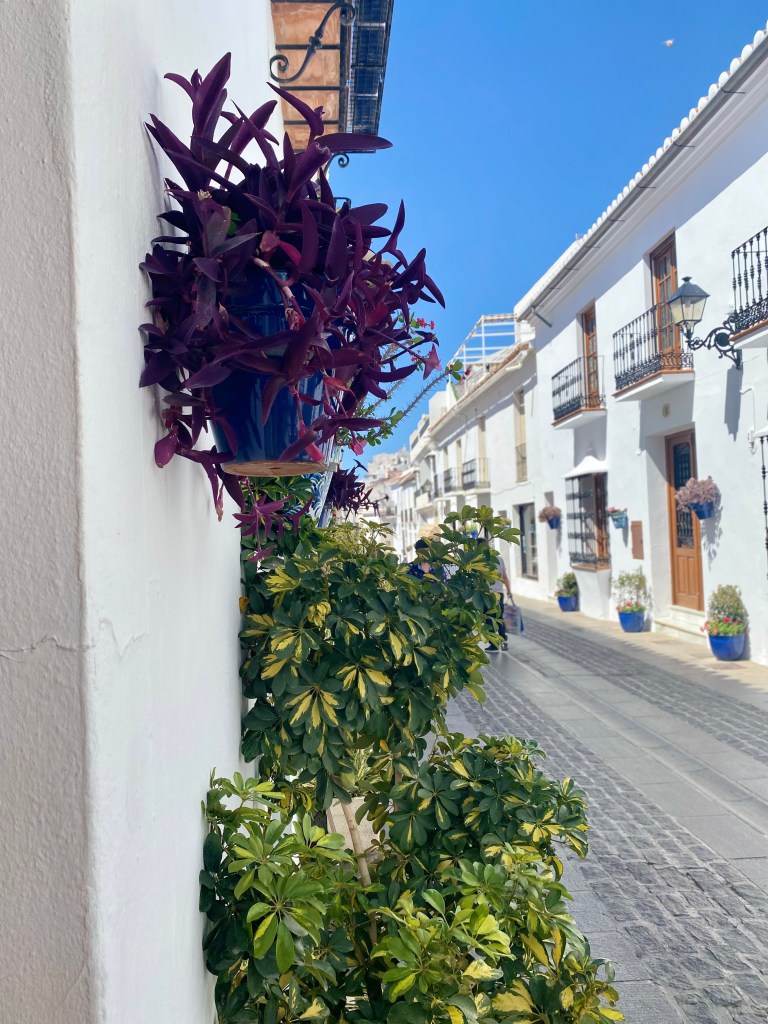
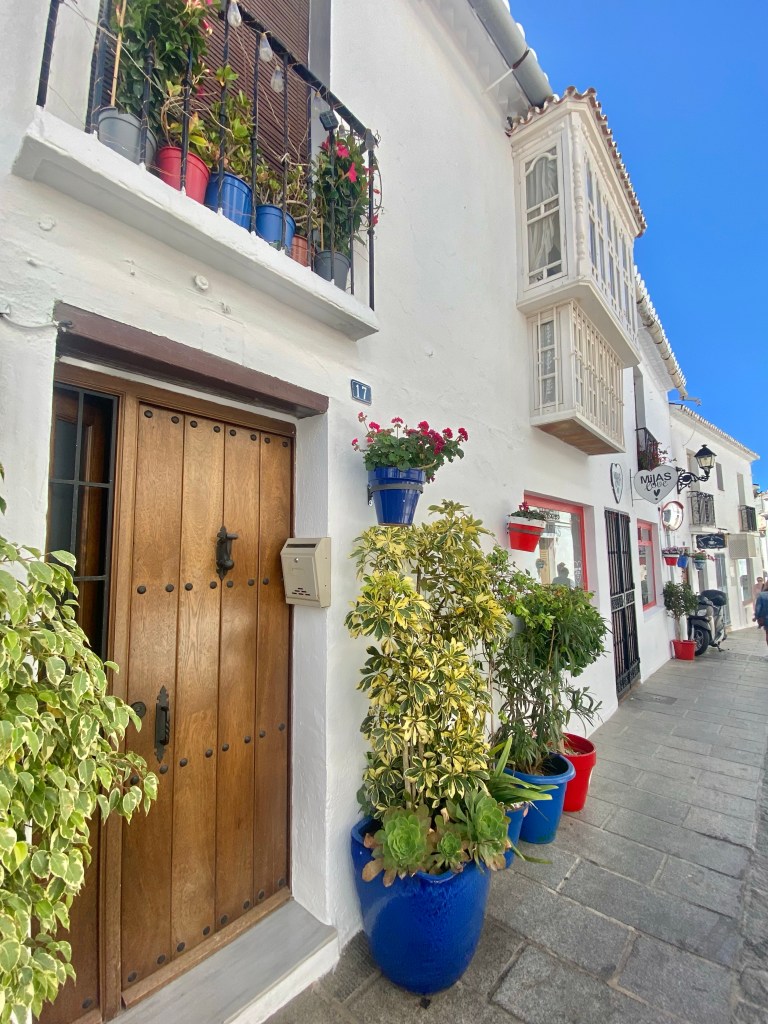
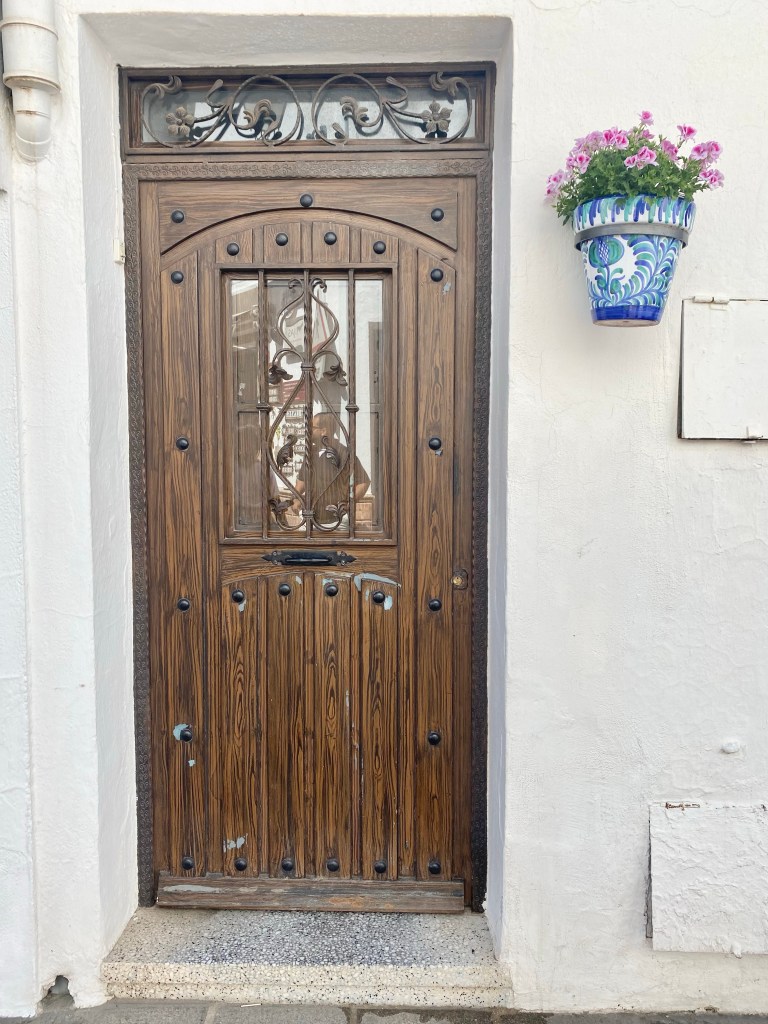
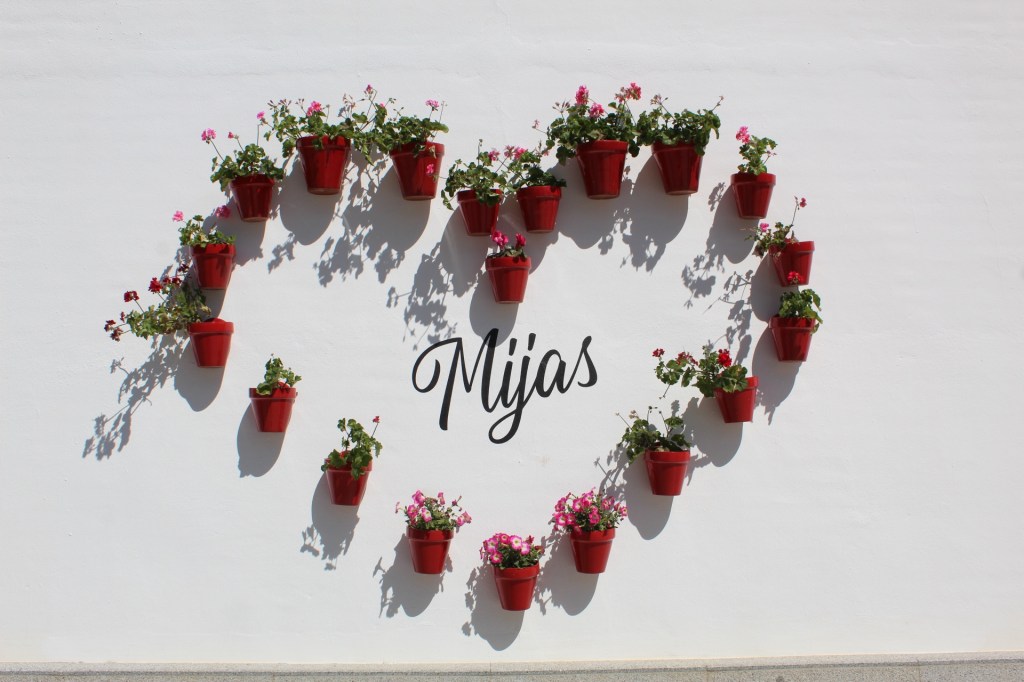
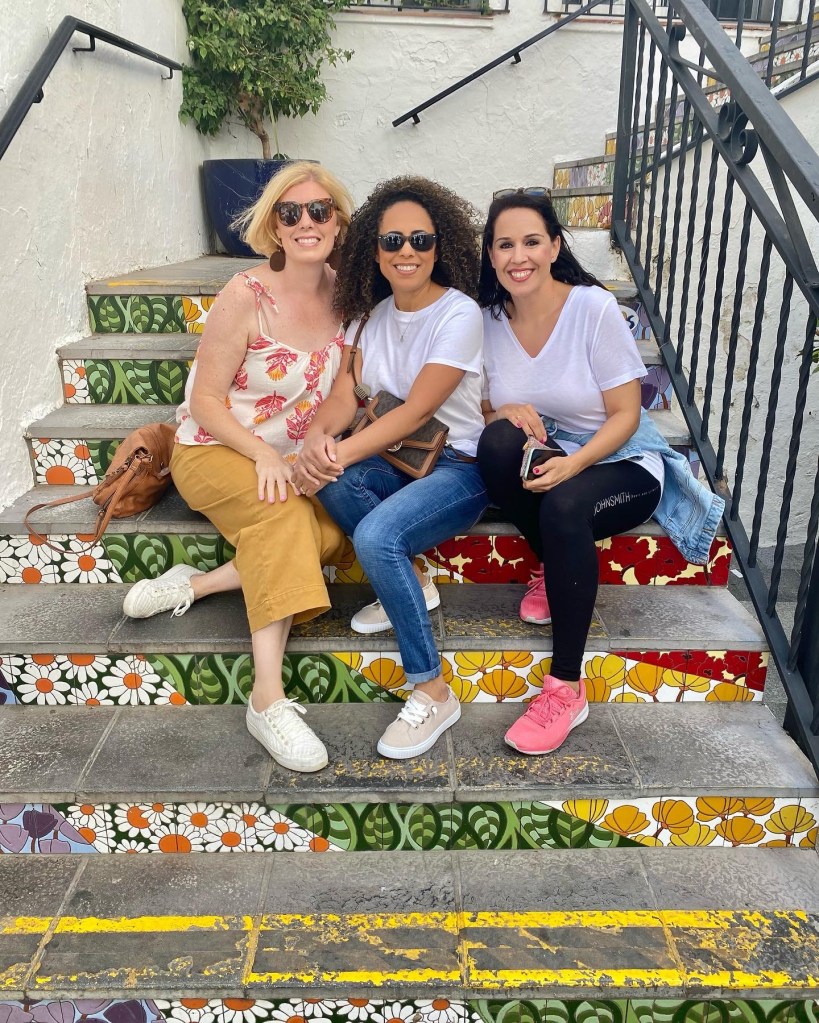
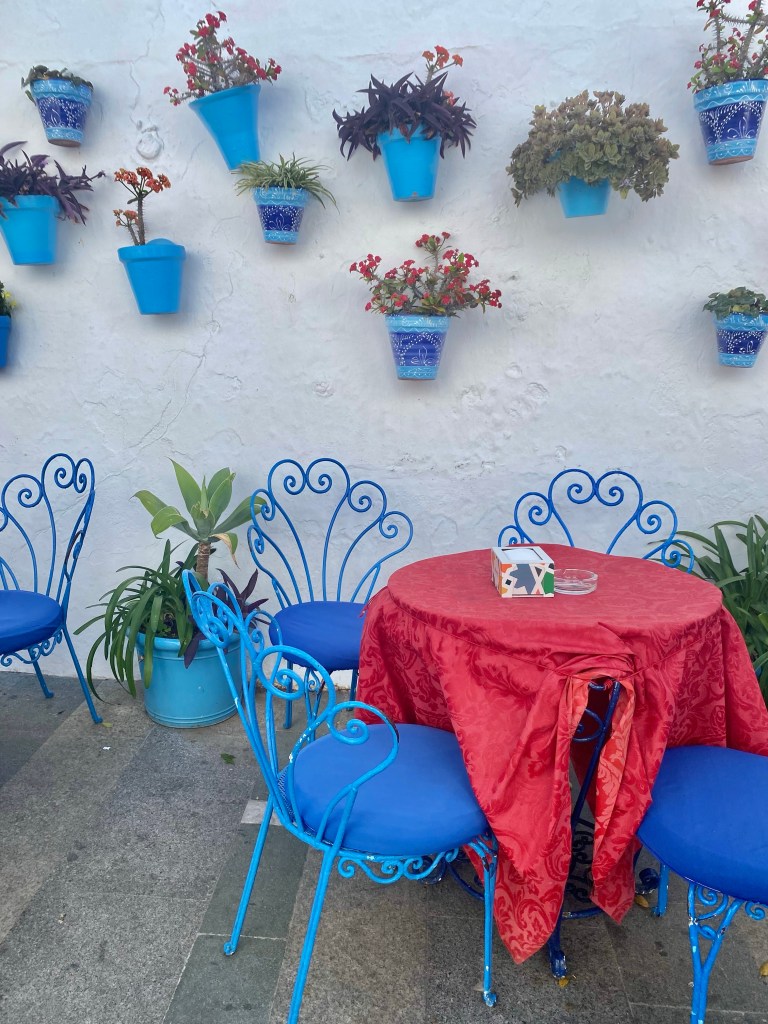
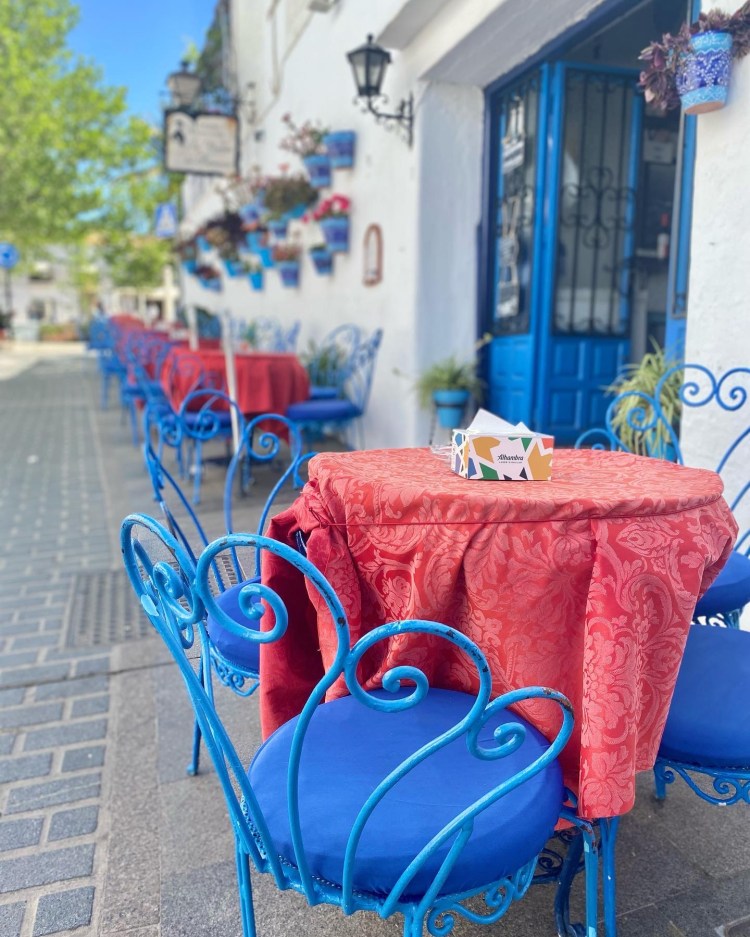
Next on our list was to head back to Madrid and spend two nights in an AirBnB and do some sighseeing before we took our flight home. Our new friends came to say goodbye and recommended we stop in a cute town just a ten minute drive from Malaga. We decided to go there first and I am so happy we didn’t miss it. The town is called Mijas and it was so charming. Small little streets to roam through and shop, grab a coffee or ice cream and take pictures!
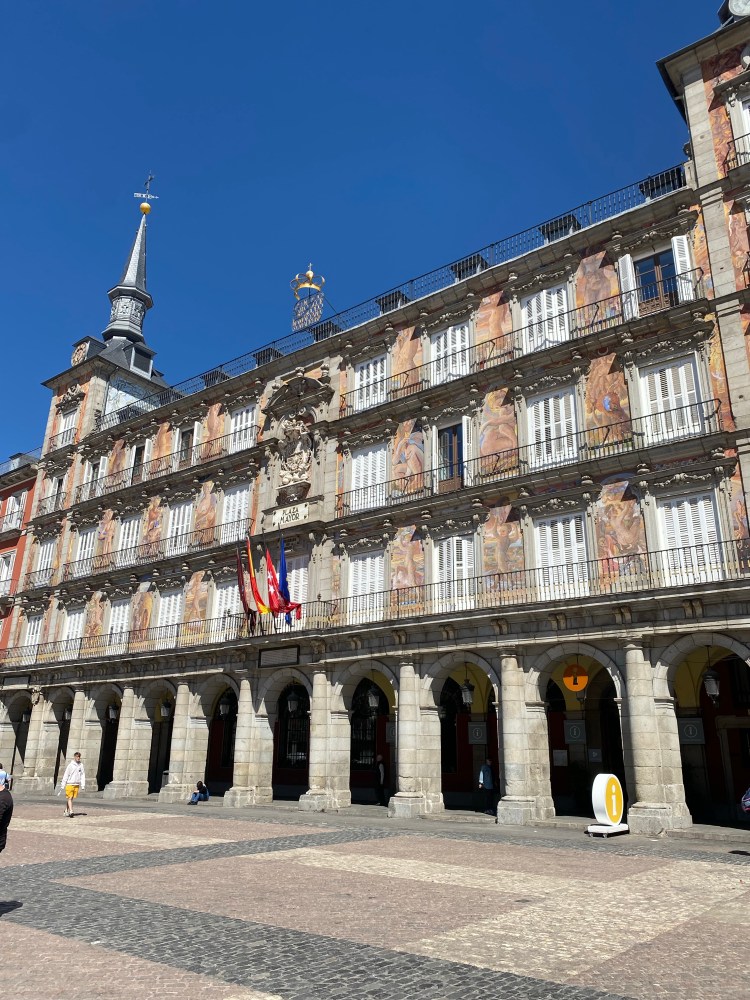
It was such a cute town and I am so happy we didn’t miss touring it! Once we finished there we headed back to Madrid. We arrived late that night so we got a good nights rest so we could do plenty of sightseeing. We first headed to Plaza de Mayor. It is a large public square with restaurants and shops. We grabbed lunch there. I felt the area was a bit of a tourist trap, but it is worth seeing. Next we walked to Mercado San Miguel which is a large food market. I had regretted eating lunch earlier because the food looked amazing!
Plaza MayorMercado San Miguel
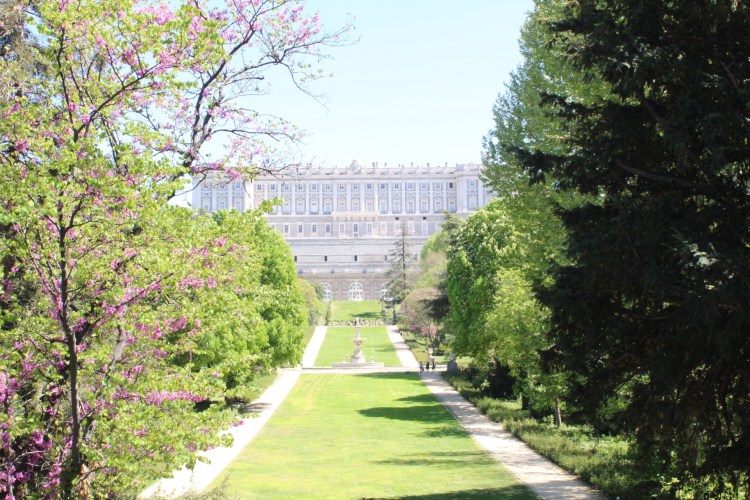
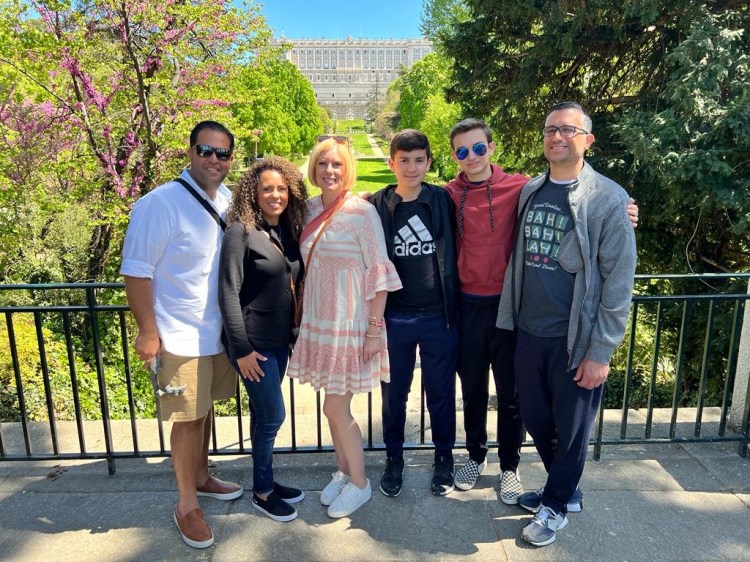
From there we walked to the Royal Palace of Madrid. You can buy a ticket to tour inside but we decided not to. We noticed some mini open buses offering tours of the city and we decided to do that. Our goal was to end up at the Parque of Madrid and we would have needed to take a taxi, so the mini bus was a good option to see a lot of the city. They brought us to the other side of the Palace which was beautiful.
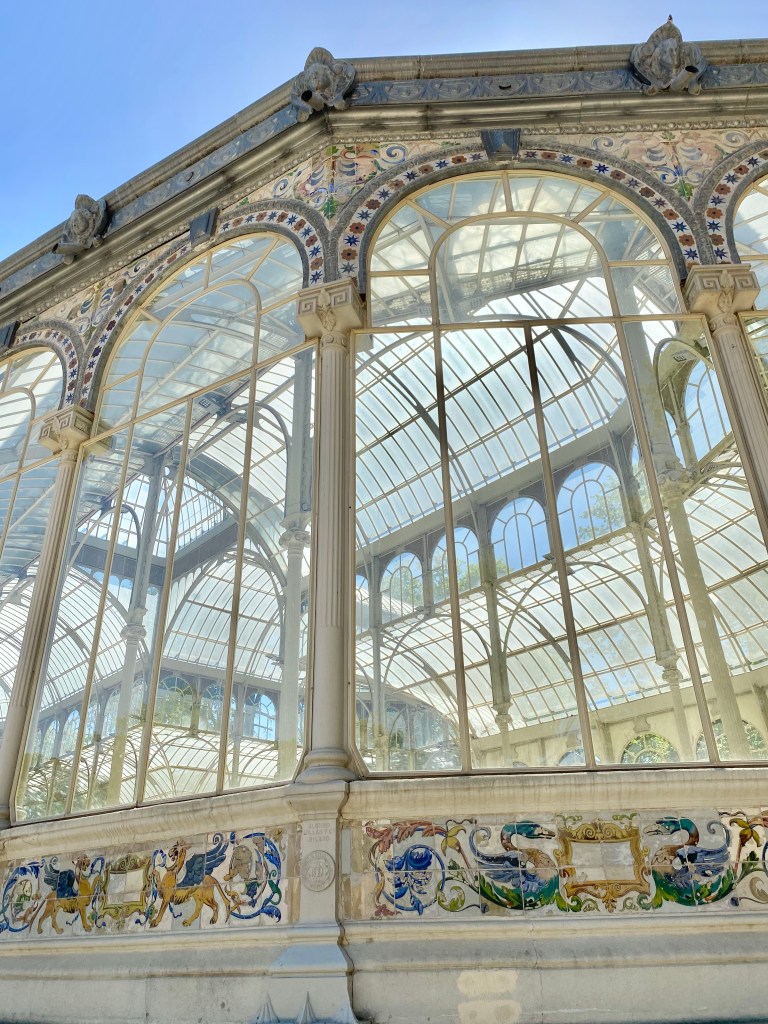
After touring the city we ended up Retiriro Park. This was my favorite part of Madrid. The park was beautiful to walk through. There were spots to grab a drink or some food. We went to see the Crystal Palace.
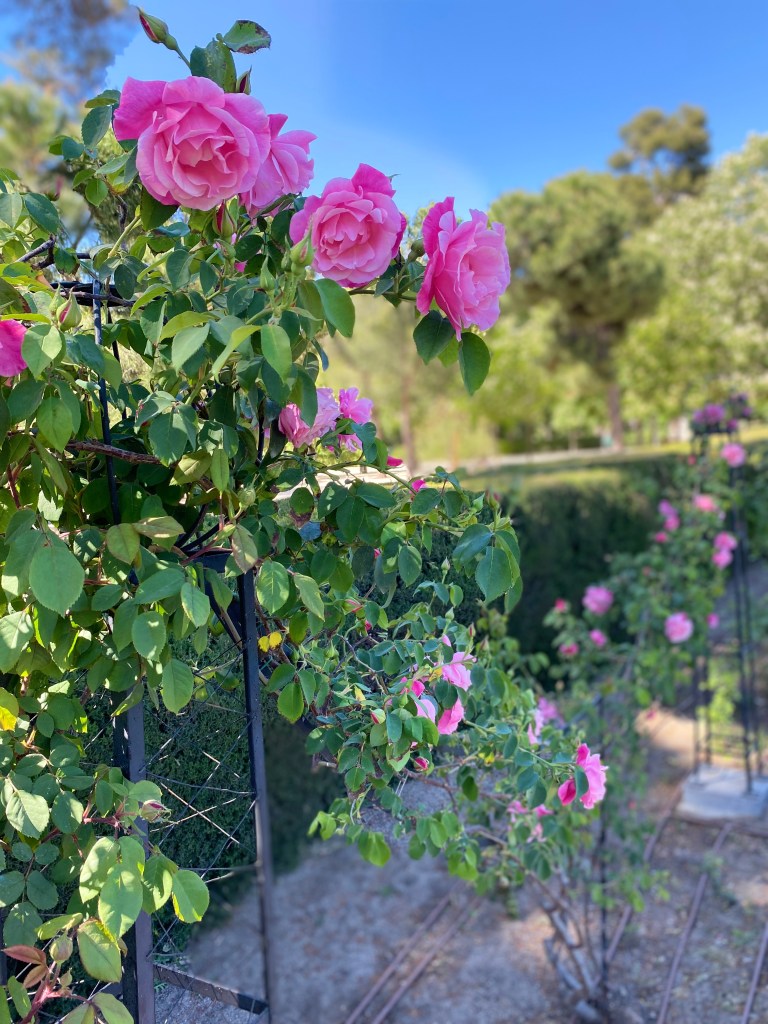
Then we also checked out the Rose Garden in the park. It wasn’t in full bloom but it was still pretty to see.
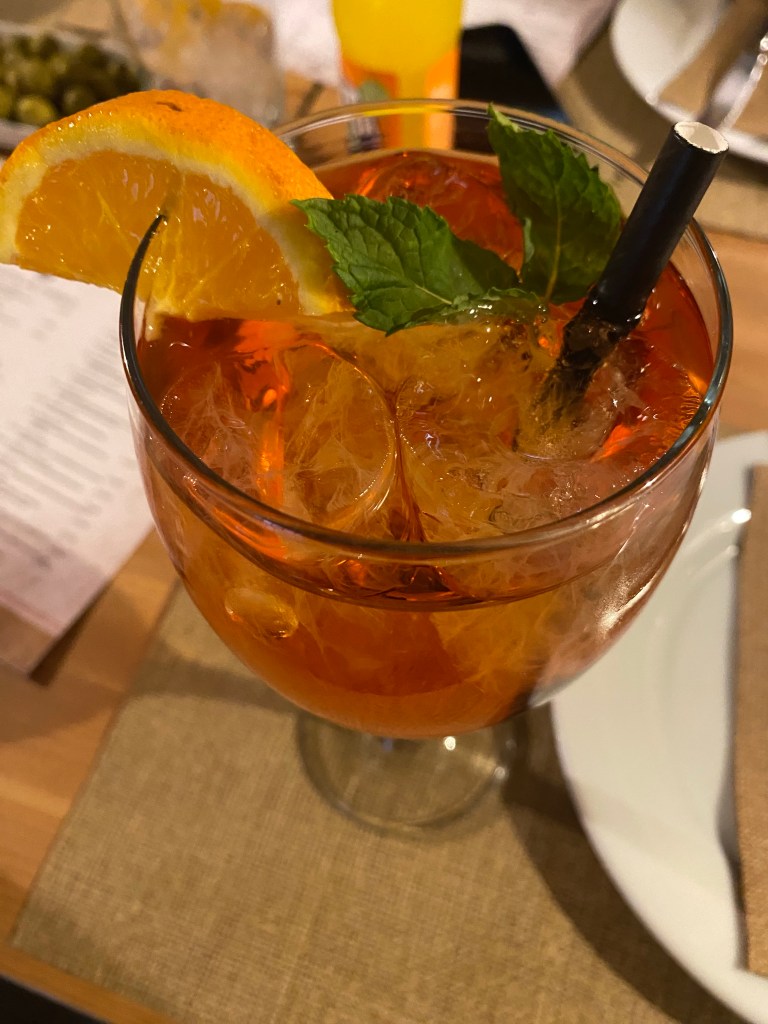
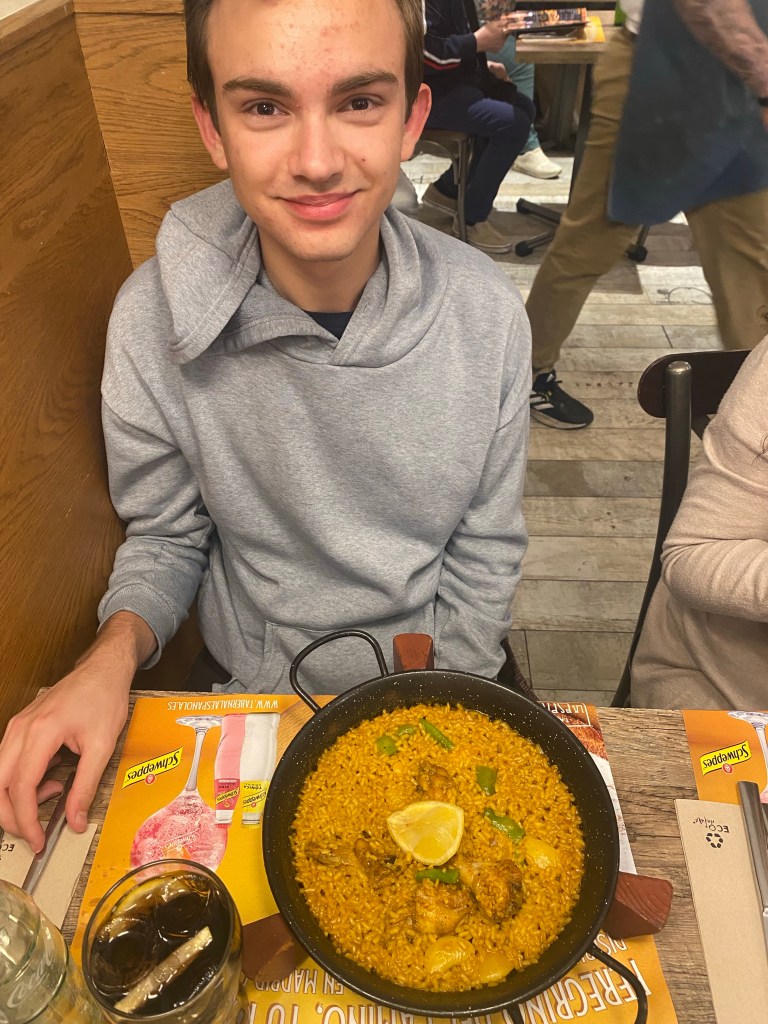
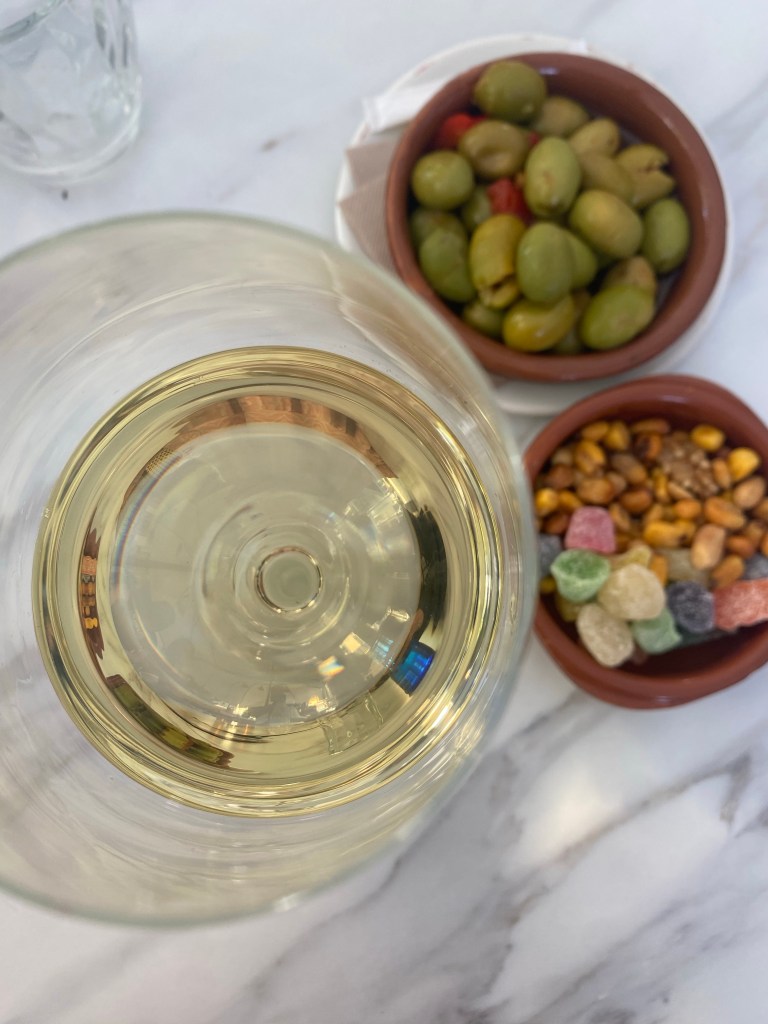
We had a good time in Madrid, but definitely preferred less of a city vibe and preferred Malaga and Seville. A few things you want to make sure you do while in Spain is : drink lots of coffee, have an Aperol Spritz, eat all the olives, try the fresh fish and eat some paella! Thanks for coming along on our adventure, feel free to comment below with your favorite part or if you have ever been to any of these locations!
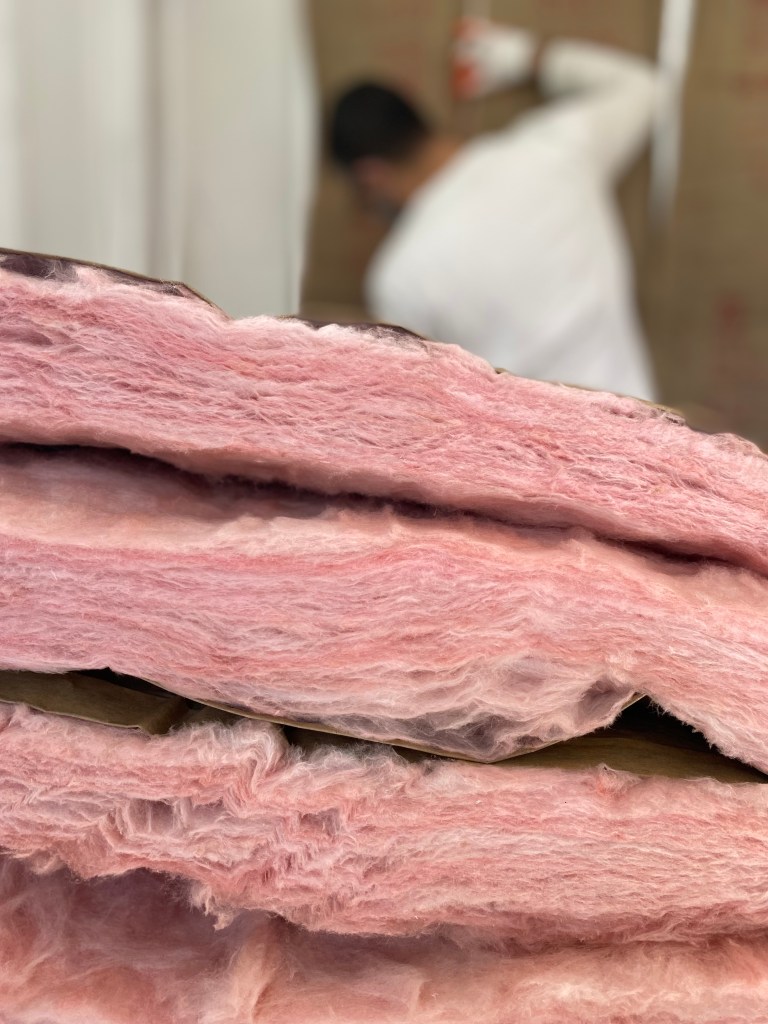
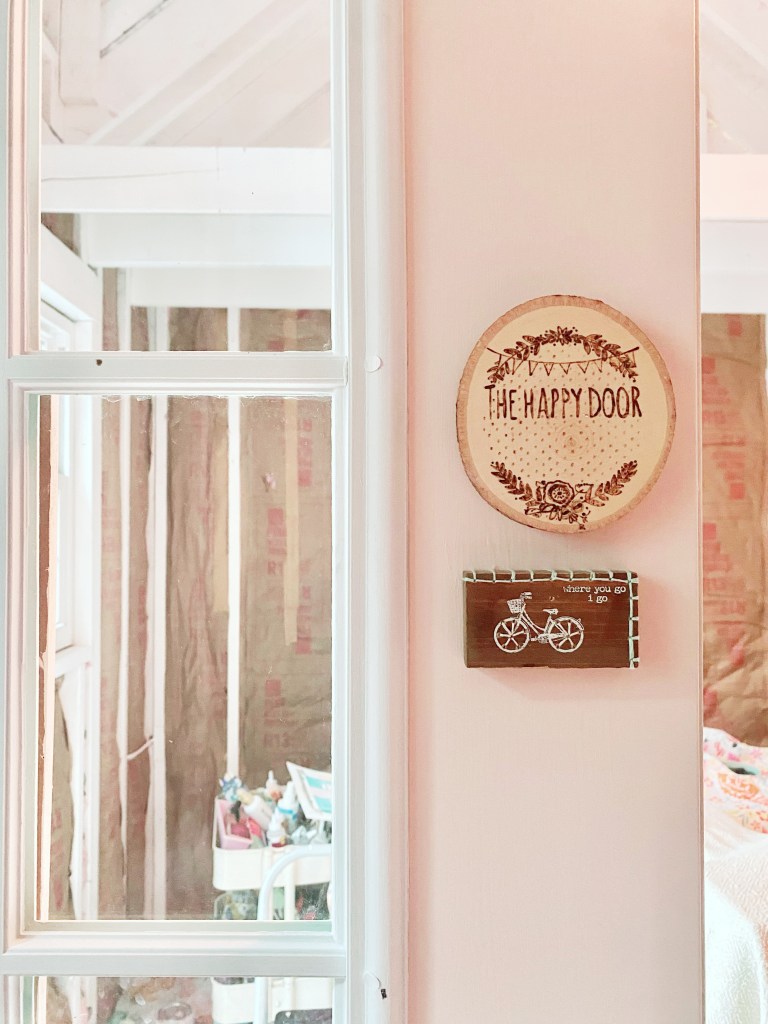
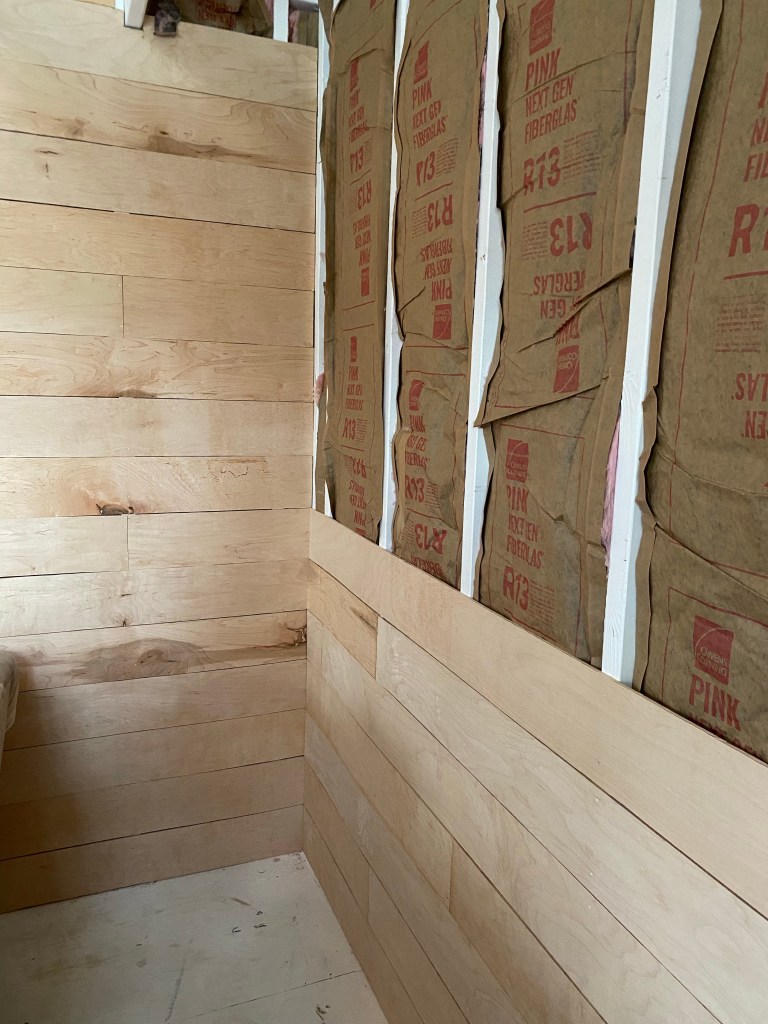
About three months ago we decided to insulate the walls of my she shed since it was getting too hot in the summer and too cold in the winter. Check out the way it looked when we started here….She Shed Tour . My husband was going to do the project and decided to cut his own shiplap. It was just more cost effective to do it this way. I’ll share some of the details and the final result!
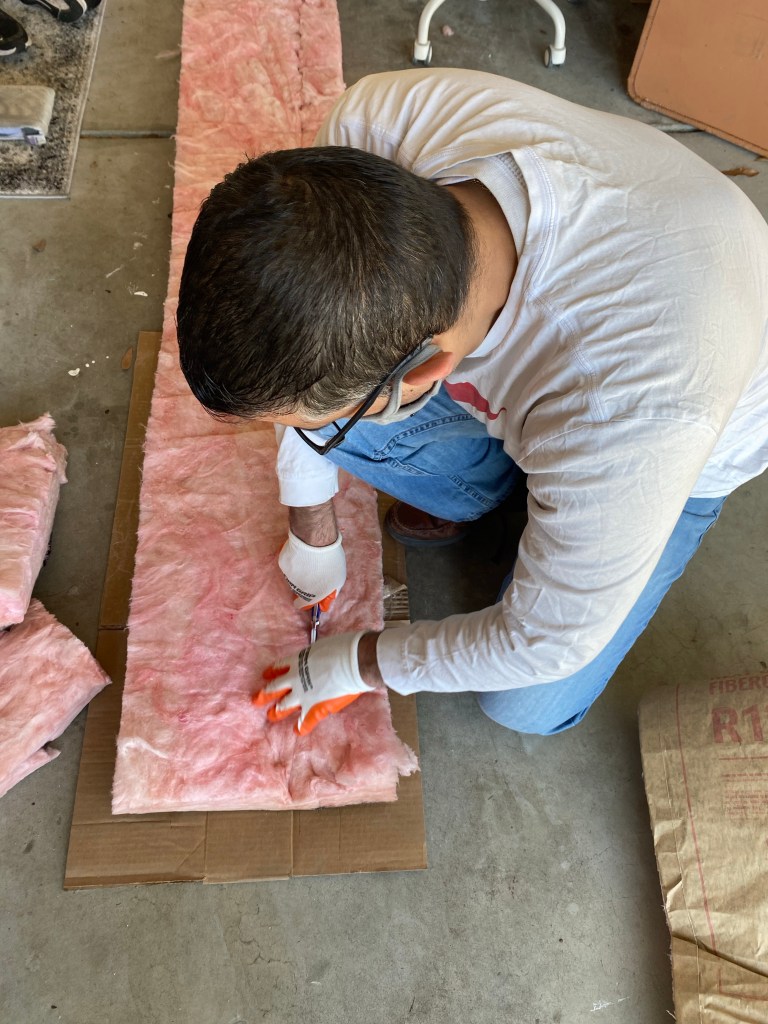
First up we bought the insulation.
This part was fairly easy for him. He just measured and placed the insulation between the studs and stapled it in place. Of course, wear gloves, a mask and glasses!
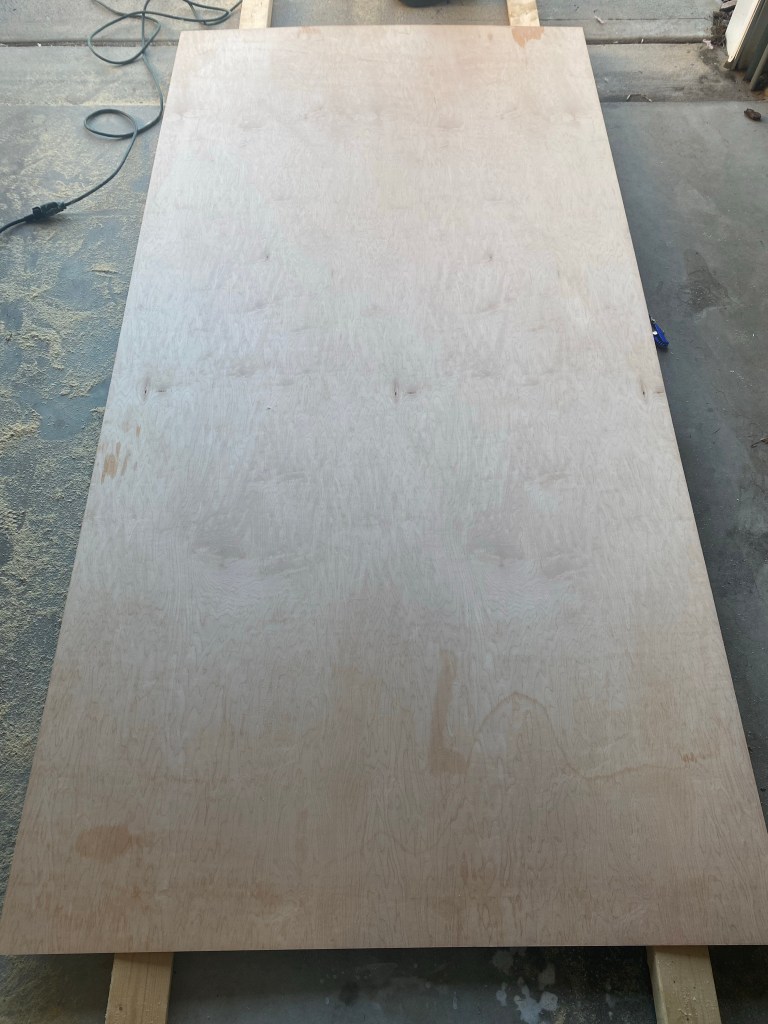
Next up was the shiplap. He priced out buying it from hardware stores but read an article about cutting the wood yourself to save money. I also believe some stores will cut it for you!
He bought Maple hardwood.
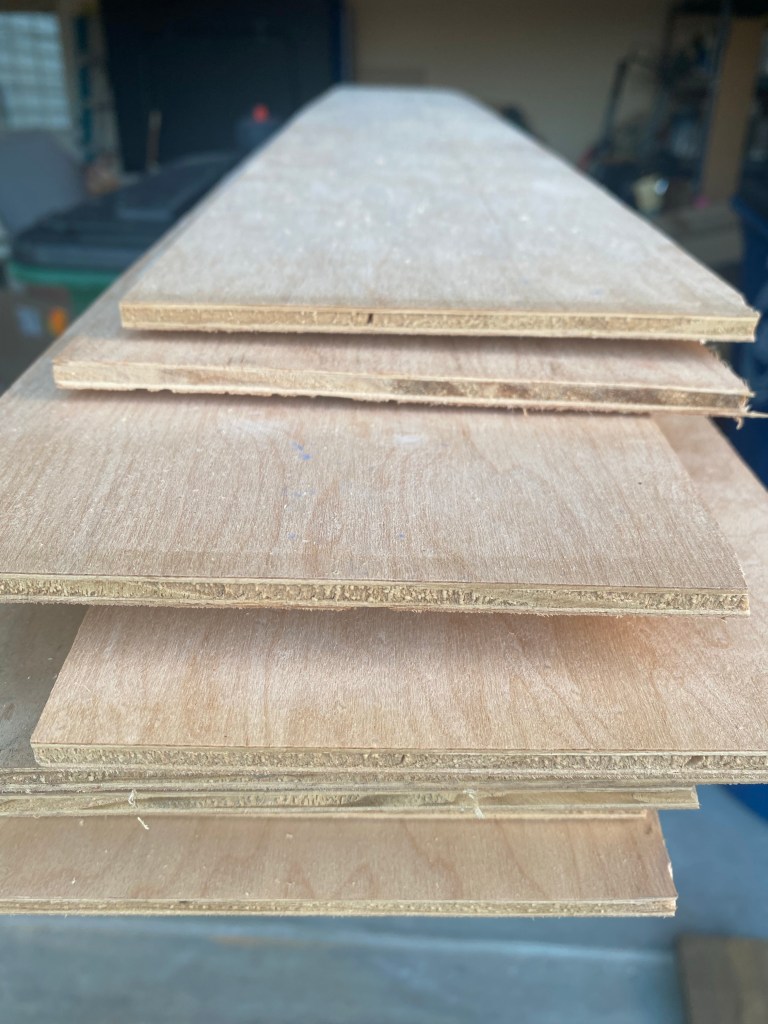
Next he measured 6” strips and we marked it off with a chalk line. He then cut the strips and got ready to hang them!
Lots of measuring and cutting!
Now comes the part that seemed to take forever! He only has weekends to work on this and we had lots going on, so it took much longer than we thought! It probably also would have been easier to take everything out of the shed, but we didn’t do that!
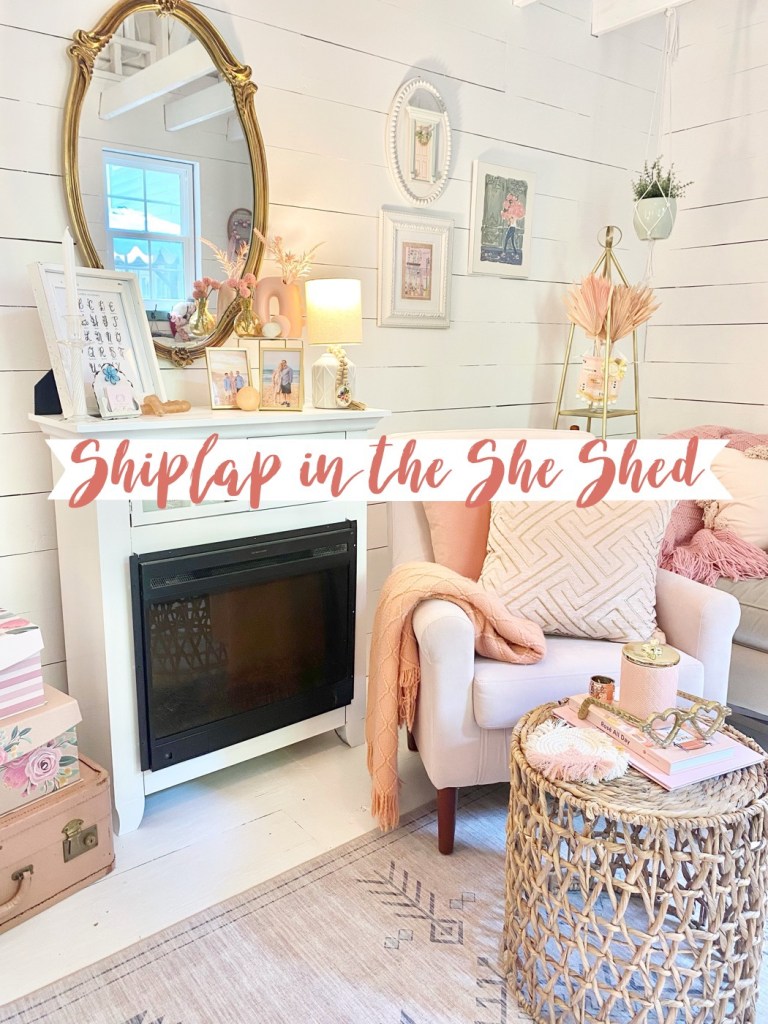
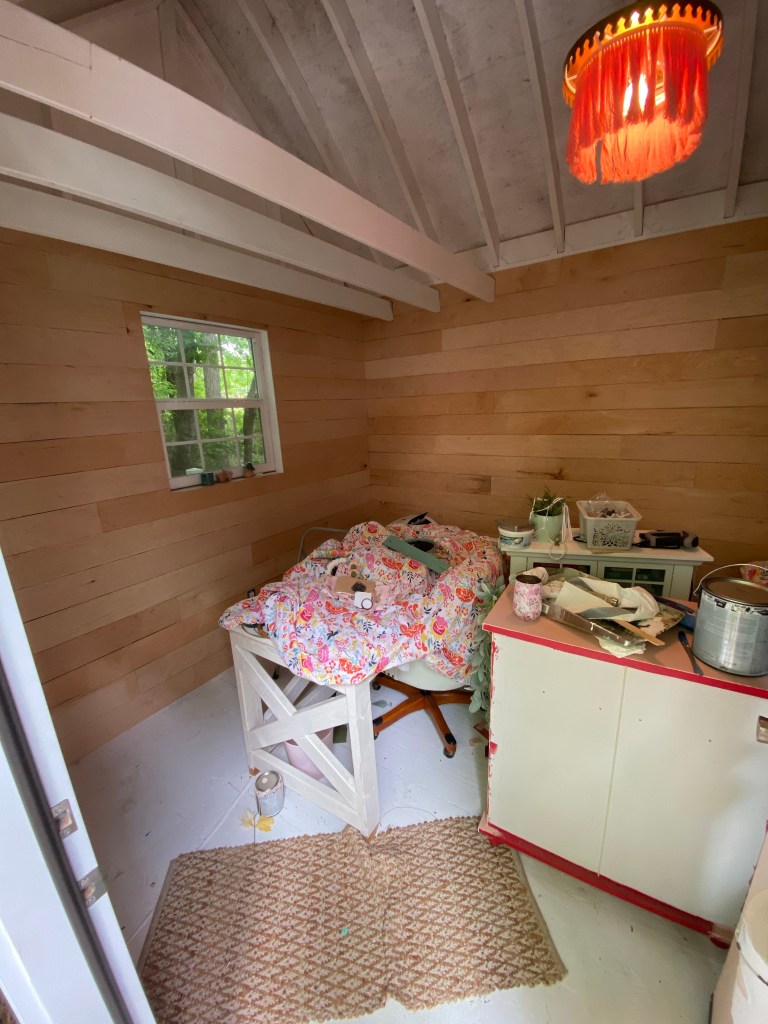
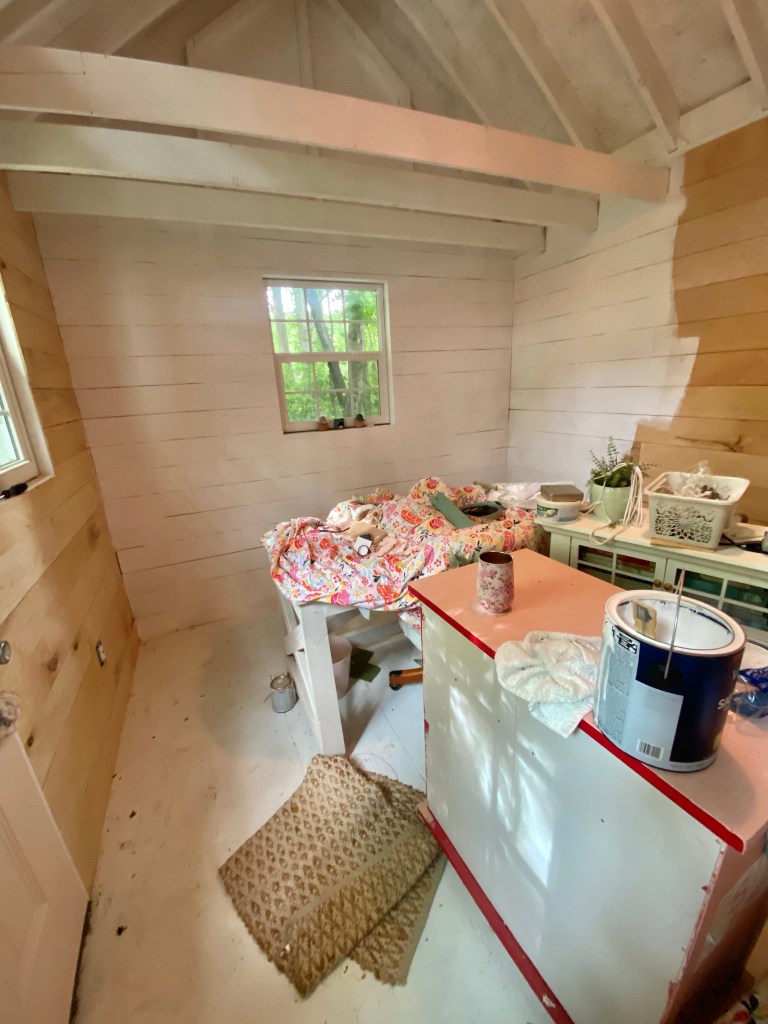
Once he had it all hung I was finally able to paint! I was so anxious to get it finished and get back in my happy space to get creative!
By the way, I really wanted the ceiling insulated and then beadboard sheets hung. My husband just wasn’t up for taking that on, so he said we will try this and see how it feels. I have a feeling that may happen in the future!! But back to the fun part… finishing the painting and putting everything back!
I ended up needing to roll two coats of paint. I decided not to caulk the seams. I like the rustic look and honestly didn’t want to spend all the time doing it!! Since I rolled it there is some paint in the seams (I don’t mind it, I know it may drive some people crazy!) I honestly didn’t think ahead and just rolled, if I didn’t want paint in the seams I probably would have needed to get a small roller and it would have been much more time consuming. I just wanted it to still feel like a shed and I’m so happy with it.
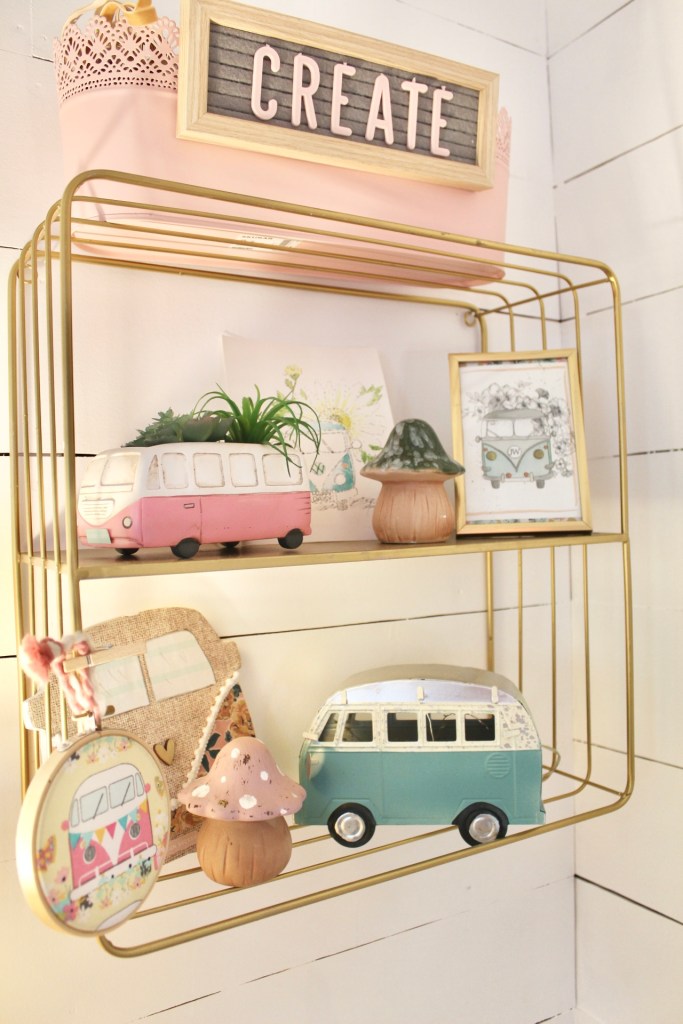
It’s so nice having smooth surfaces to hang things on. Before I had to fit things between or on top of the studs. So, I moved a few things around and reorganized a lot of my areas.
My VW collection is one of my favorites!
I am so happy to have this space back! I had no idea how much I would miss having my little pink paradise to rest and unwind! Stay tuned for more fun in The Petit Chateau!
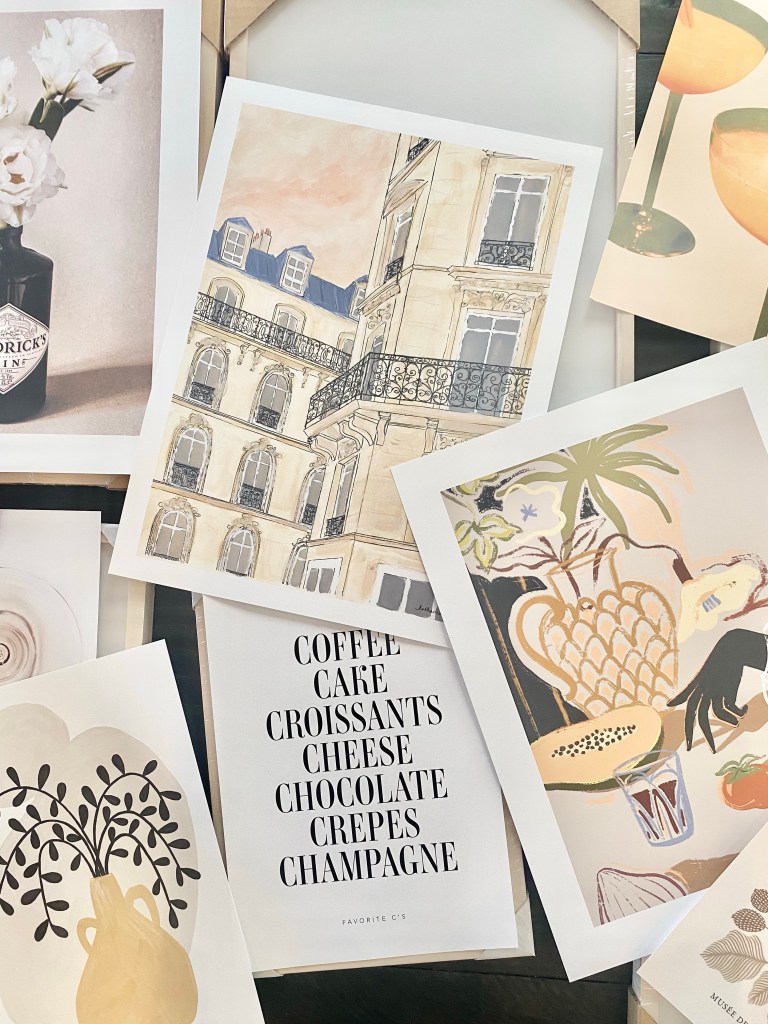
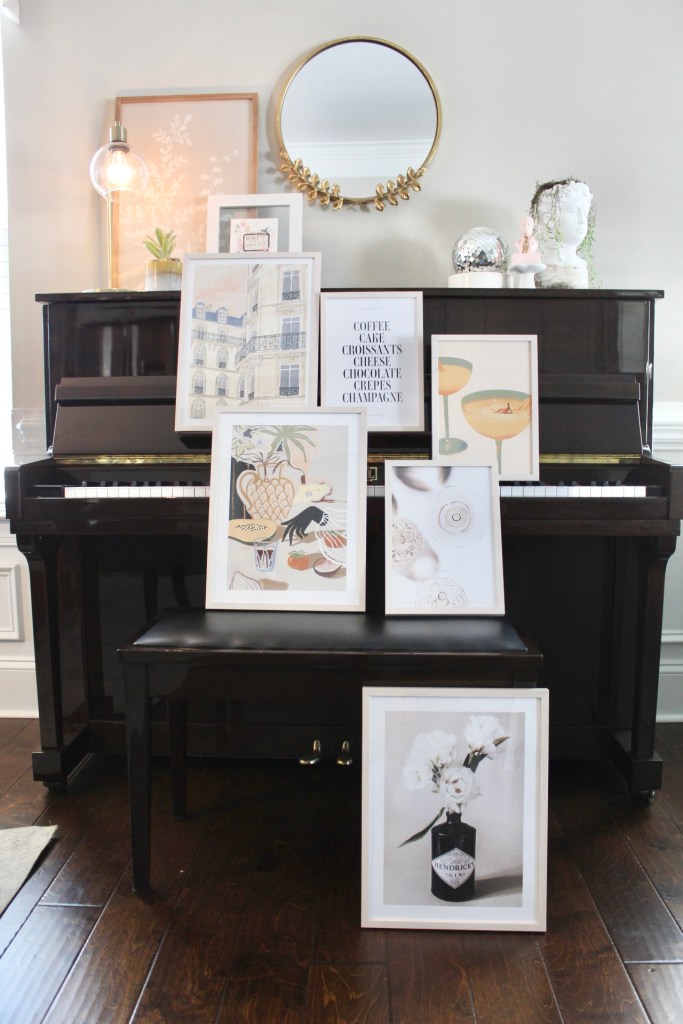
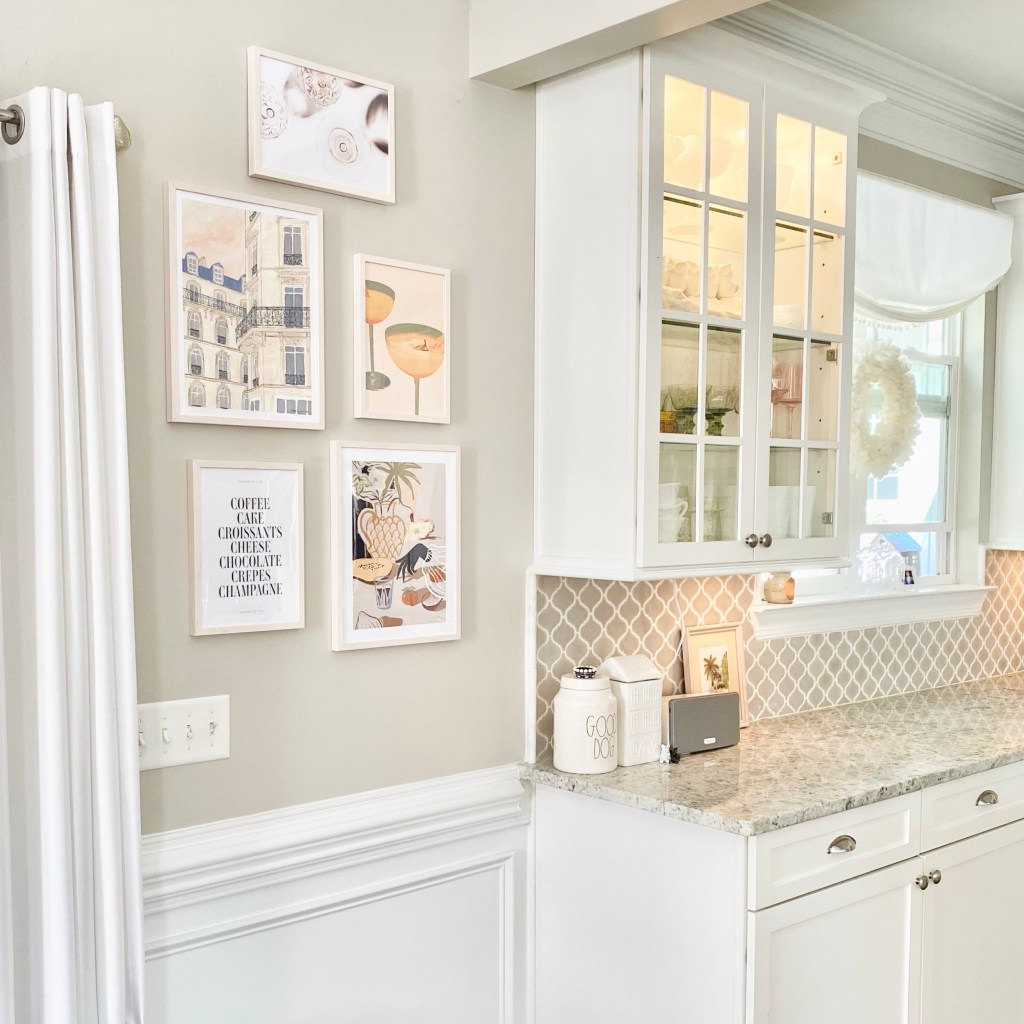
Sometimes some new art or a few accessories make your home feel new and fresh. I was excited to receive some posters and frames from Desenio . They have an amazing assortment of art and posters to update your space. I loved browsing their website for gallery wall ideas.
Once I decided on my posters I then decided on my frames. I went with light oak. I have a mix of different woods in my home and thought that would look pretty in my kitchen and dining area.
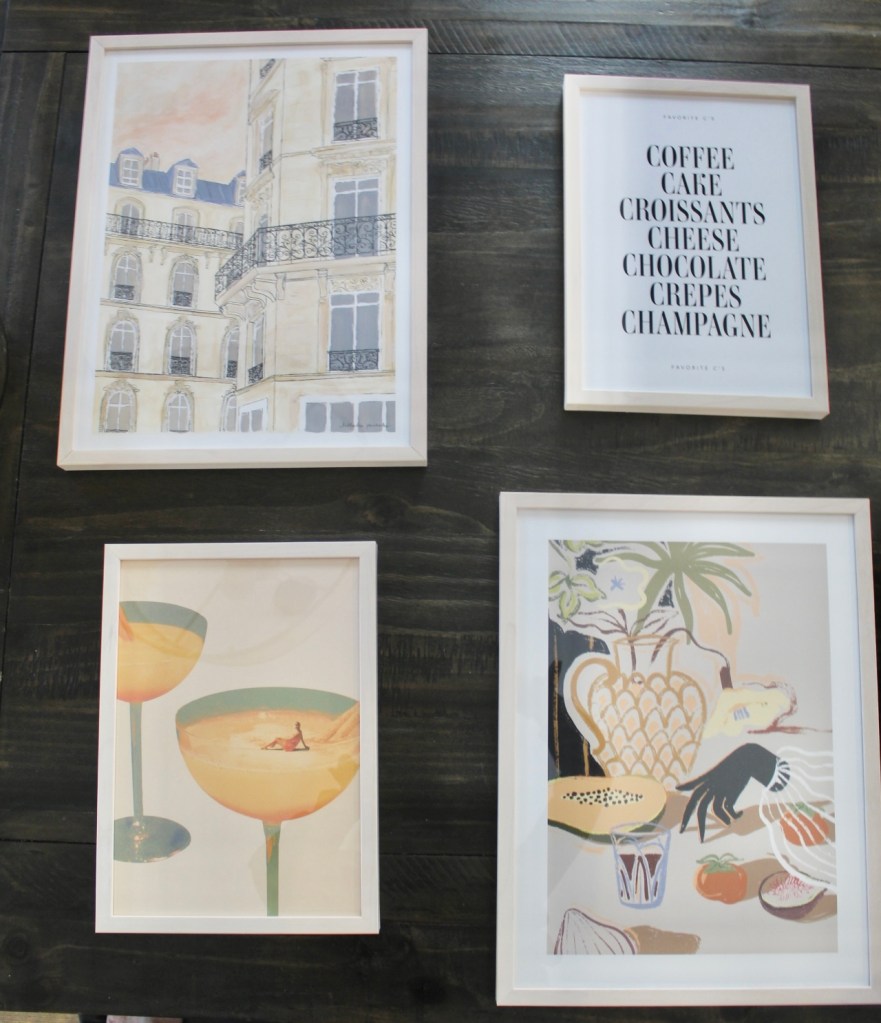
Here are some of my prints!
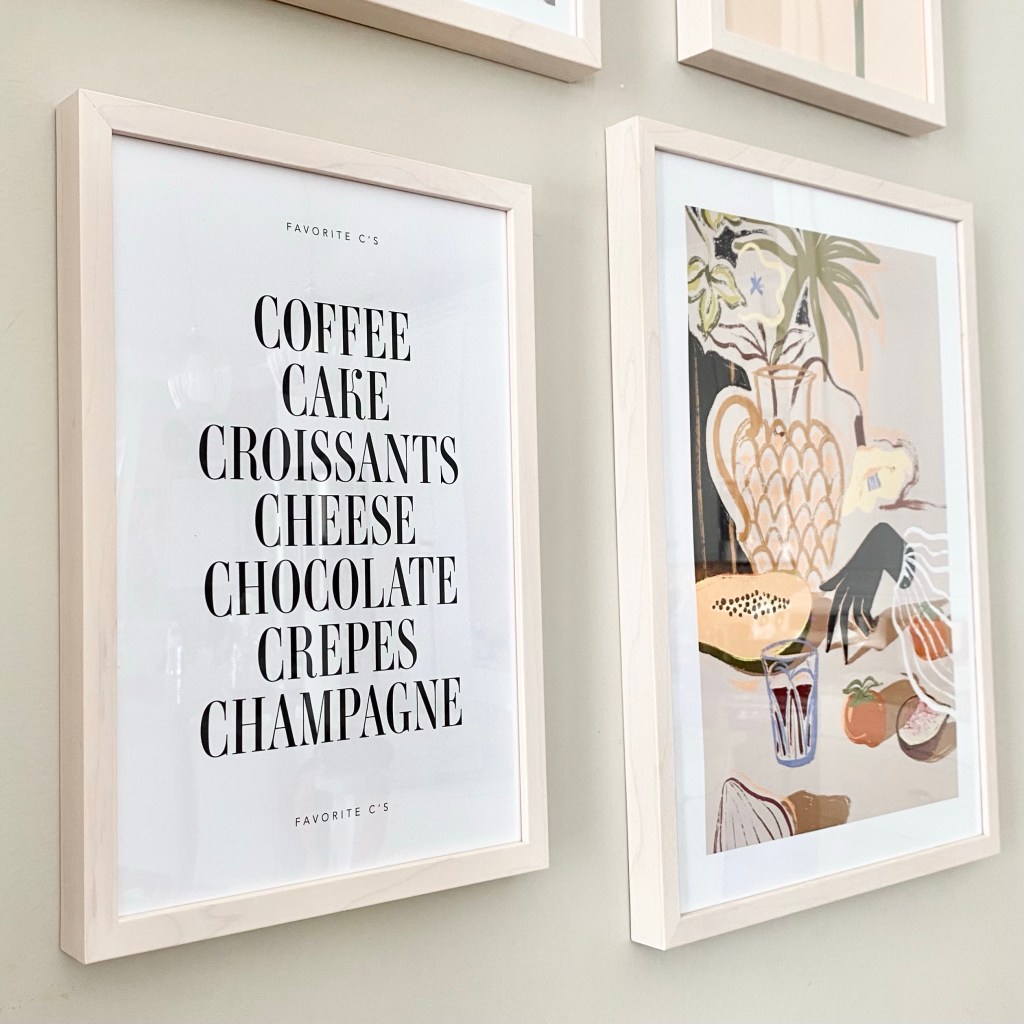
Since my kitchen is grays, white and yellows I went with similar colors. I wanted a hint of a French Bistro feel so I mixed and matched to create and one of a kind look. I ordered two extra posters so I can change things up now and then. Then I just placed the art in the frame and played with placement.
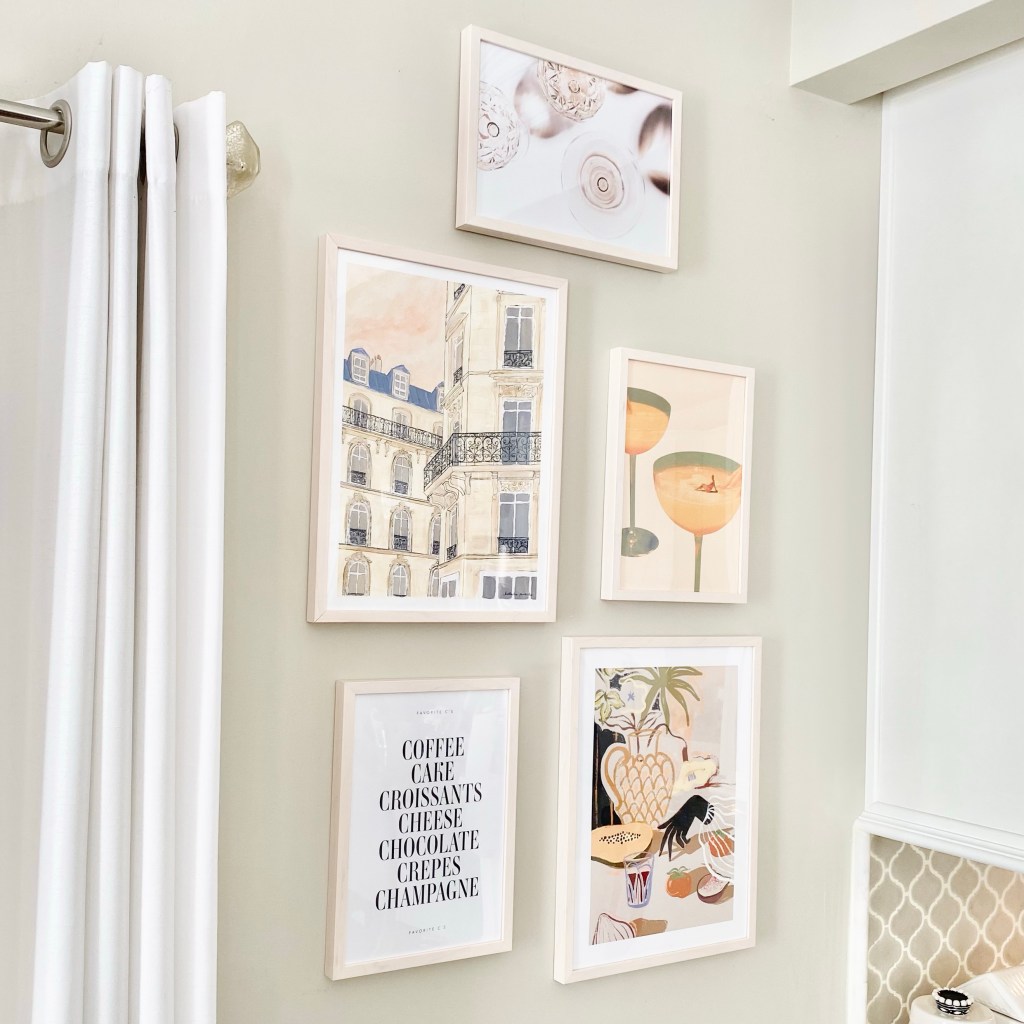
I decided on these six to start my gallery wall.
So, before I started hanging I tried to lay out on my table an idea of how I wanted them hung. I always end up tweaking and moving things and probably end up with more holes than I should. Shhhh….don’t tell my husband!
I started with these four but ended up adding the champagne glasses to the top!
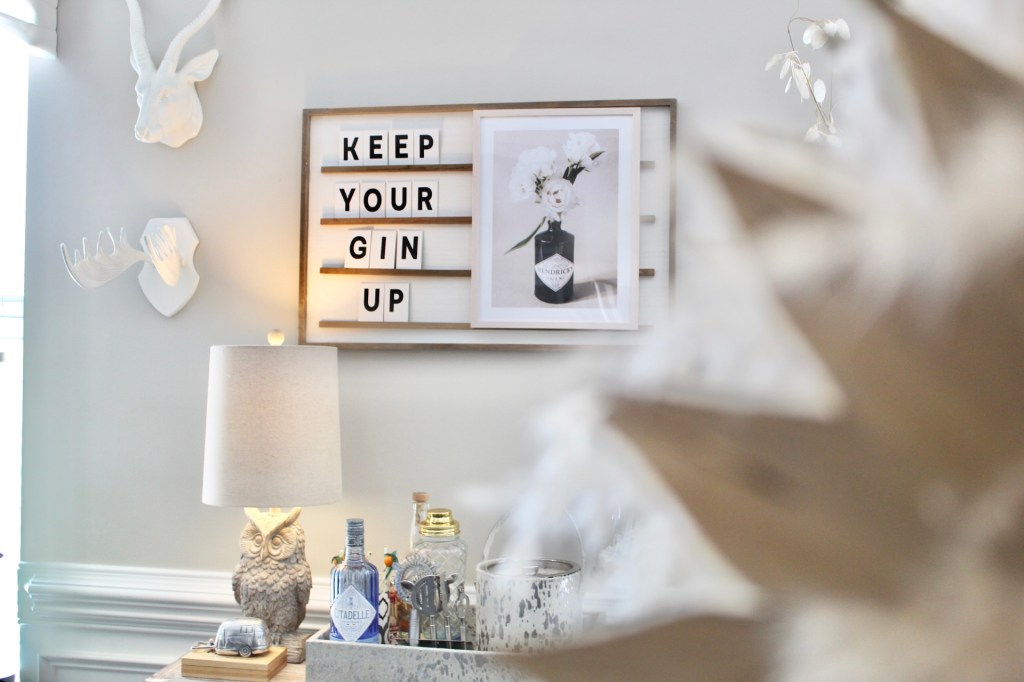
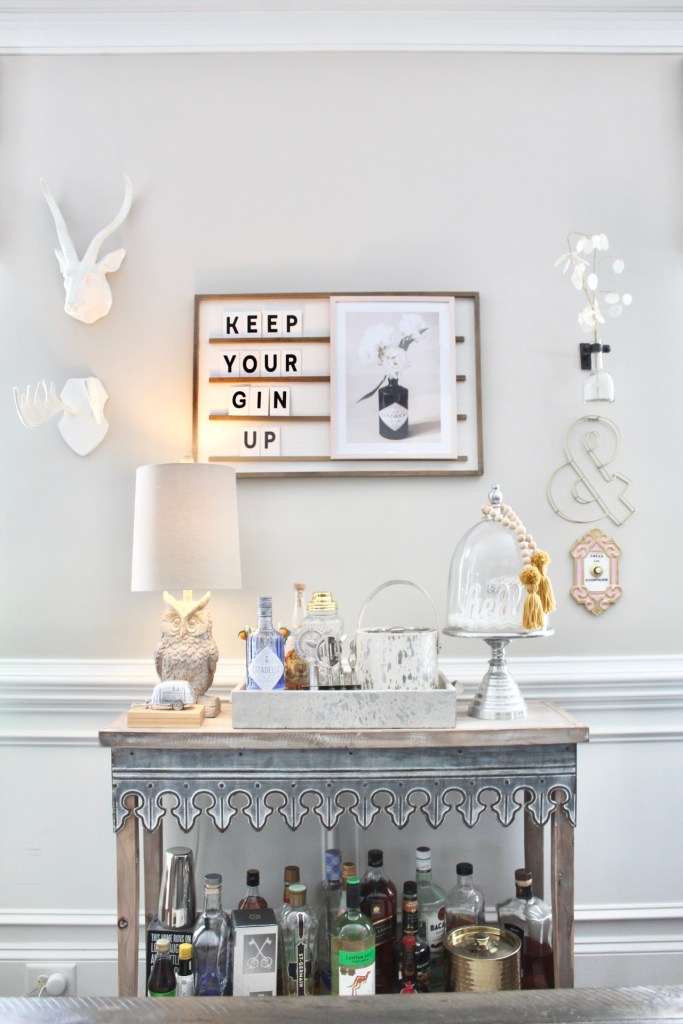
Next I decided to add the Gin and Roses Poster to my dining area. I have a letterboard and I just hung it on top of that with a fun quote for the bar area!
I may add or move things around later, but I think this is a fun spot!
I am so happy with my new art! Make sure to check out Desenio! I’m sure you will find something perfect for your home. From 4/3-4/10/23 use the code HAPPYDOOR for 35% off prints!
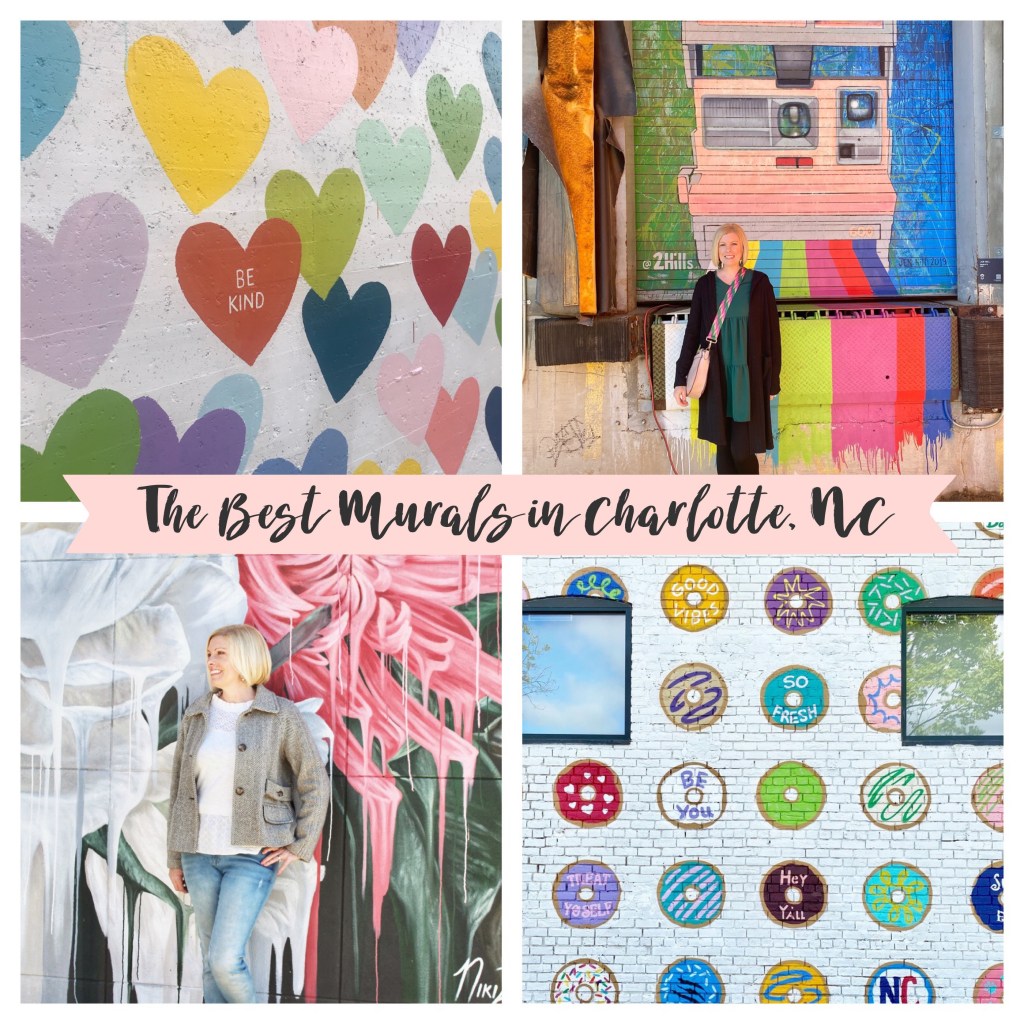
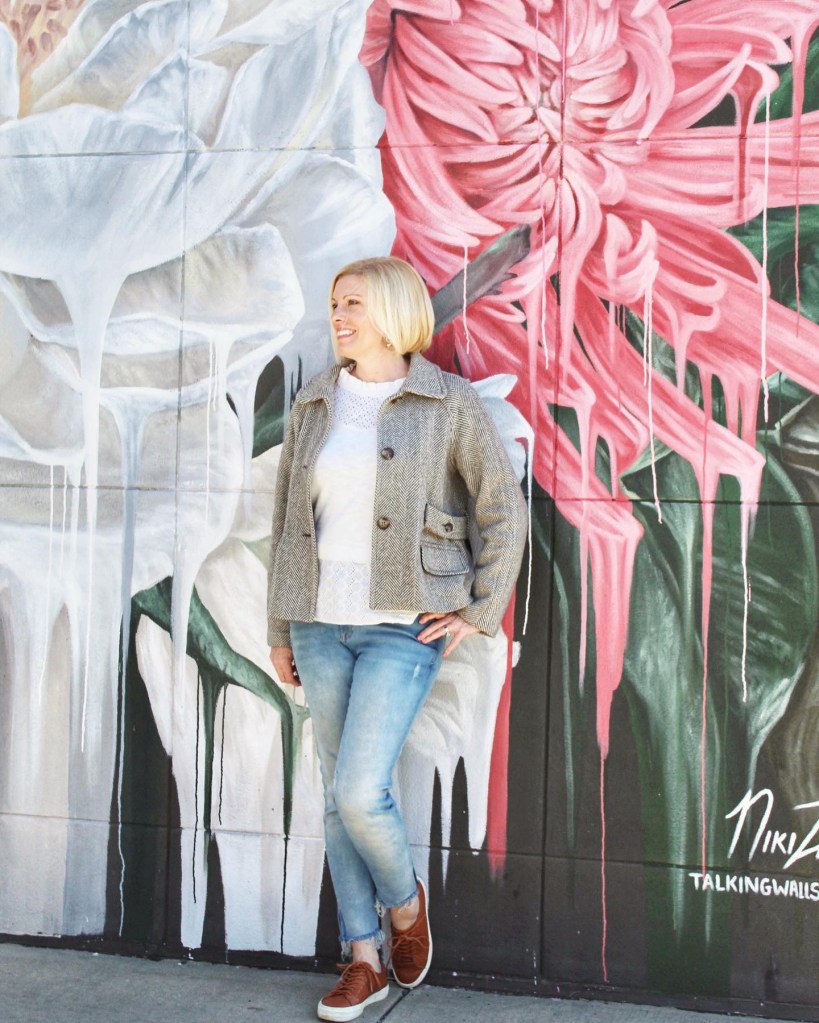
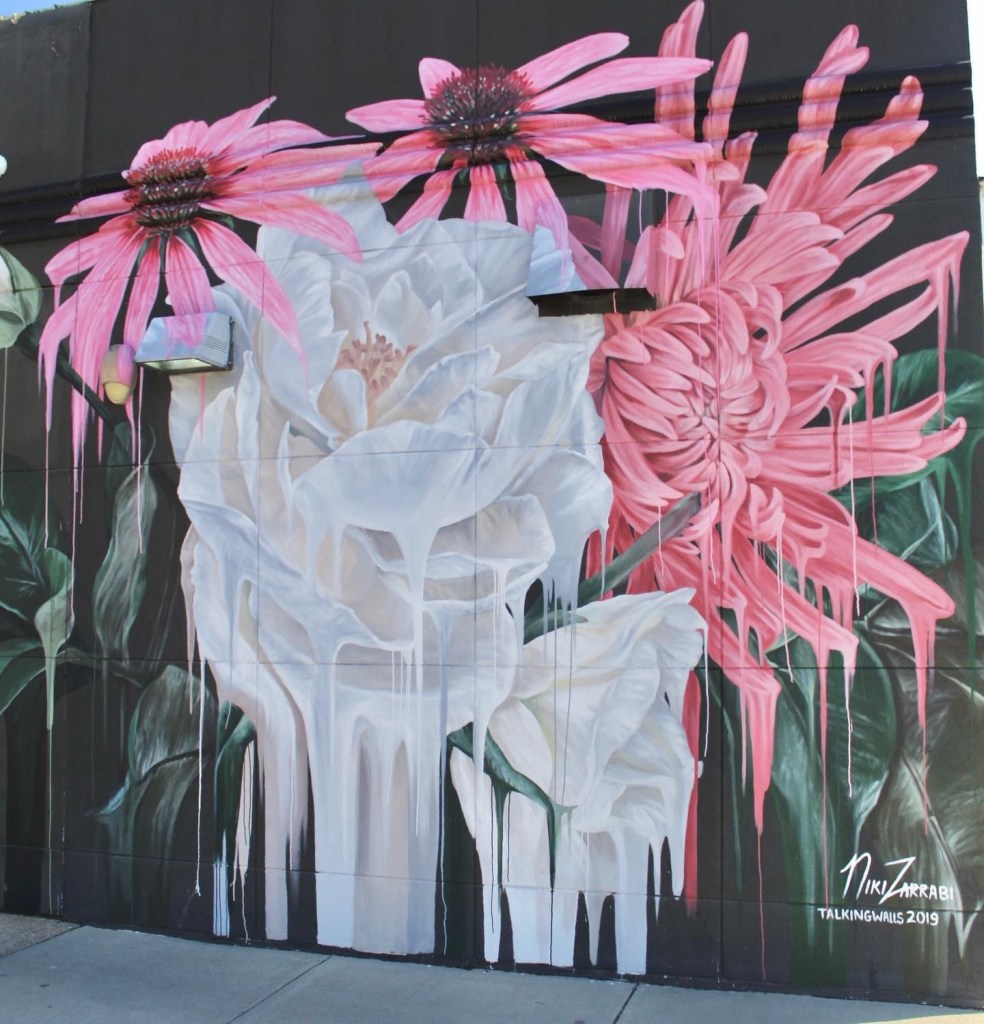
I have always loved art. I especially love art outdoors in a garden, park or city. I’ve lived in Charlotte, NC for about seventeen years and I love finding new things to do and see. What I have learned is that treating my city like a tourist is a great way to explore your own town. So, I started reading blogs and following social media accounts to find new things to do. One thing in have loved doing is finding new murals. There are so many to see. I’m happy to share some I have seen and love.
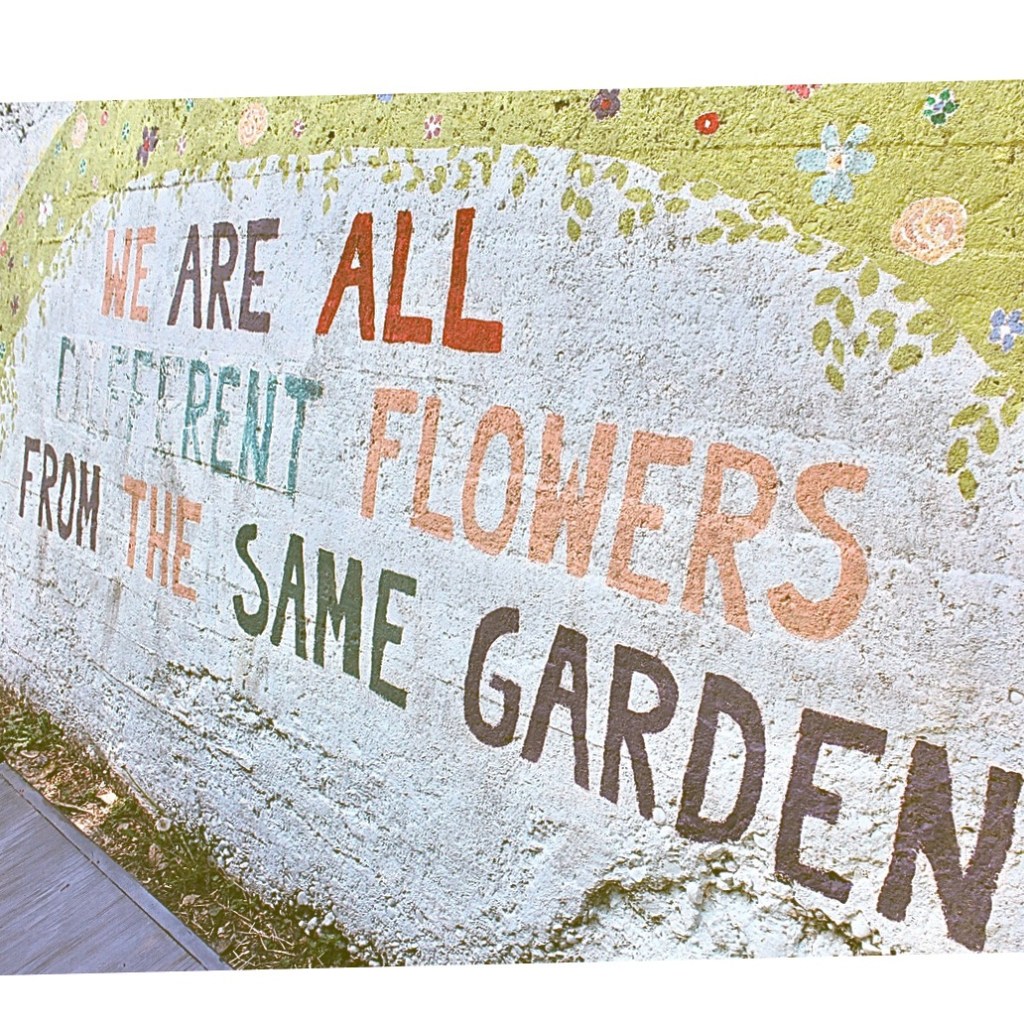
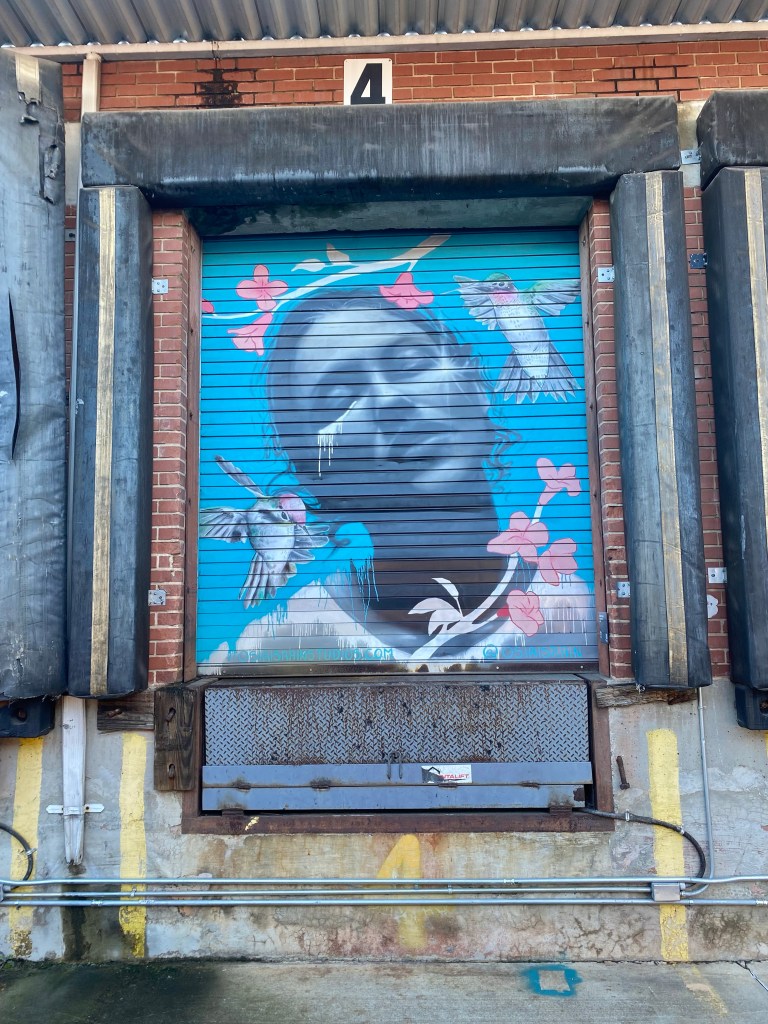
This is one of my favorite murals in Charlotte!This mural is in Plaza Midwood 1600 Central Ave. Charlotte, NC
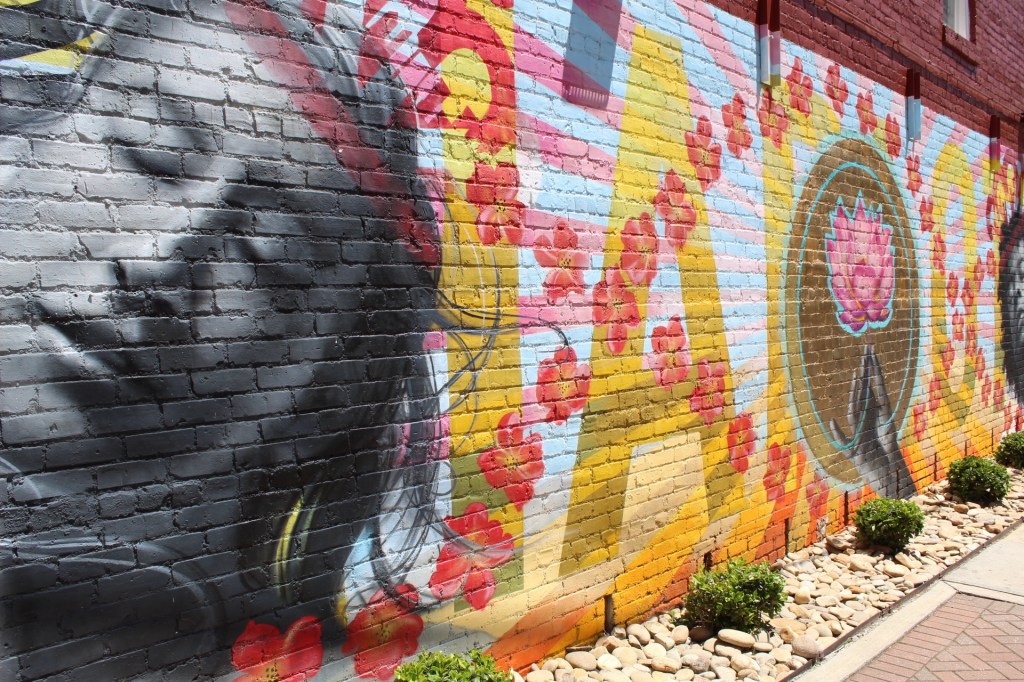
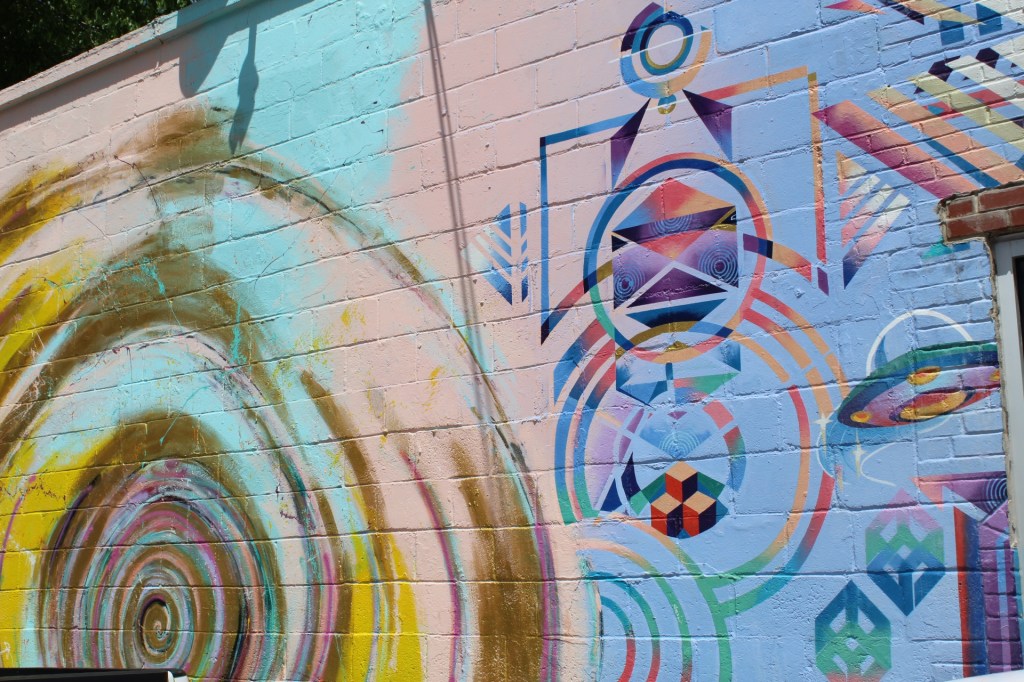
No Da is a great art district with so many murals to see.
This beautiful mural in Noda is located at 3120 N. Davidson St. Charlotte, NCThis vibrant mural is located at 3221 N. Davidson St. Charlotte, NC
If you want to grab a coffee or a glass of wine head to Rosie’s Wine Garden and make sure to check out the mural they have with a beautiful message!
Rosie’s Wine Garden 940 N. Davidson St. Charlotte, NC
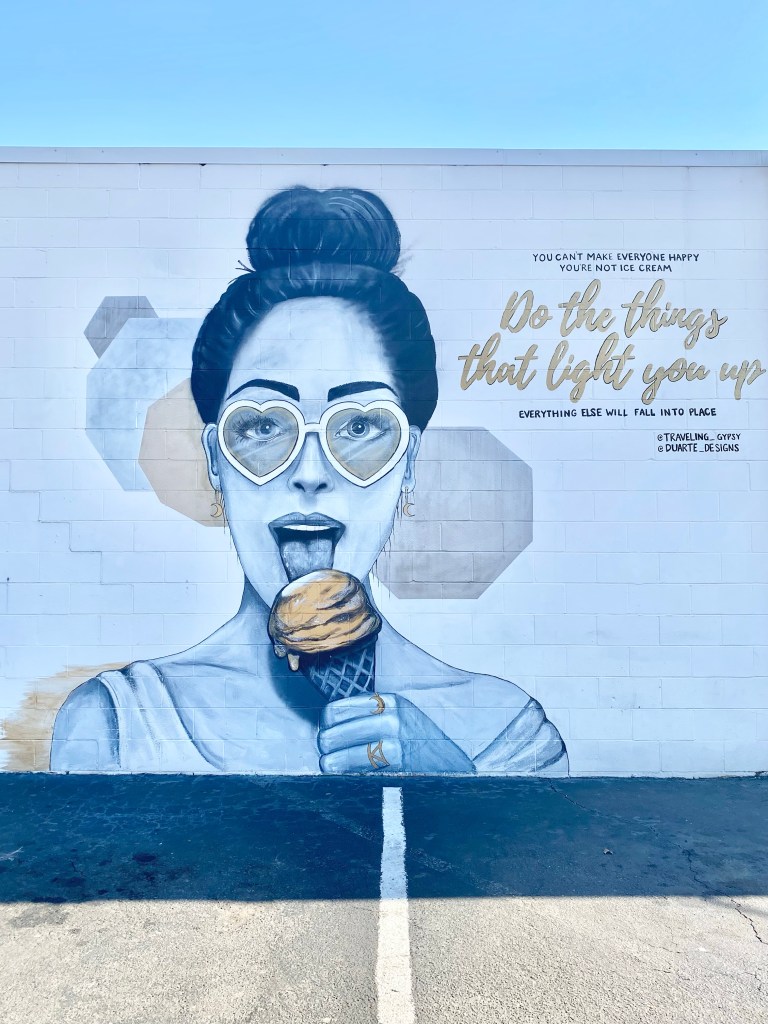
One of my favorite artists is Evelyn Henson. Make sure you check her murals out! The Confetti Stripes mural is located at Jeni’s Ice Cream, 424 E 36th St. Charlotte, NC.
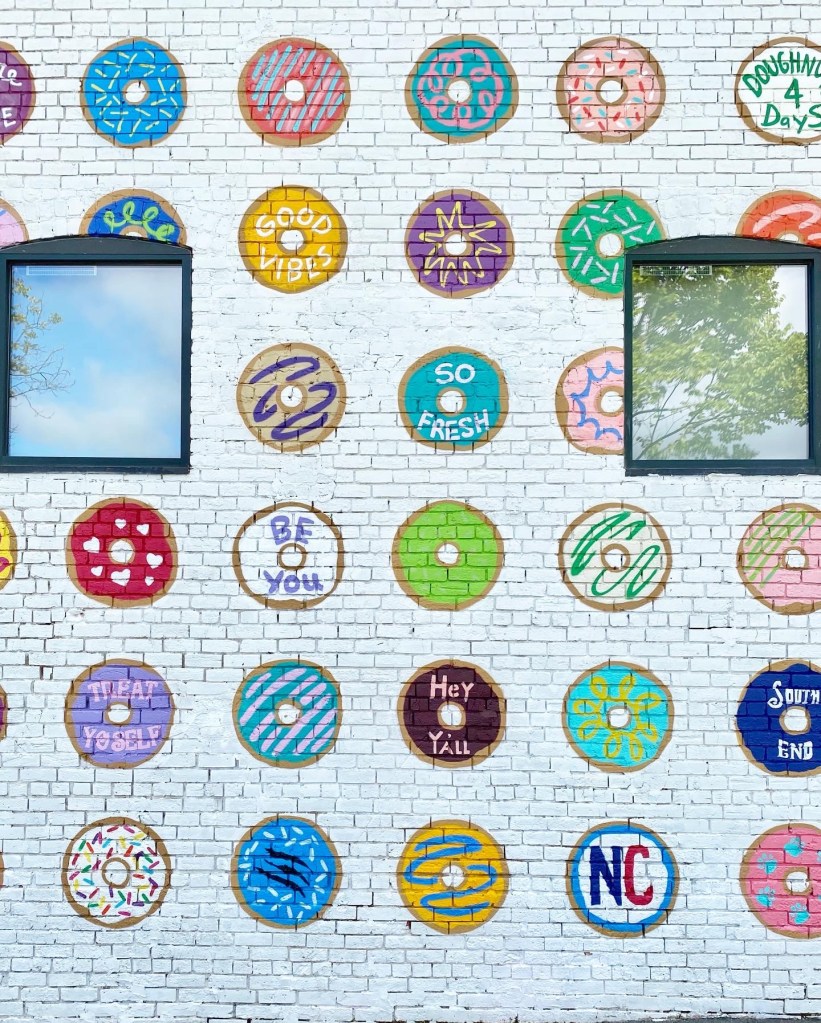
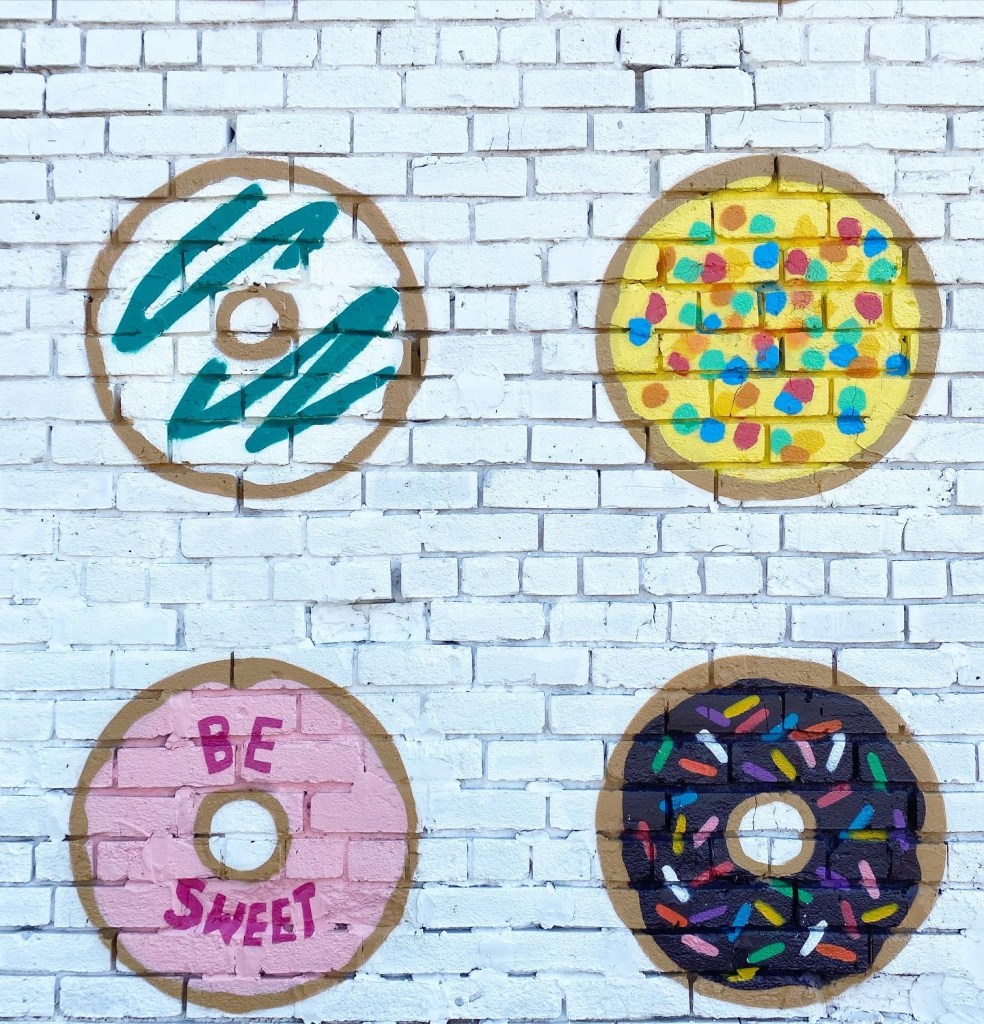
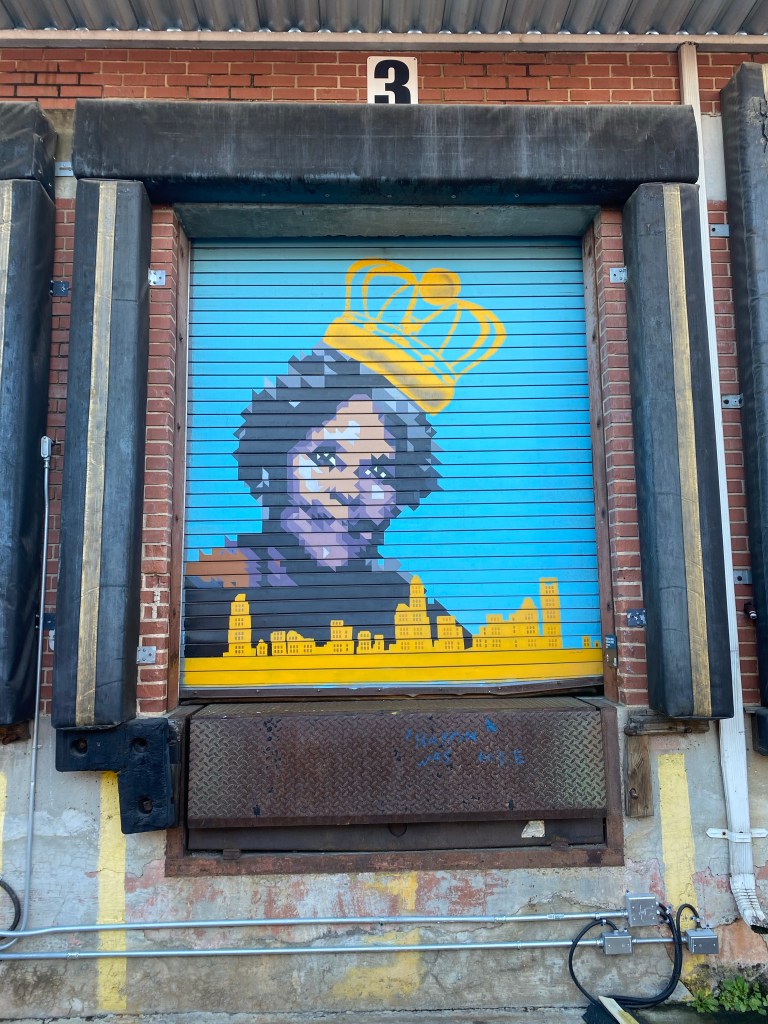
The next area that has great murals is the South End. You’ll have to go to The Krispy Kreme headquarters at 2116 Hawkins St. Charlotte, NC!
Such a cute and fun mural!
You can’t miss the Confetti Hearts Wall next. It’s right behind the Jeni’s Ice Cream.
My family had our photos done there one year! It’s the perfect backdrop.
Plaza Midwood has some awesome murals. Head to 913 Central Ave. Charlotte, NC. There are three murals right next to each other that are perfect for a photo op!
This is a quote to live by!These beautiful hands, the ice cream and the cool lady with glasses are all in the same spot!
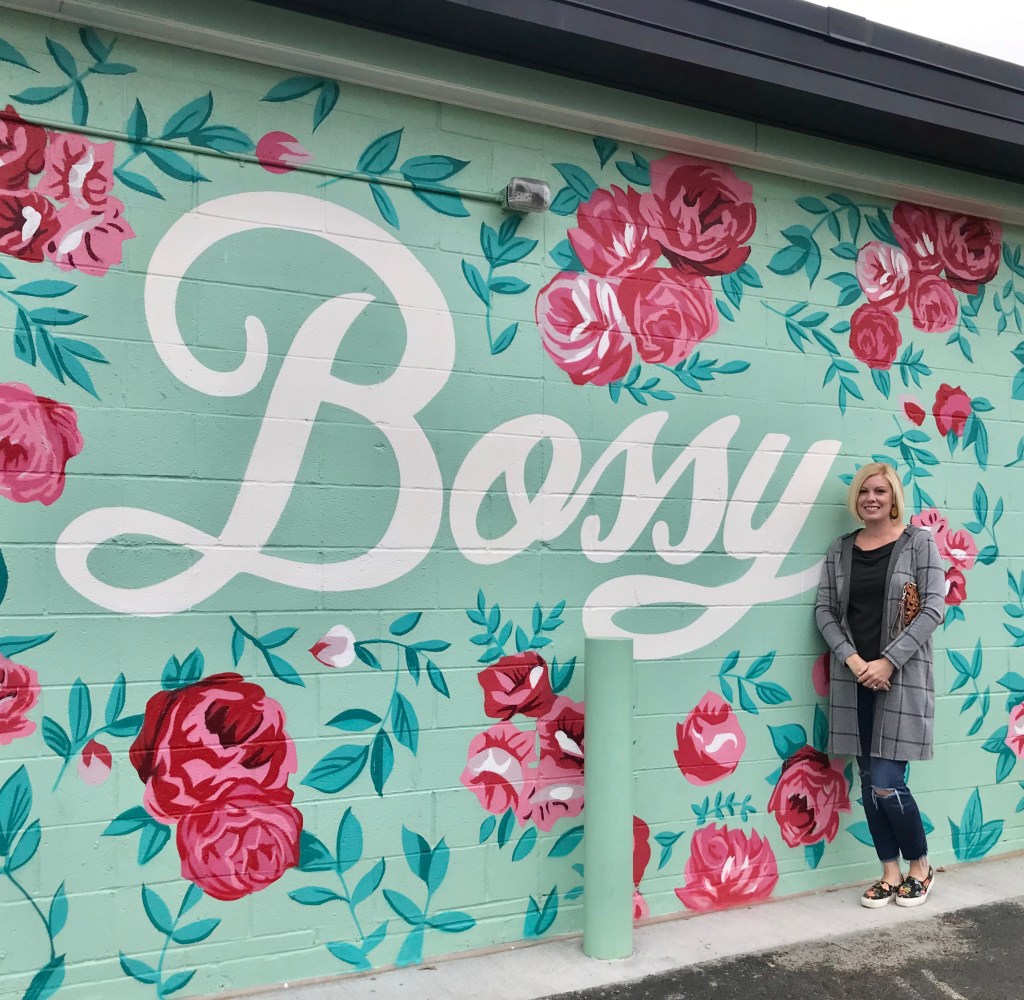
If you want to see a cute mural and grab a great lunch head to Bossy Beulah’s at 2200 Freedom Dr. Charlotte, NC.
The mural is beautiful! You must also try the sandwich!
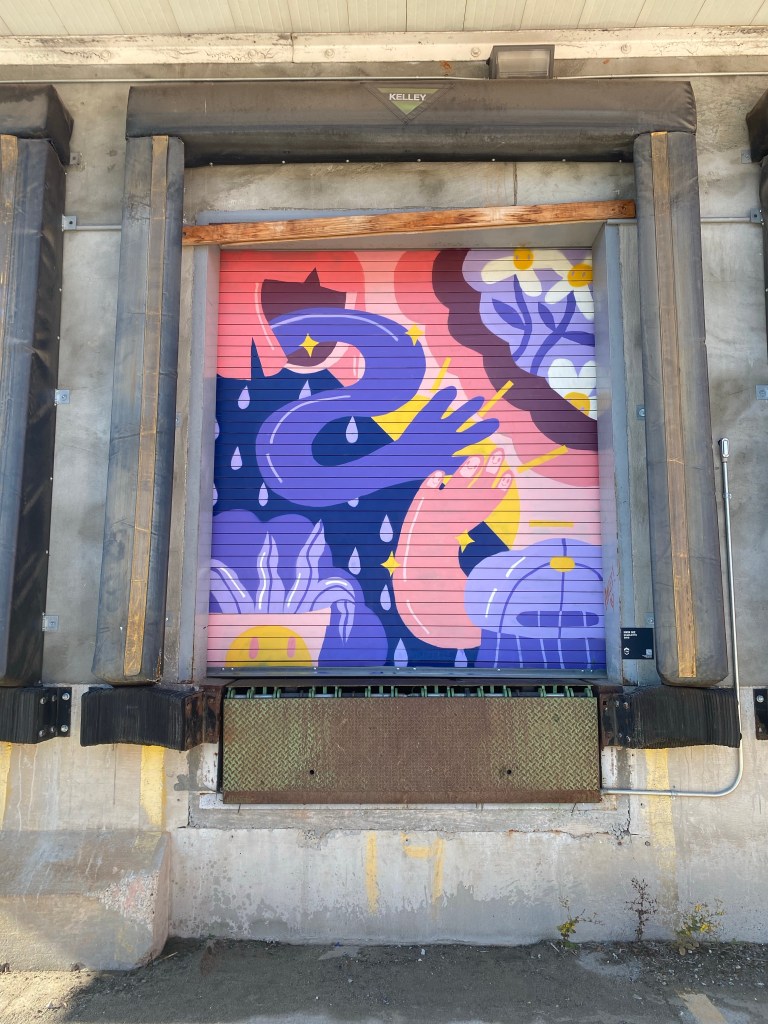
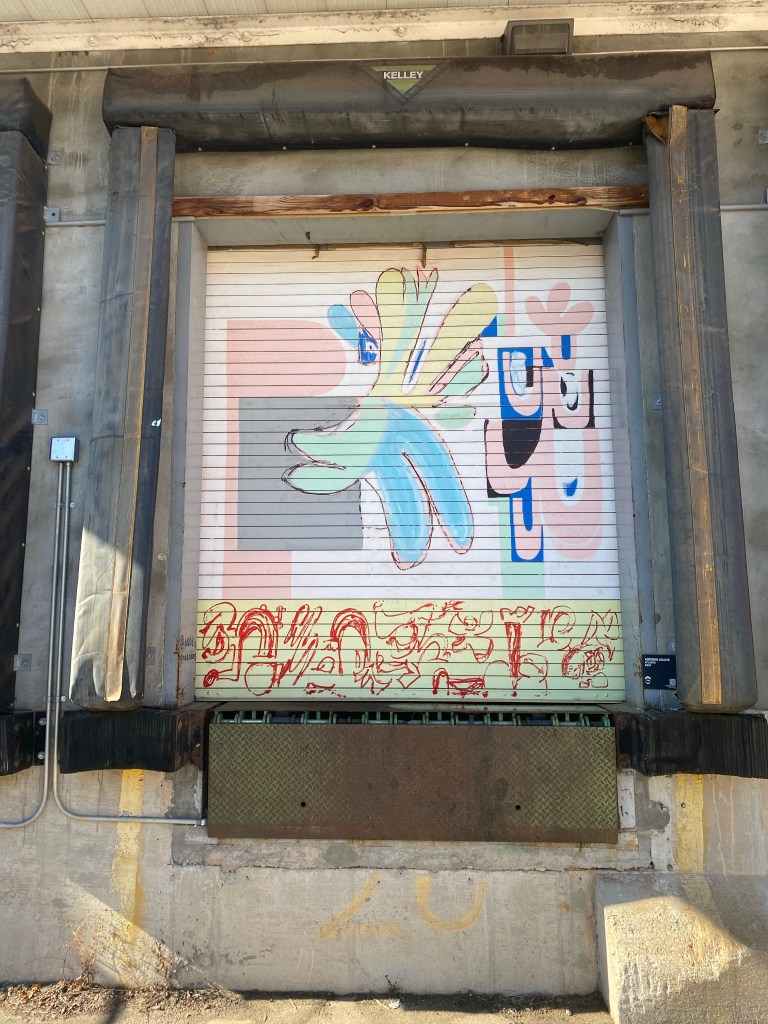
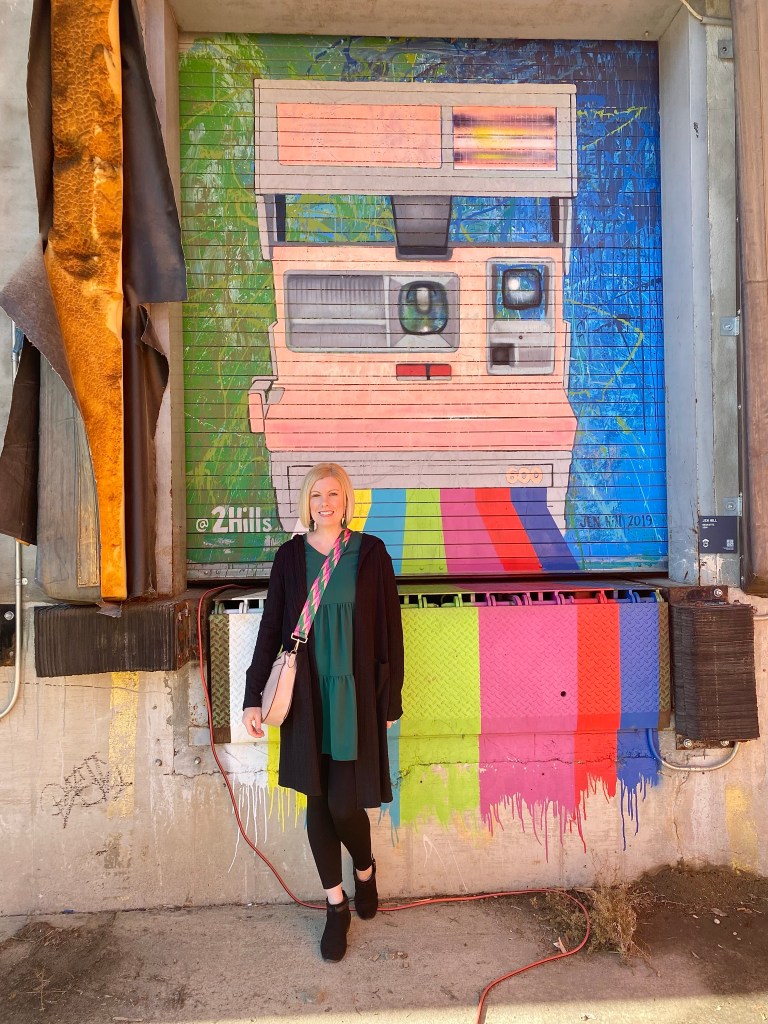
Lastly, don’t miss roaming Camp North End! There are so many murals, shops and things to see.
Camp North End 300 Camp Rd. Charlotte, NCThe pink Polaroid was my favorite!
I hope you have found some new areas to visit in Charlotte. Enjoy the art and murals that this amazing city has to offer!
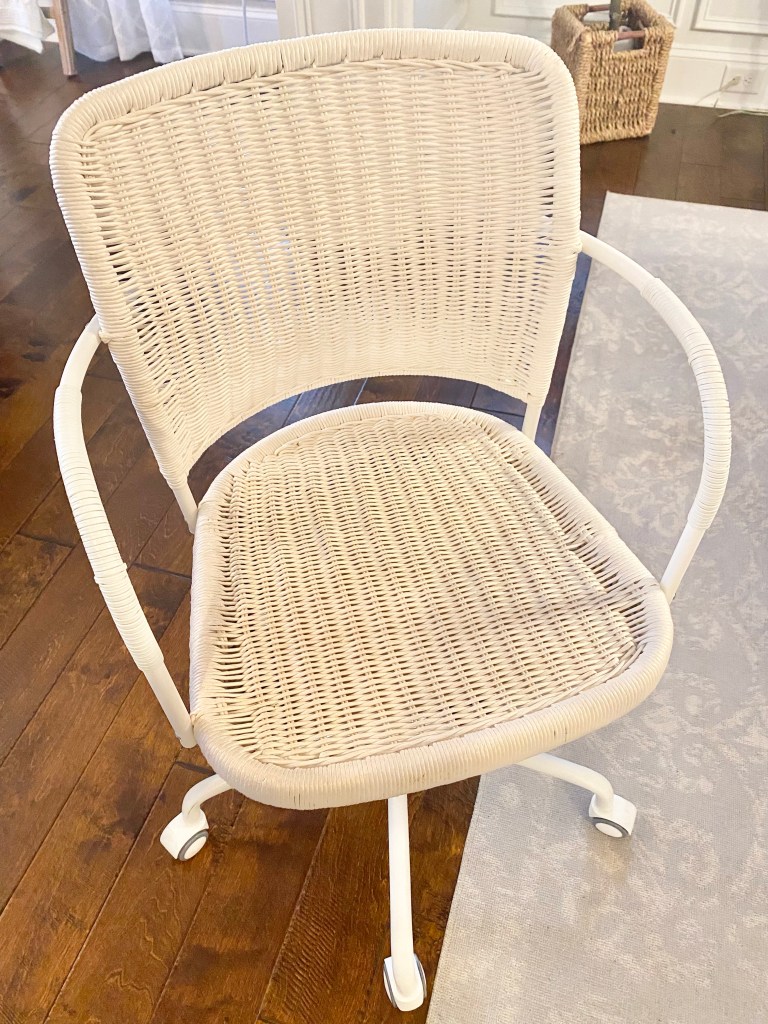
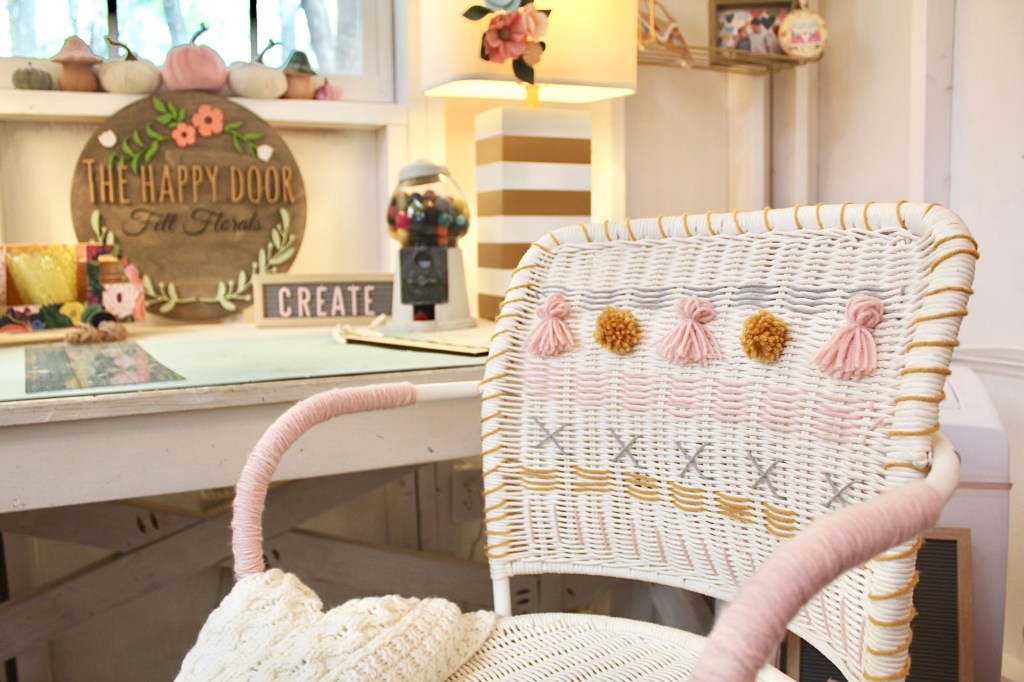
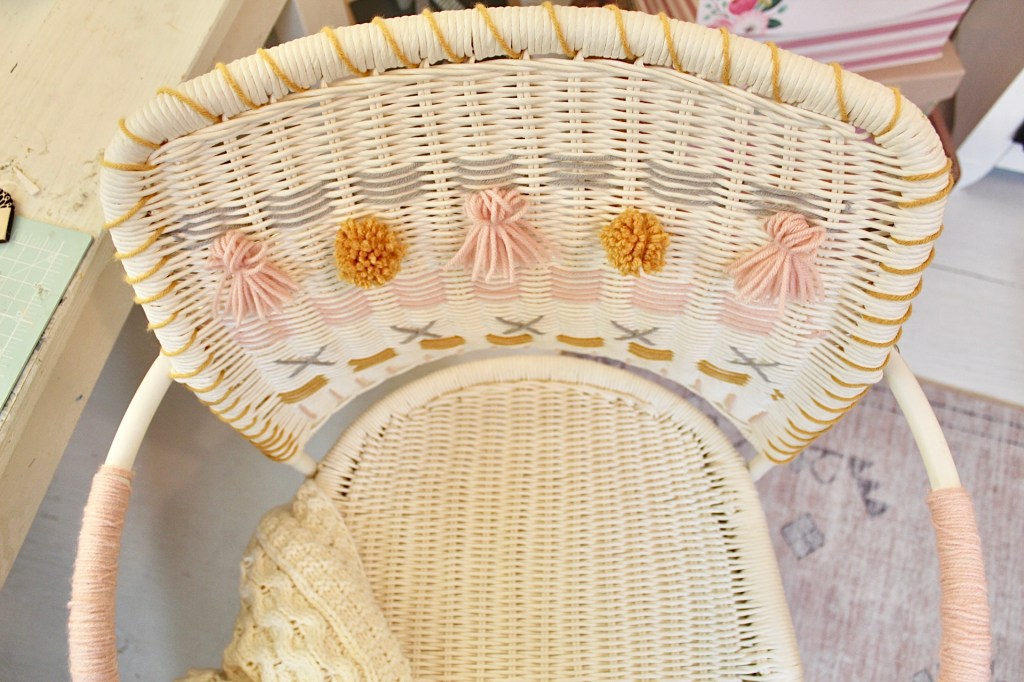
I was thrilled to find a wicker rolling chair at Goodwill on my last thrifting trip! I found this chair for $4.99! Talk about a deal.
When I first brought it home I thought I might add a coat of pink spray paint and add it to my she shed. But, as I thought more about it I thought of a new idea. I had a vision of weaving some yarn through the wicker and wrapping other areas. Now, I have no embroidery skills but figured I would give it a try. I have to say, I am really happy with how it turned out! I think it’s fun and whimsical. It won’t be my everyday chair, it will be more for extra seating and decoration.
Here she is all finished up.
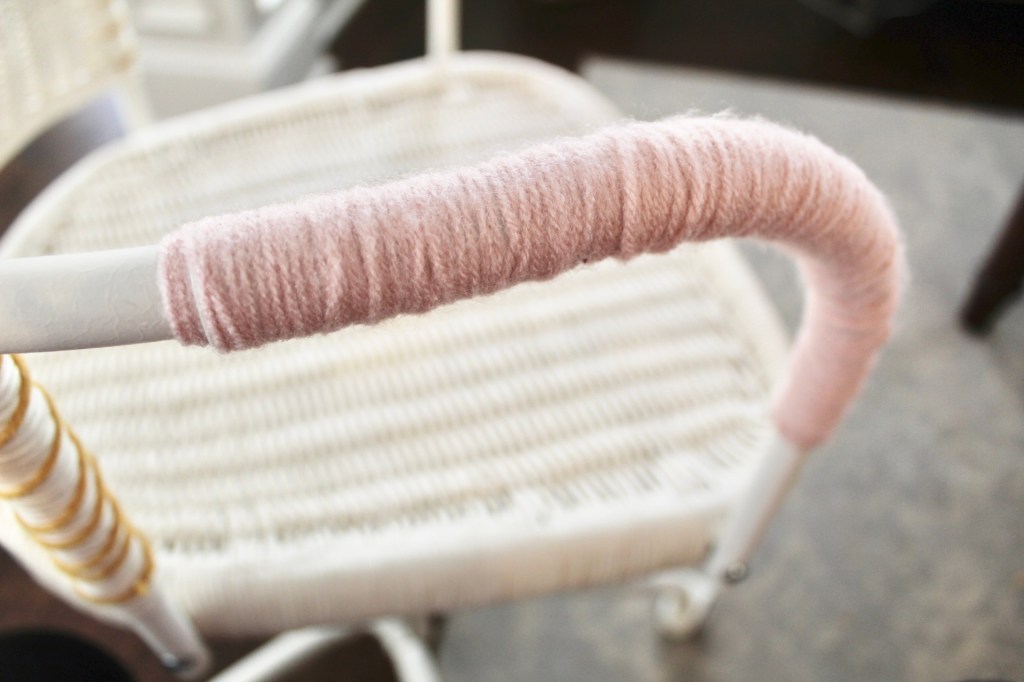
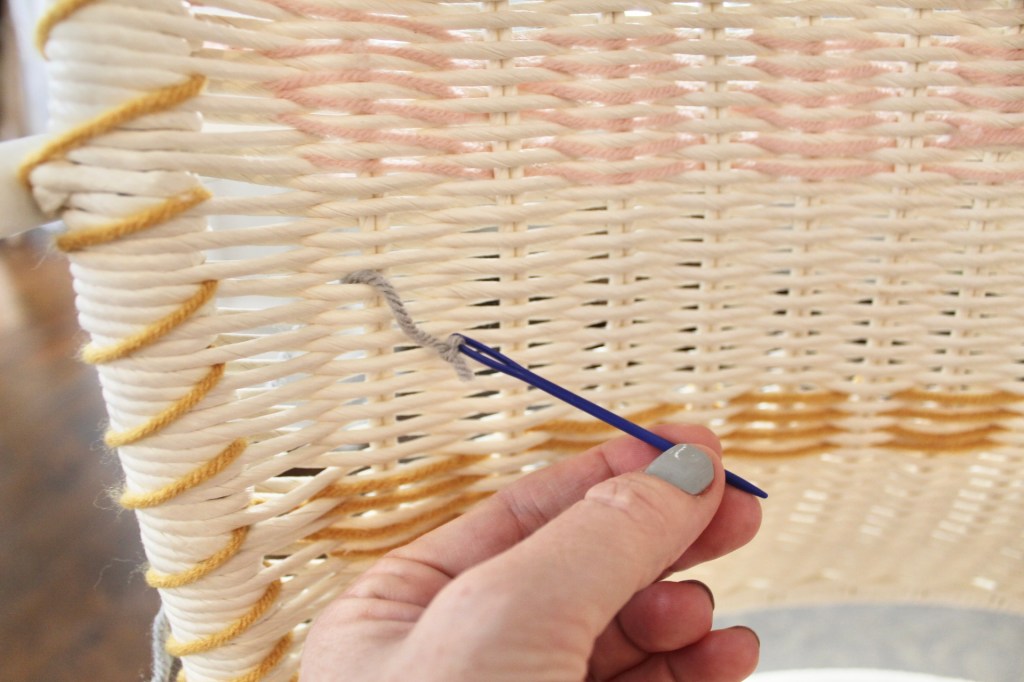
So, I first cleaned it up. I then grabbed yarn in pink, mustard and gray. I also bought a thick plastic embroidery needle.
All cleaned up and ready to go!
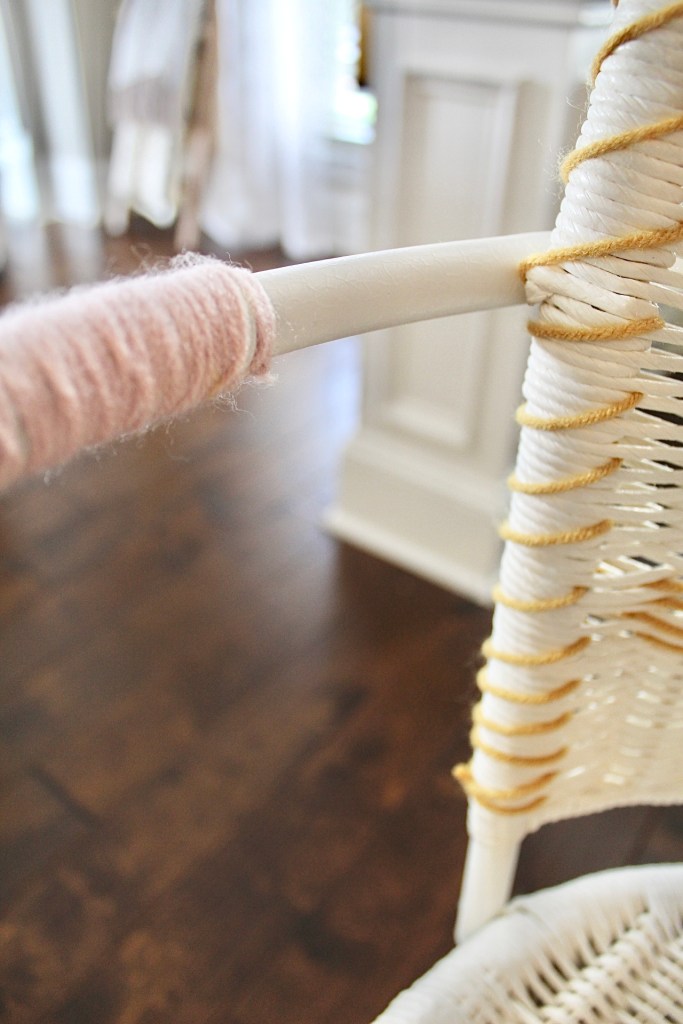
First I decided to wrap the arm rests. That part was pretty easy. Just keep wrapping! At the end I added a bit of hot glue to secure it in place.
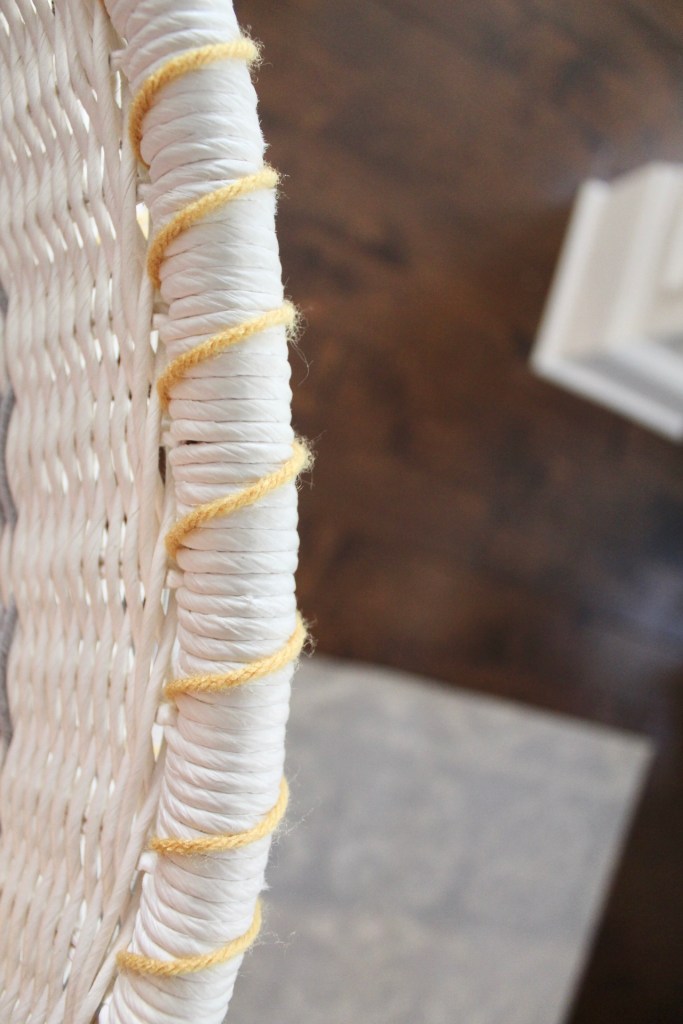
Next. I wrapped the back in the mustard yarn. I just used the embroidery needle and went around the back of the chair.
It was starting to come together!
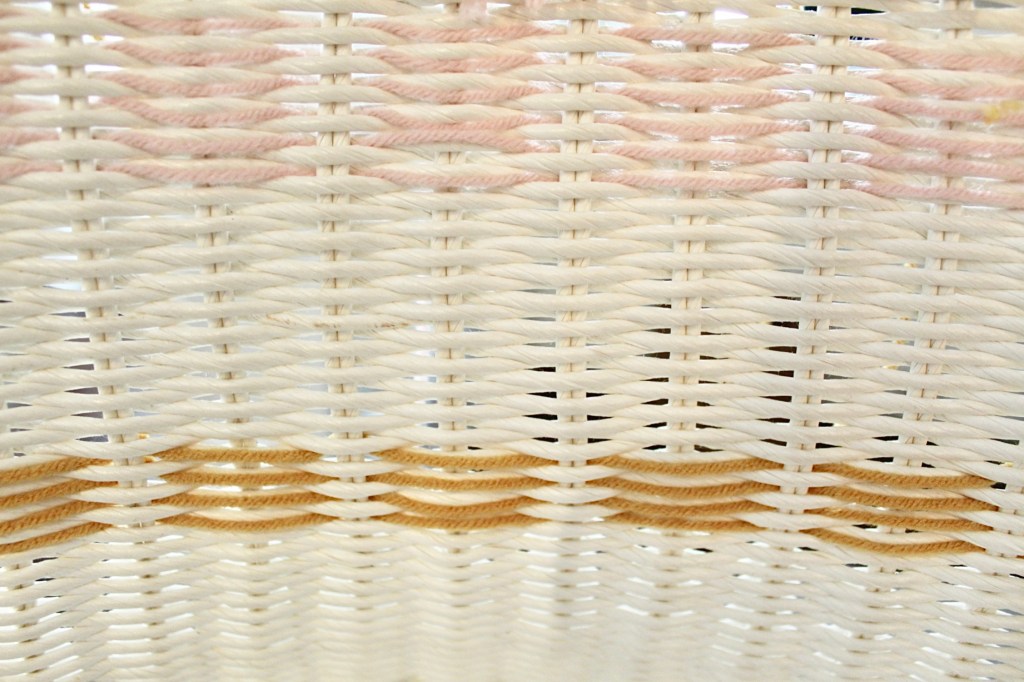
Once I started weaving the back of the chair there was definitely some trial and error. I quickly learned following a pattern keeps a consistent look. So, I would go over and under and count the spacing as I went.
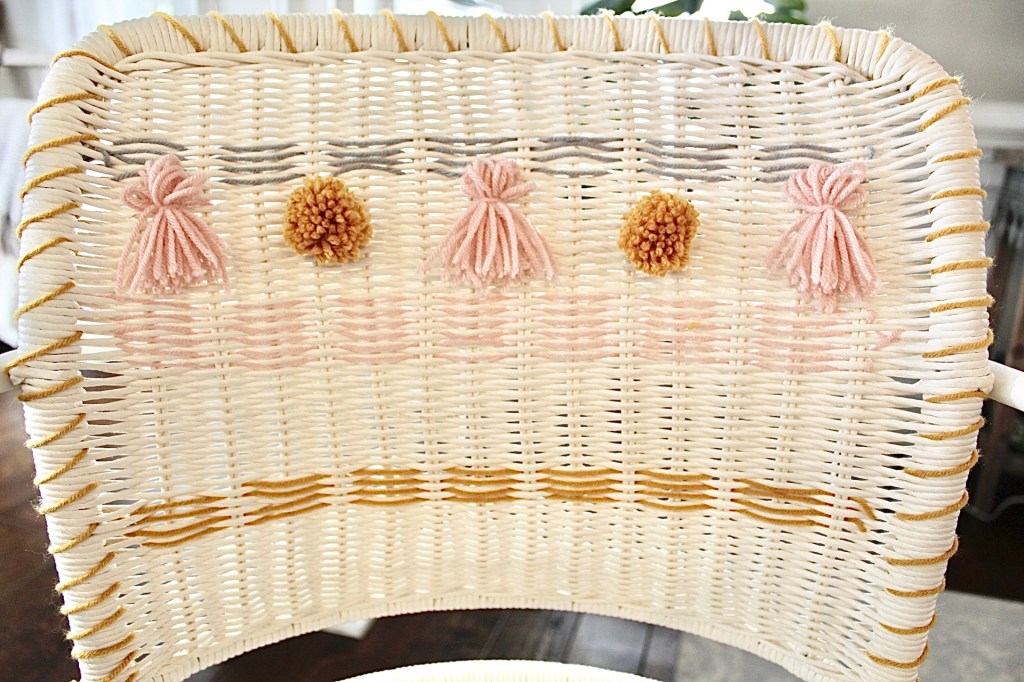
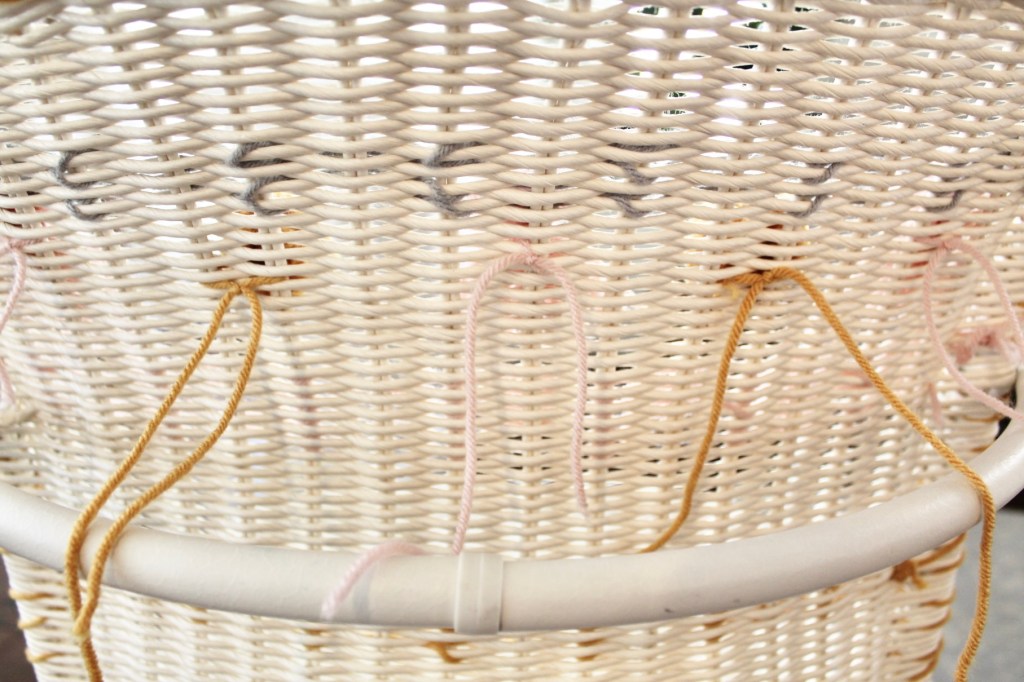
After I had three rows of stripes ( one in each color) I thought some tassels and pom poms would be a cute touch! If you want to see a pom pom tuturial I have a blog post on how to make them without a pom pom maker. I kept string on each pom pom and tassel so I could string it to the back of the chair and tie them in place. The back of the chair isn’t as pretty as the front, but it doesn’t bother me. I did trim all the loose strings.
These were the pom poms and tassels before I snipped the loose strings.
Lastly, I added some X’s and vertical stripes to finish it off!
And now my one of a kind chair is in my She Shed! I was so happy to have a new and different project to work on and love the results!
What do you think? Would you try a project like this? Let me know.
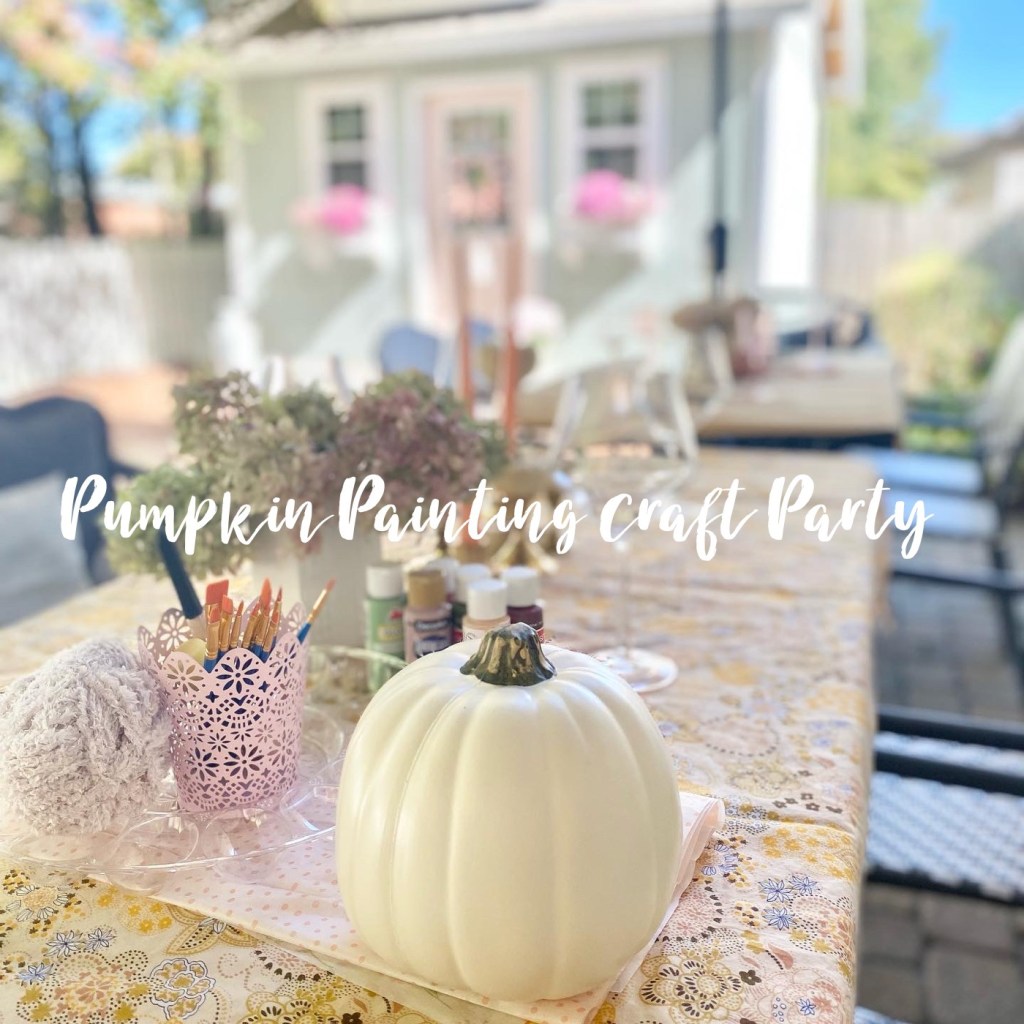
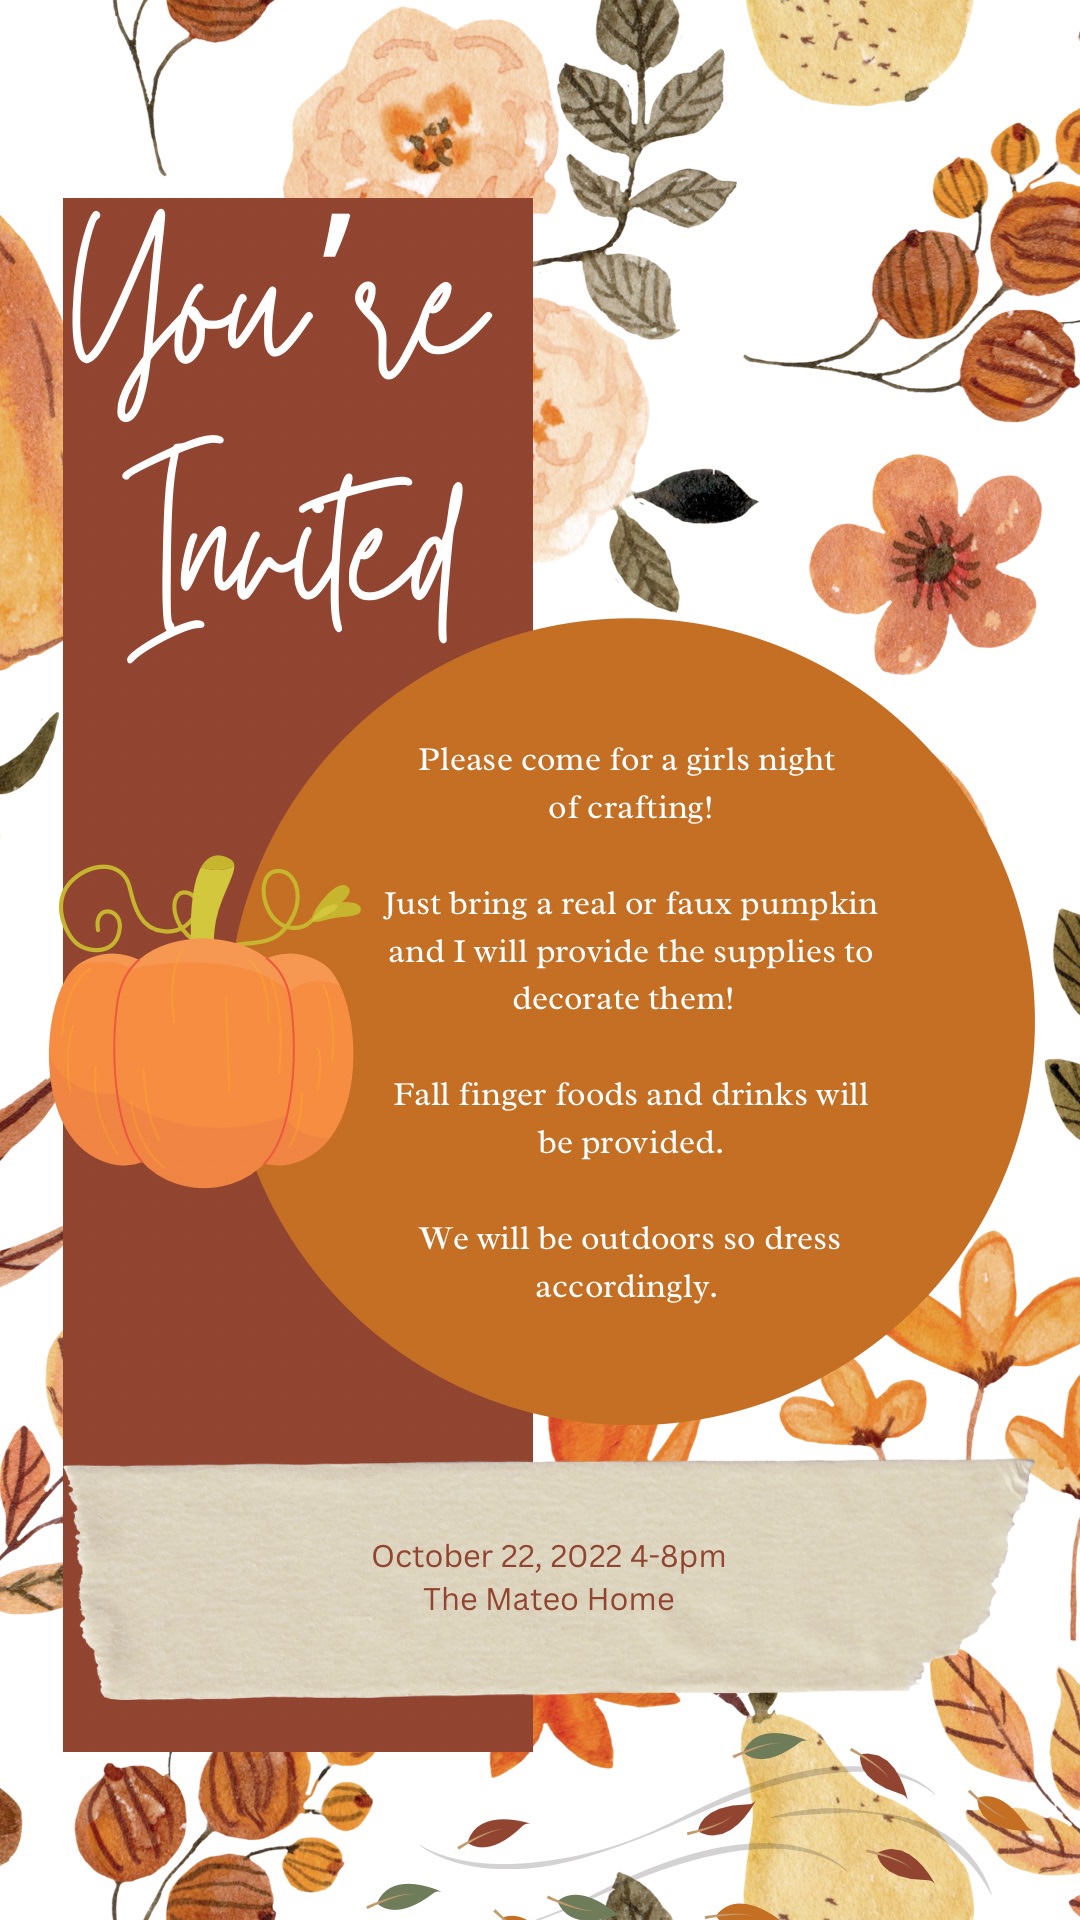
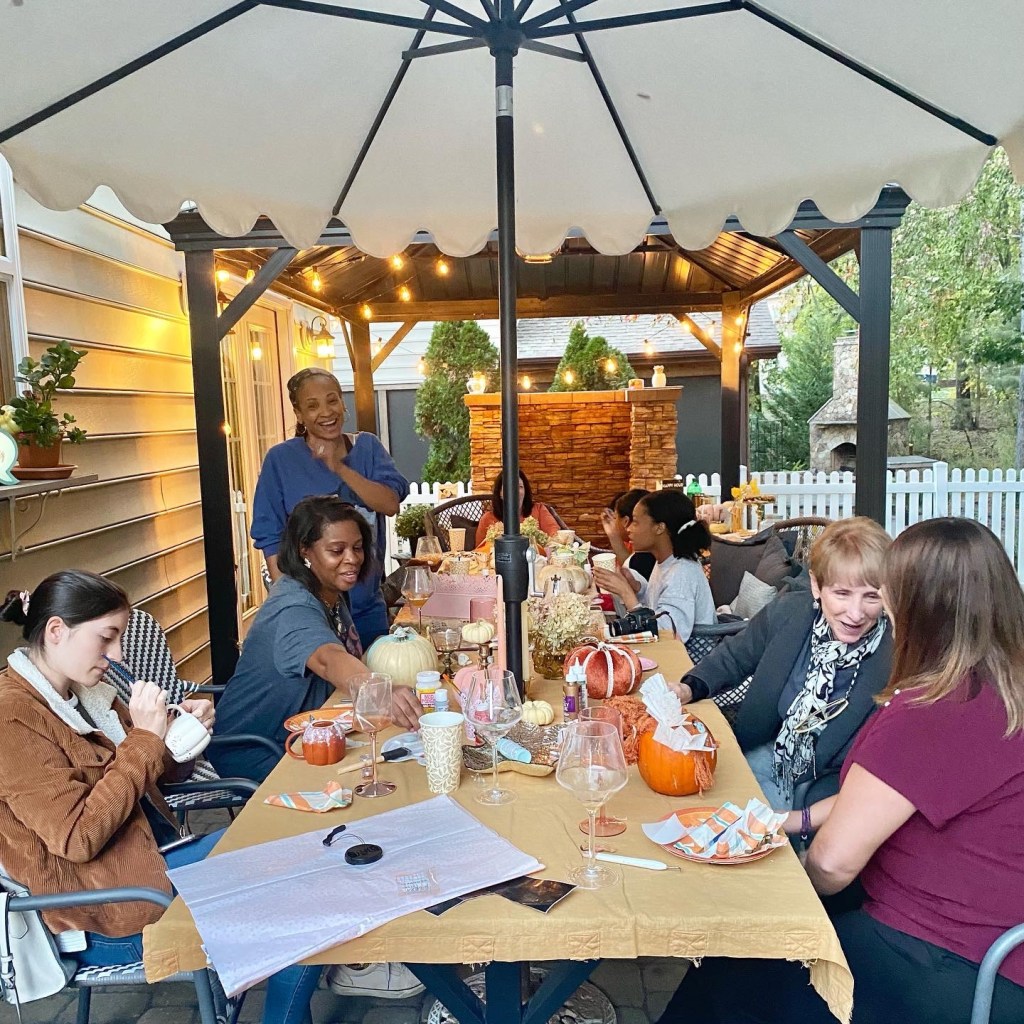
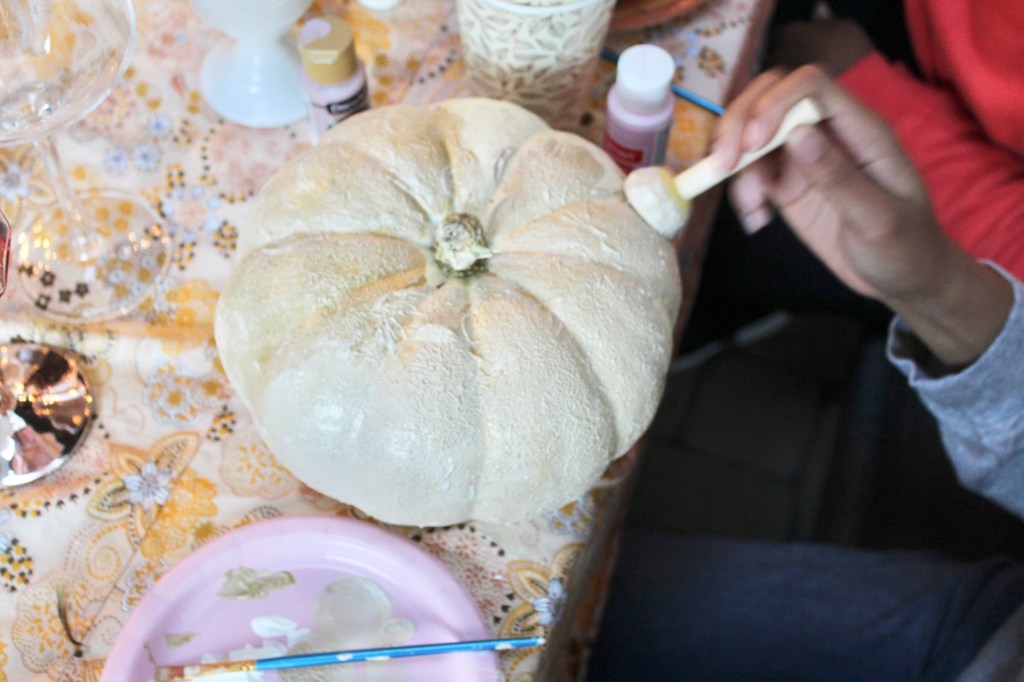
Fall is my favorite season and I wanted to host a party for a few friends. October is such a beautiful month in North Carolina, so I picked a date and started planning. Since I love crafting I thought pumpkin painting and decorating would be fun. I made an invitation on Canva and texted it to some friends and started planning! For me, planning and setting up the party is just as fun as the event itself!
I quickly made an invitation to text to friends. Canva is so easy to use. I asked everyone to bring a pumpkin and I’d handle the rest!
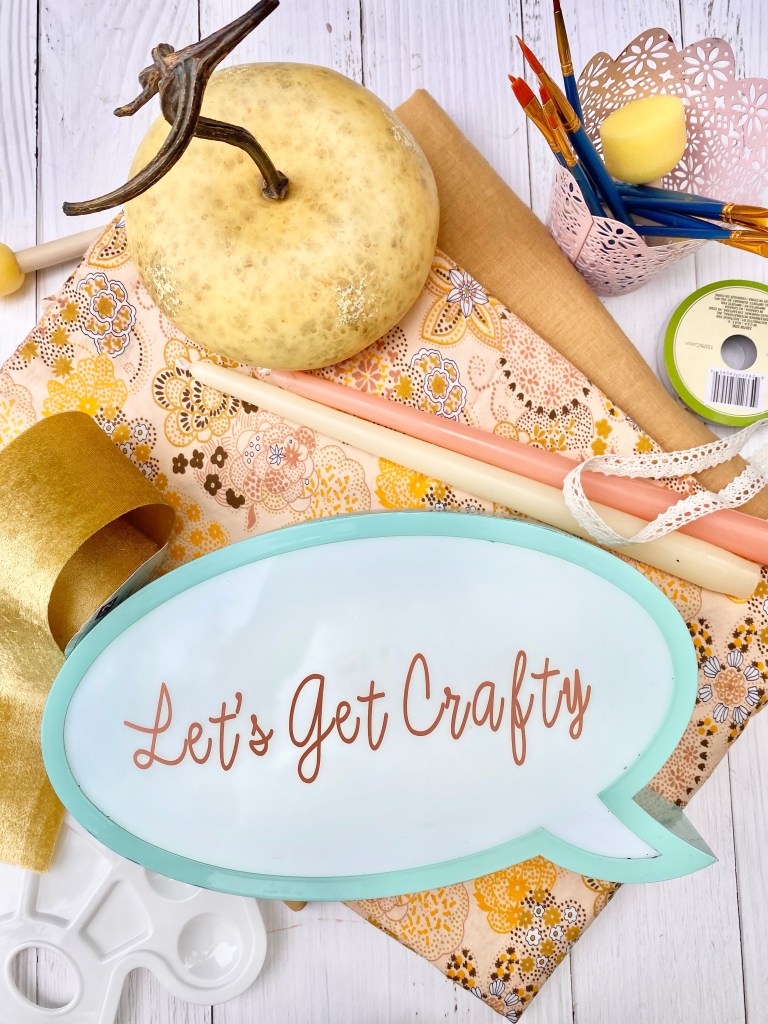
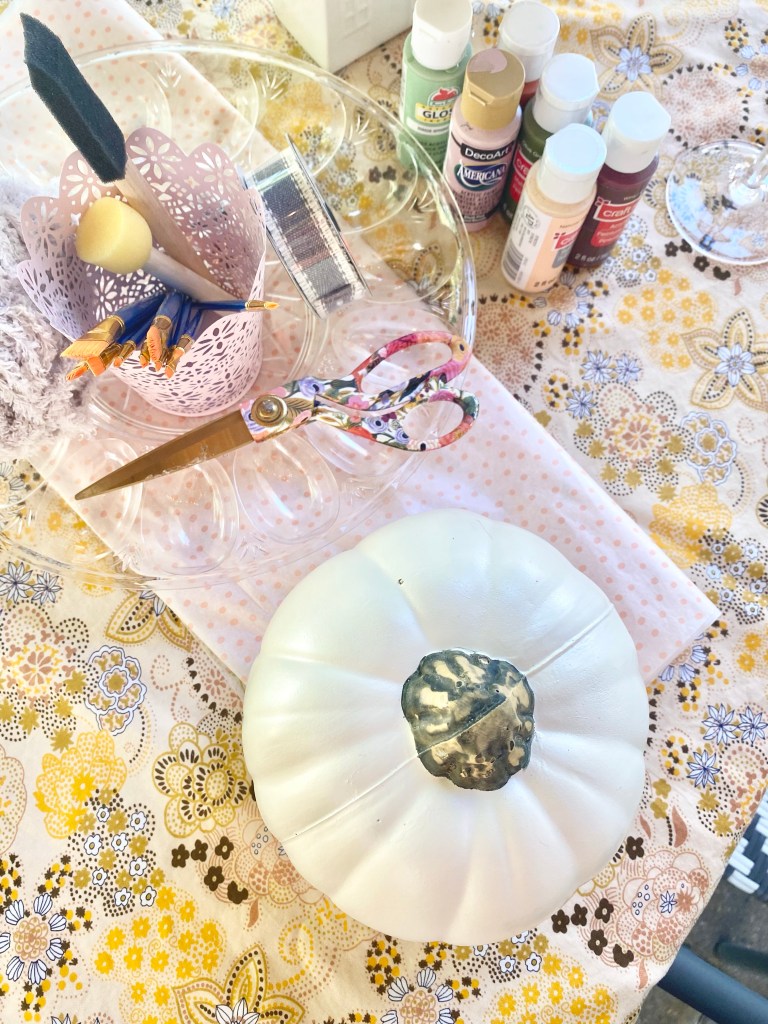
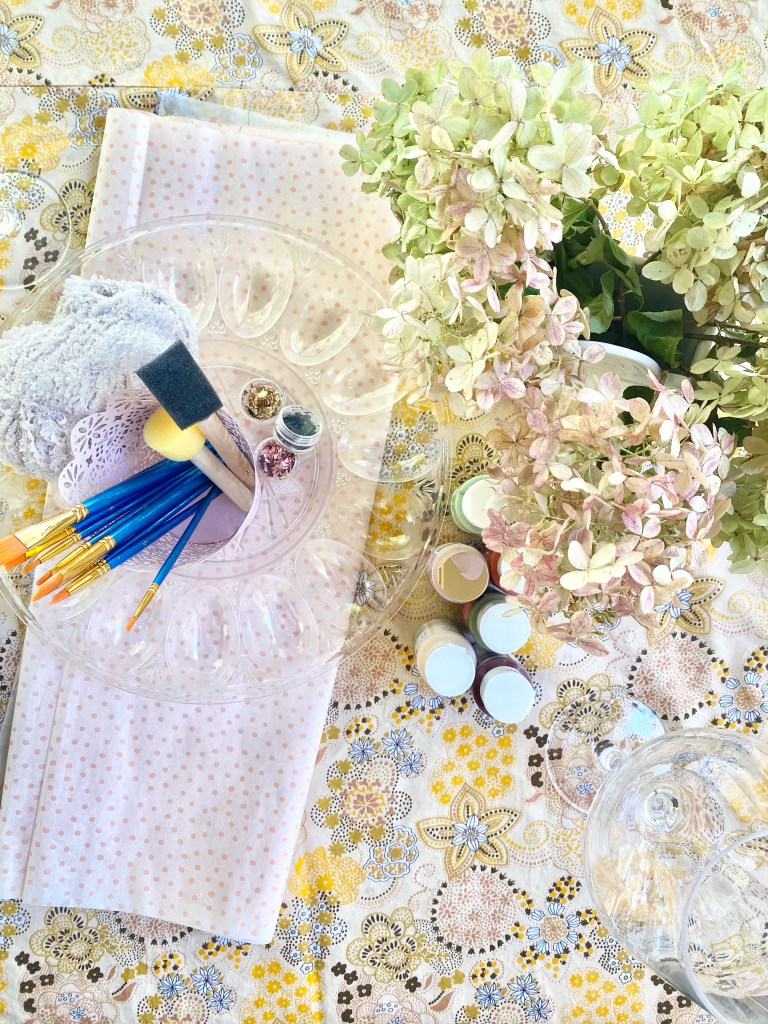
I decided I wanted to set up two tables since I was having about 10-12 people. I went to Goodwill to see if I could find some fabric or sheets to use as tablecloths. I did! And for $2.99 each I didn’t mind if they got paint on them. I also decided I would just “shop my house” and decorate with what I had. Since I love Fall so much I had plenty of pumpkins! I also grabbed some candles and candlestick holders and and used them to decorate.
When I found these sheets Goodwill I knew they’d be great tablecloths!
I layered out the tablecloths, craft supplies, wine glasses and some dried hydrangeas. I then used some candlesticks and put mini white pumpkins on them.
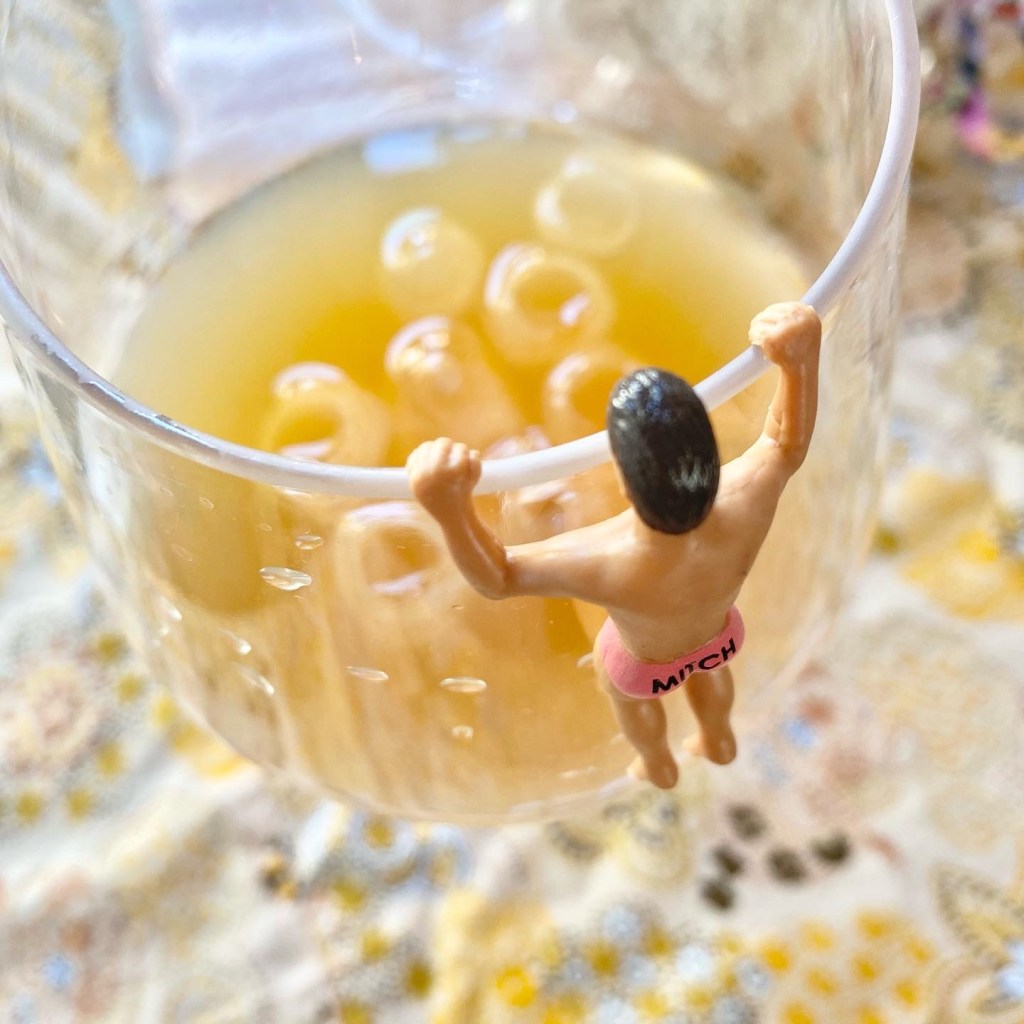
No girls night is complete without a “drinking buddy”.
We had a mix of ages, which was great. A few of the teenage girls brought some fun and creativity to the party. It made my heart happy hearing all the laughter from everyone.
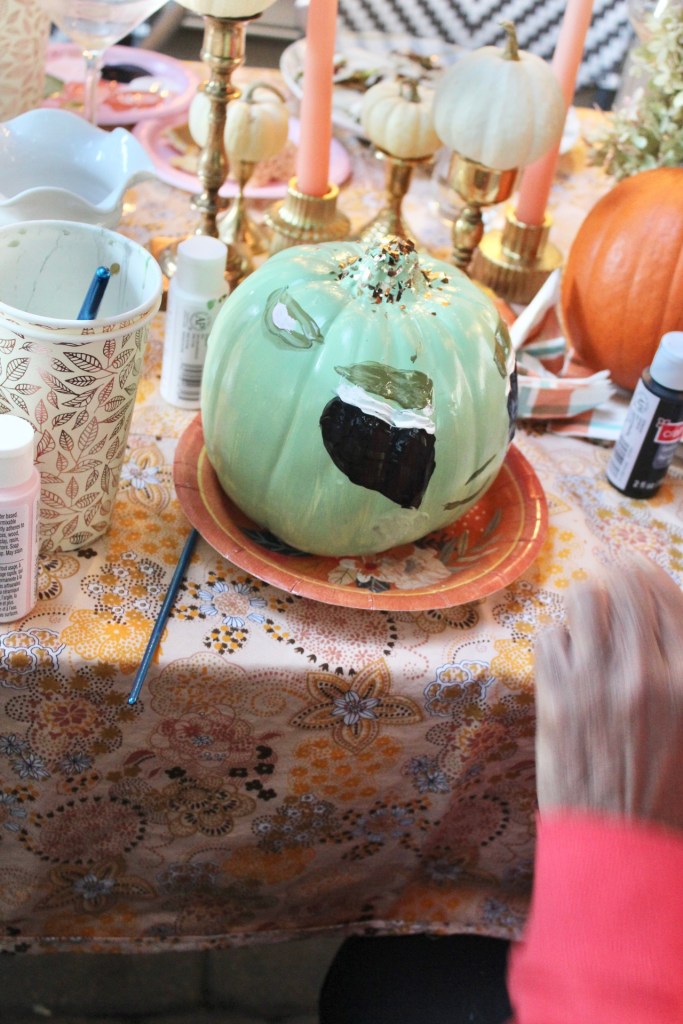
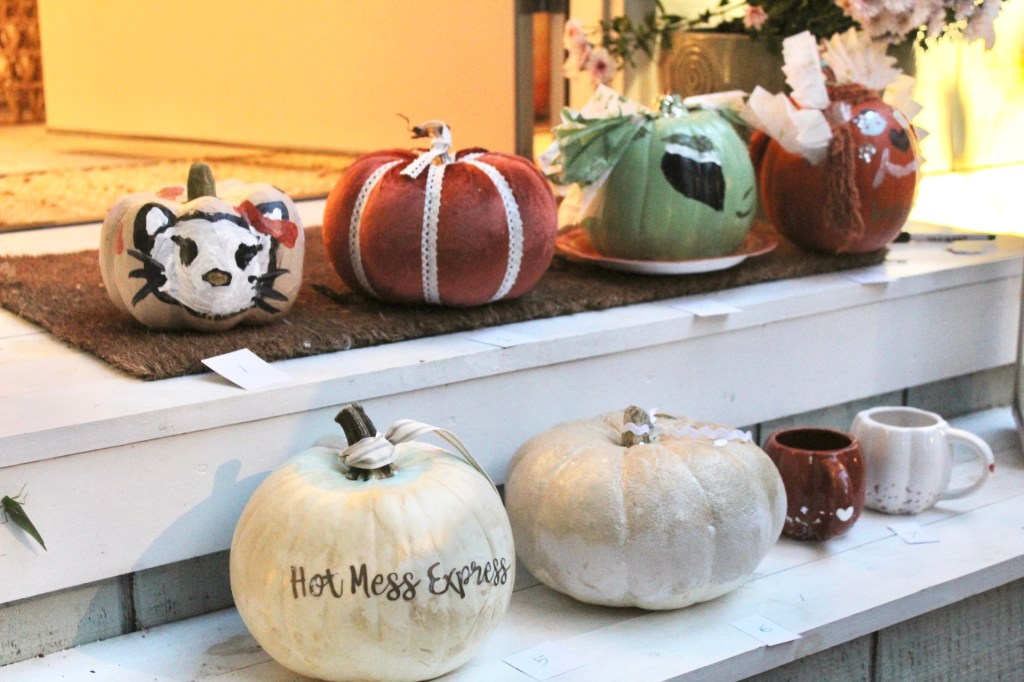
I decided that I would create a challenge! So, I said when all the pumpkins were done we would line them up and everyone could vote for their favorite. Then, I would give the winner a Fall sign I had made as a prize.
It’s so fun to see everyone creating. The winner was the Baby Yoda pumpkin.
Somehow I didn’t get a group picture of everyone with their pumpkins! I guess we were distracted by a surprise visitor. While we were sitting we couldn’t believe who dropped by!
We couldn’t believe that this owl showed up to party!
We had a great night. Girls nights are always fun and a great way to connect with friends! I can’t wait to plan another one.